An expense records money going out: a supplier’s invoice or a receipt you were handed. Registering them keeps your VAT return and your profit and loss honest. Follow these steps to create one.
Step 1 — Start a new expense
From the menu bar, open Procurement and click Purchases, or the plus icon beside it for a new one.
Step 2 — Upload the expense or receipt
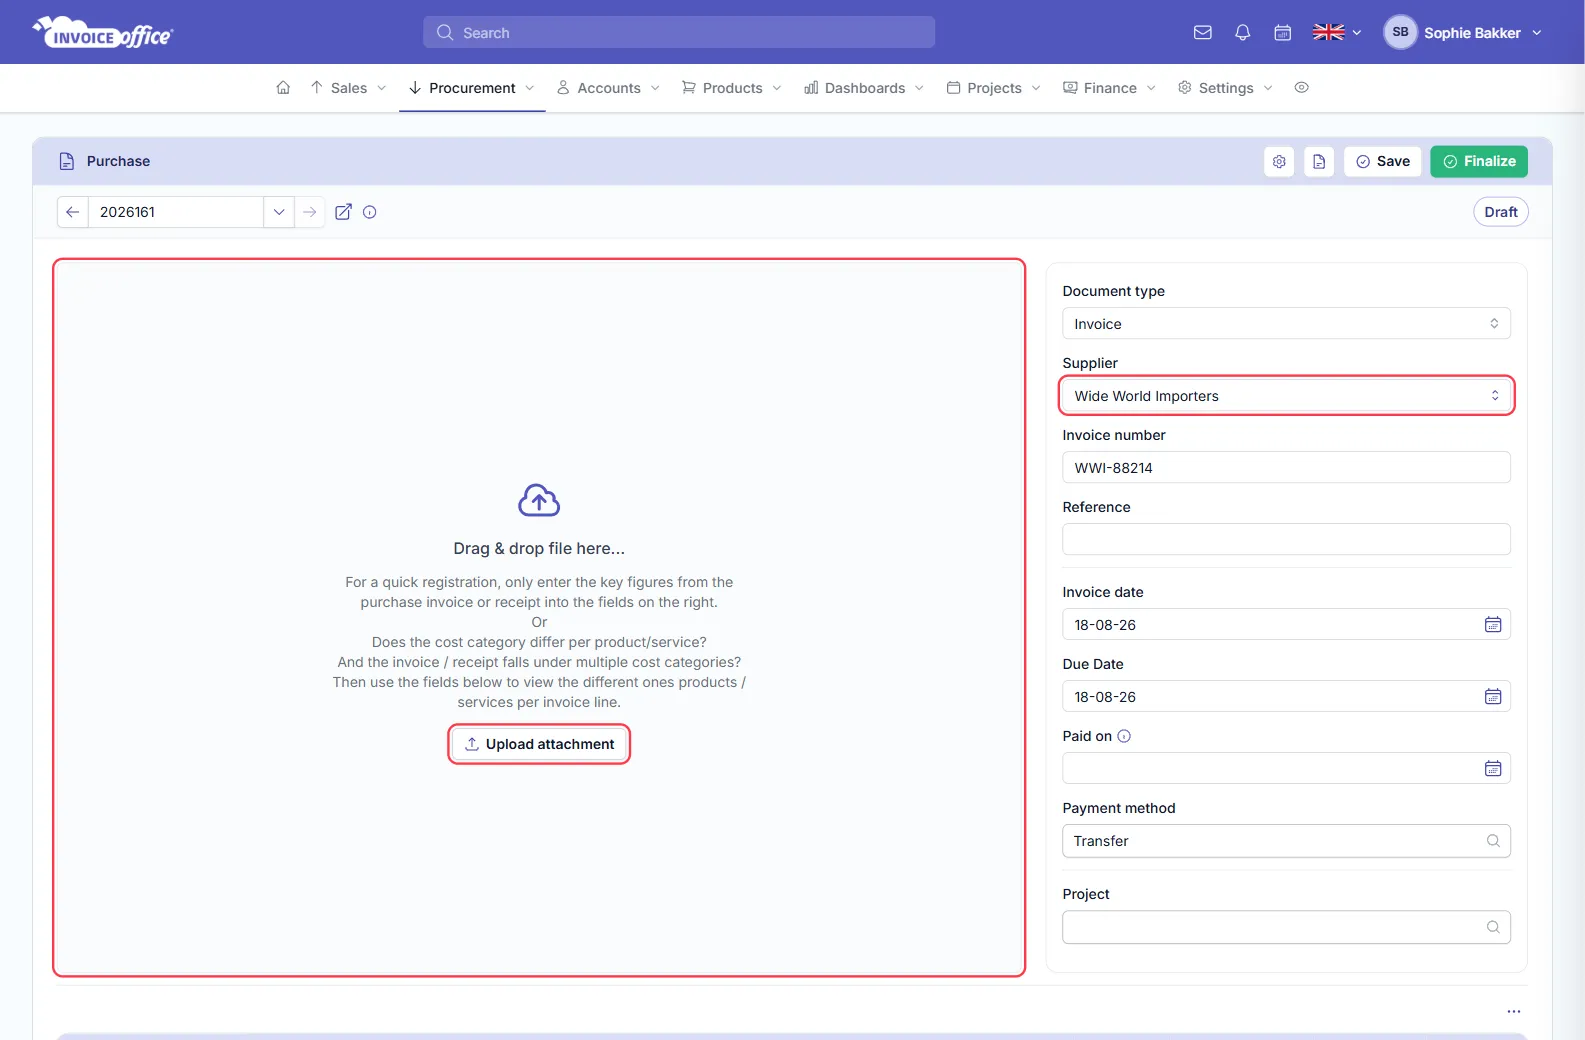
Drag and drop the purchase invoice or receipt onto the upload area on the left, or use Upload attachment to pick the file.
Step 3 — Enter the figures
For a quick registration, you only need the key figures from the purchase invoice or receipt. Fill in the fields on the right of the document:
- Document type — invoice or receipt
- Supplier — who you paid
- Invoice number and reference
- Invoice date and due date
- Paid on and payment method — if it is already settled
- Project — if the cost belongs to one
Step 4 — Split it across cost categories
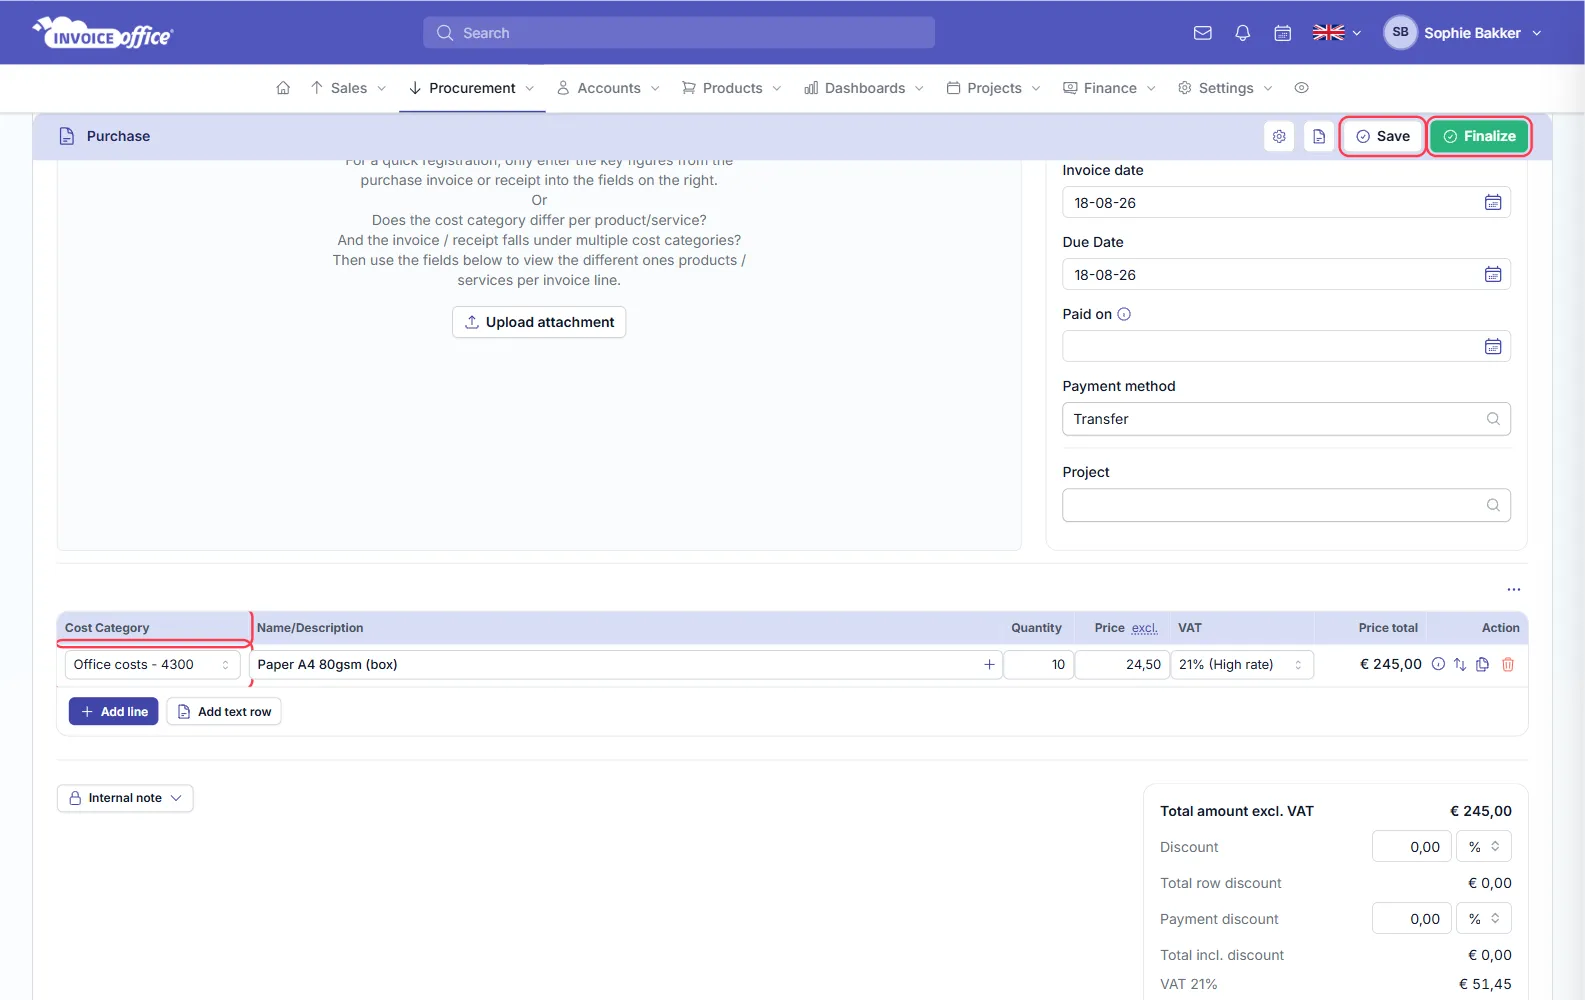
The line table underneath carries a Cost Category column, so a purchase that falls under more than one heading is split line by line: give each line its own category, description, quantity, price and VAT rate.
Step 5 — Save or finalize
Save keeps it as a Draft if you want to come back to it — see Why do my documents say Draft/concept? — and Finalize registers the expense. Both sit in the top-right of the card; a purchase has no Preview button, because there is nothing to send.