An order confirmation is a document that confirms the receipt and acceptance of an order. In the transport industry it confirms that a transport order has been placed; in retail it confirms an online order for consumer goods. Either way, both sides have the agreed order in writing.
Where to start
There are several ways to create an order confirmation in Invoice Office.
- Option A — from the menu bar, open Sales and click Order confirmations, or the plus icon beside it for a new one.
- Option B — from Accounts → Customers, open the Action menu on the customer and choose Create order confirmation.
- Option C — from Products → Action → Create order confirmation.
If the order came from a quote your customer approved, start from the quote instead — its Action menu converts it straight into an order confirmation, so nothing is retyped. See Create a quotation.
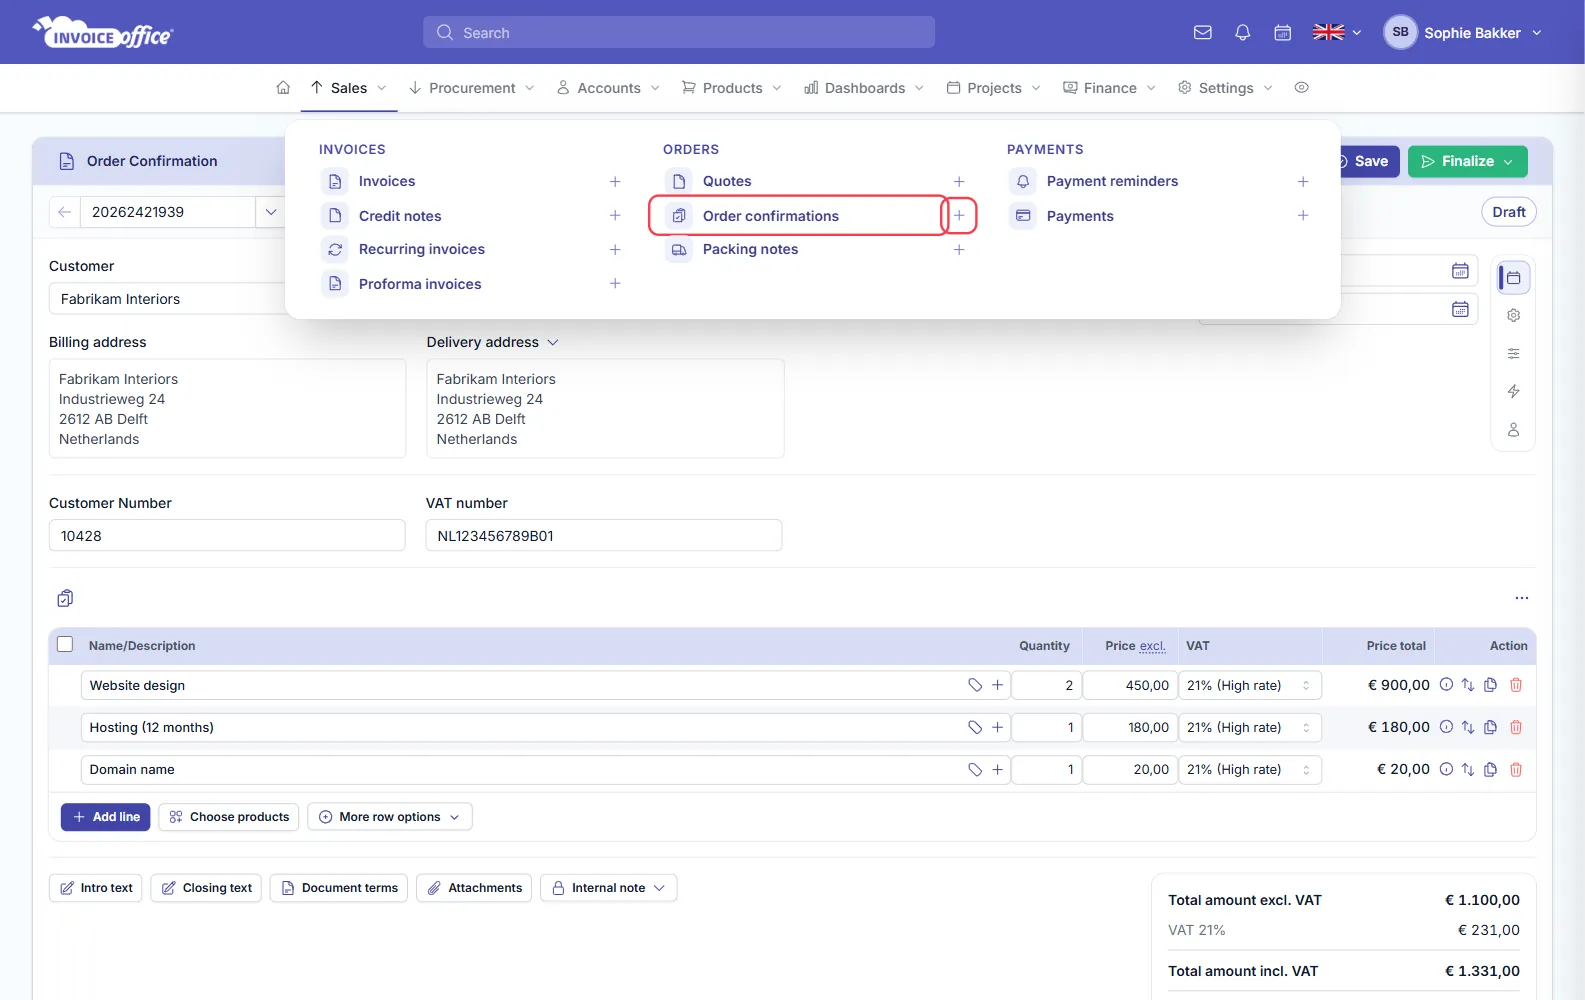
Step 1 — Fill in the basics
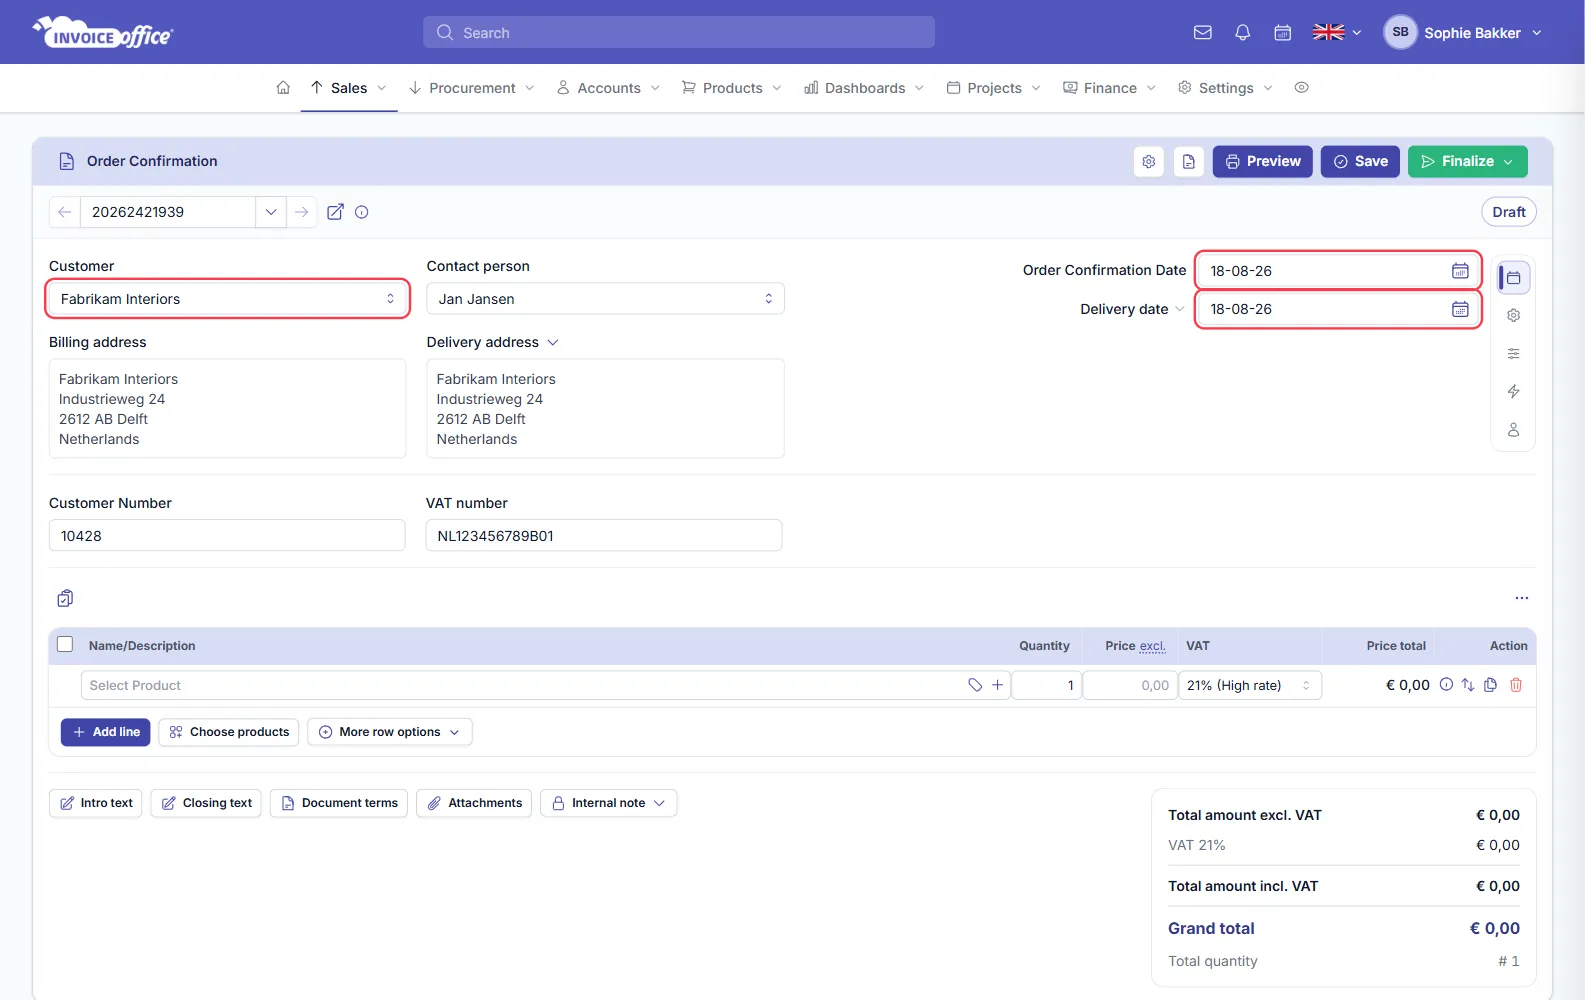
With the create order confirmation form open, complete the customer, the order confirmation date and the delivery date.
Selecting the customer fills in the contact person, delivery address and billing address automatically, where those are available on that customer’s record.
Step 2 — Add your products
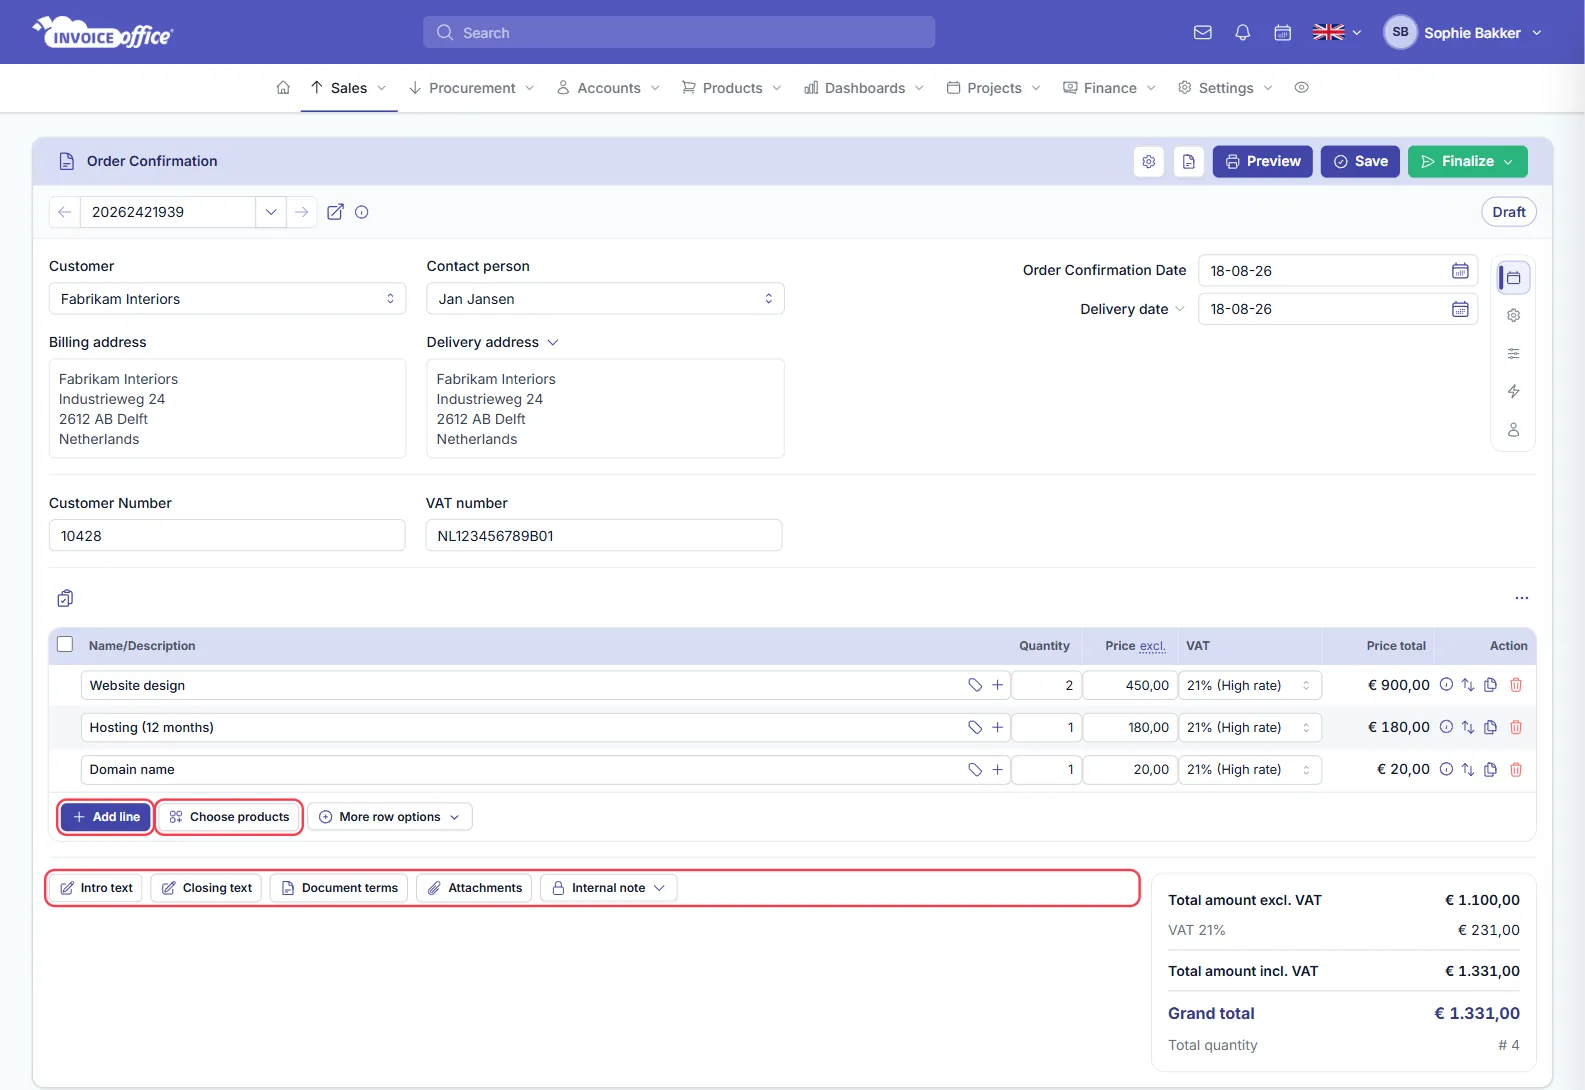
Add the products being ordered — Add line for a single row, or Choose products to pick several from your catalog at once. Each line shows the quantity, the price excluding VAT, the VAT rate and the line total, and the totals panel keeps a running subtotal, VAT and grand total.
There are also options to add intro text, closing text, document terms, attachments and an internal note at this stage — see Add an attachment to your document.
Step 3 — Preview, save or finalize
Three buttons sit in the top-right of the order confirmation card.
Preview shows you the order confirmation as it will look when it reaches the customer.
Save stores it so you can send it later. It stays a Draft until you finalize it — see Why do my documents say Draft/concept?.
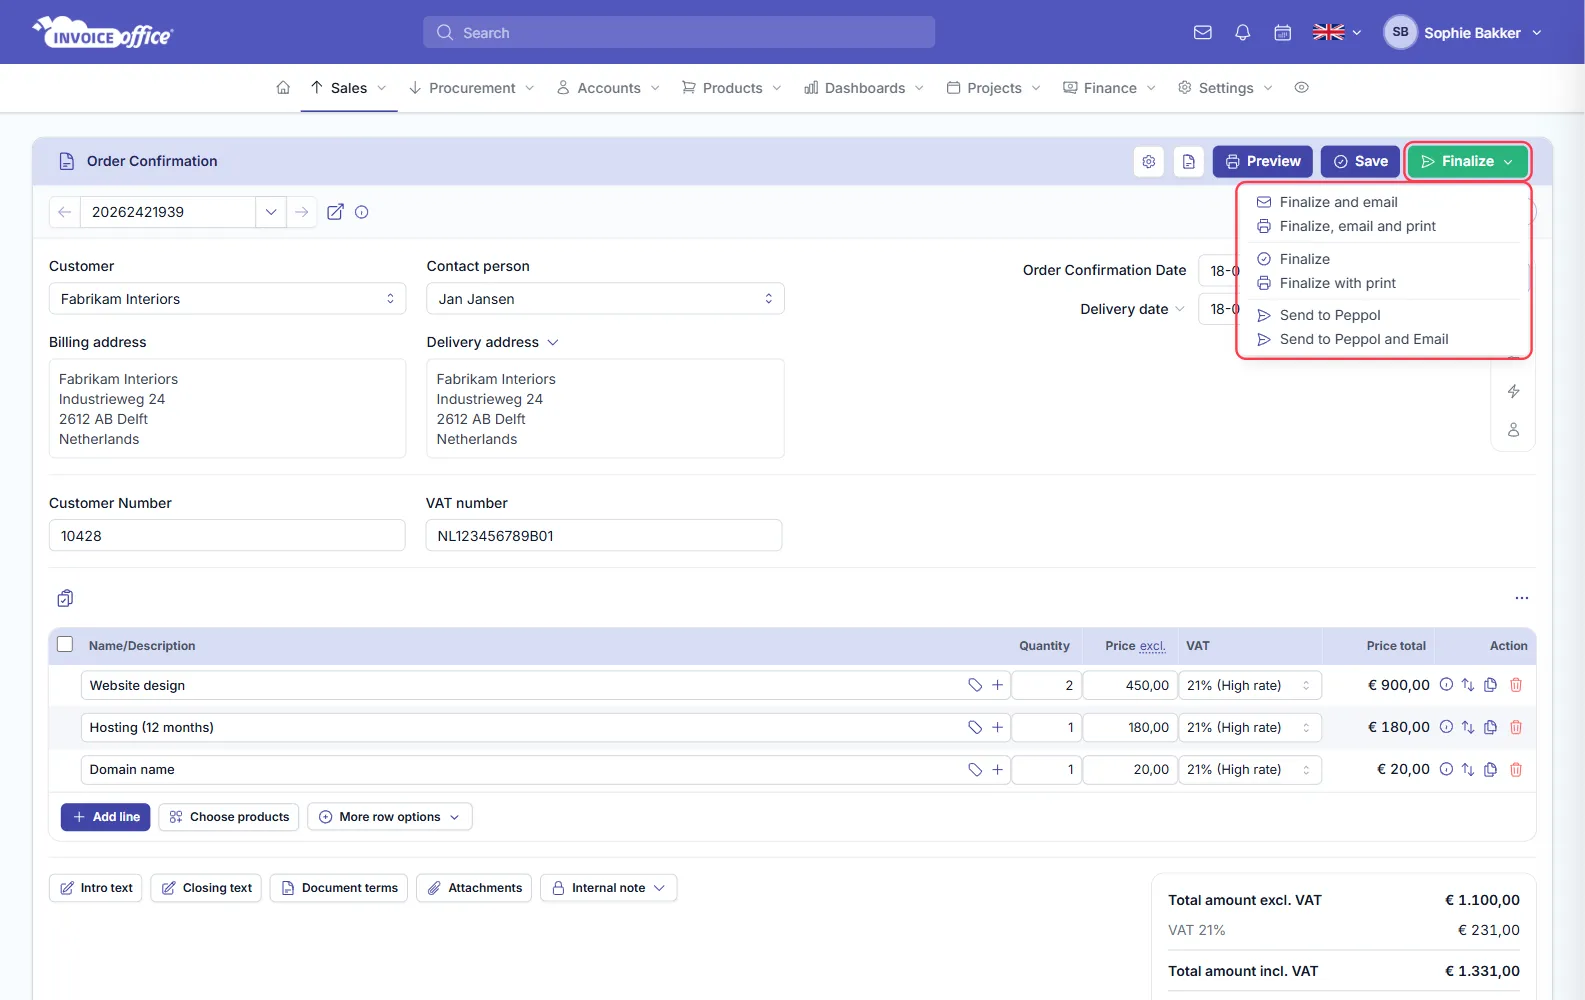
Finalize opens a menu of six ways to issue it:
- Finalize — finalises the document and nothing else.
- Finalize with print — finalises it and prints it.
- Finalize and email — finalises it and emails the customer.
- Finalize, email and print — all three at once.
- Send to Peppol — issues it over the Peppol network.
- Send to Peppol and Email — both.
Adjusting what appears on the document
Open the ⋯ button at the top-right of the product table and choose Display Columns. That opens Display Document Field, where you hide or show individual fields across three tabs: Header, Rows and Totals.
To change this for every order confirmation rather than only this one, edit your document design.