A credit note confirms that an amount has been credited back to your customer. It is the correct way to fix a finalised invoice: overcharged, wrong discount, goods returned or damaged, or something that did not meet spec.
You cannot simply edit or delete a finalised invoice — in most countries that is not allowed. Issue a credit note against it, then raise a new, correct invoice if one is needed.
Where to start
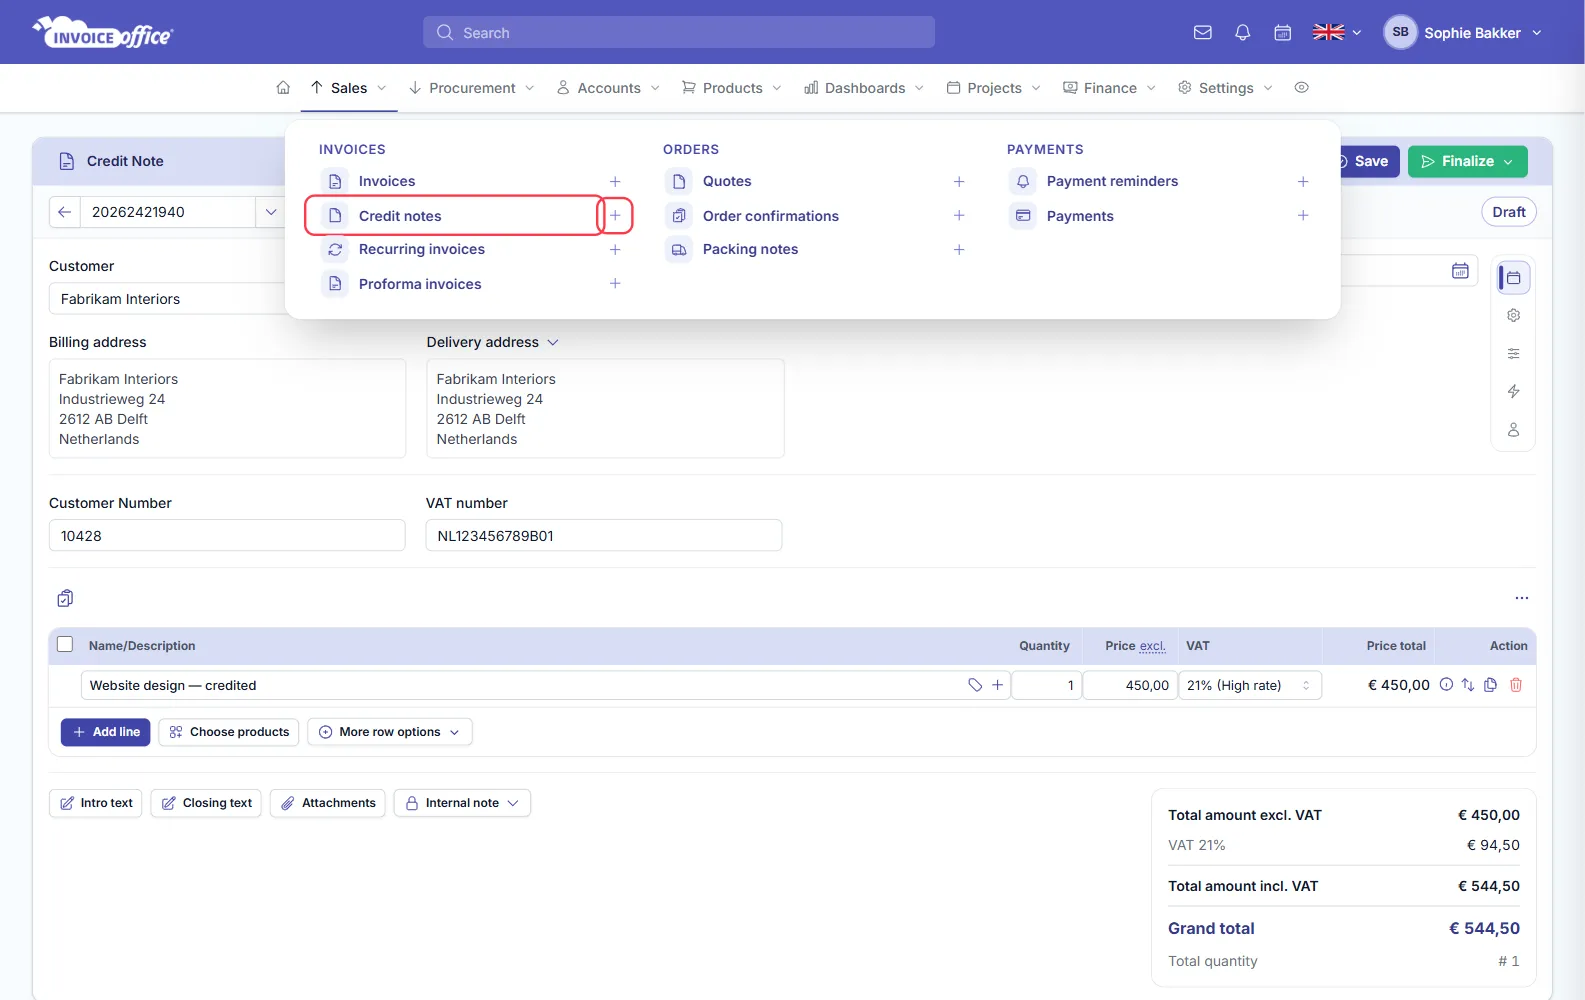
- From the menu bar, open Sales and click Credit notes, or the plus icon beside it.
- From Accounts → Customers, open the customer’s Action menu and choose Create credit note.
- From the invoice itself: its Action menu on the invoice list also offers Create credit note, which is the quickest route when you are correcting a specific invoice.
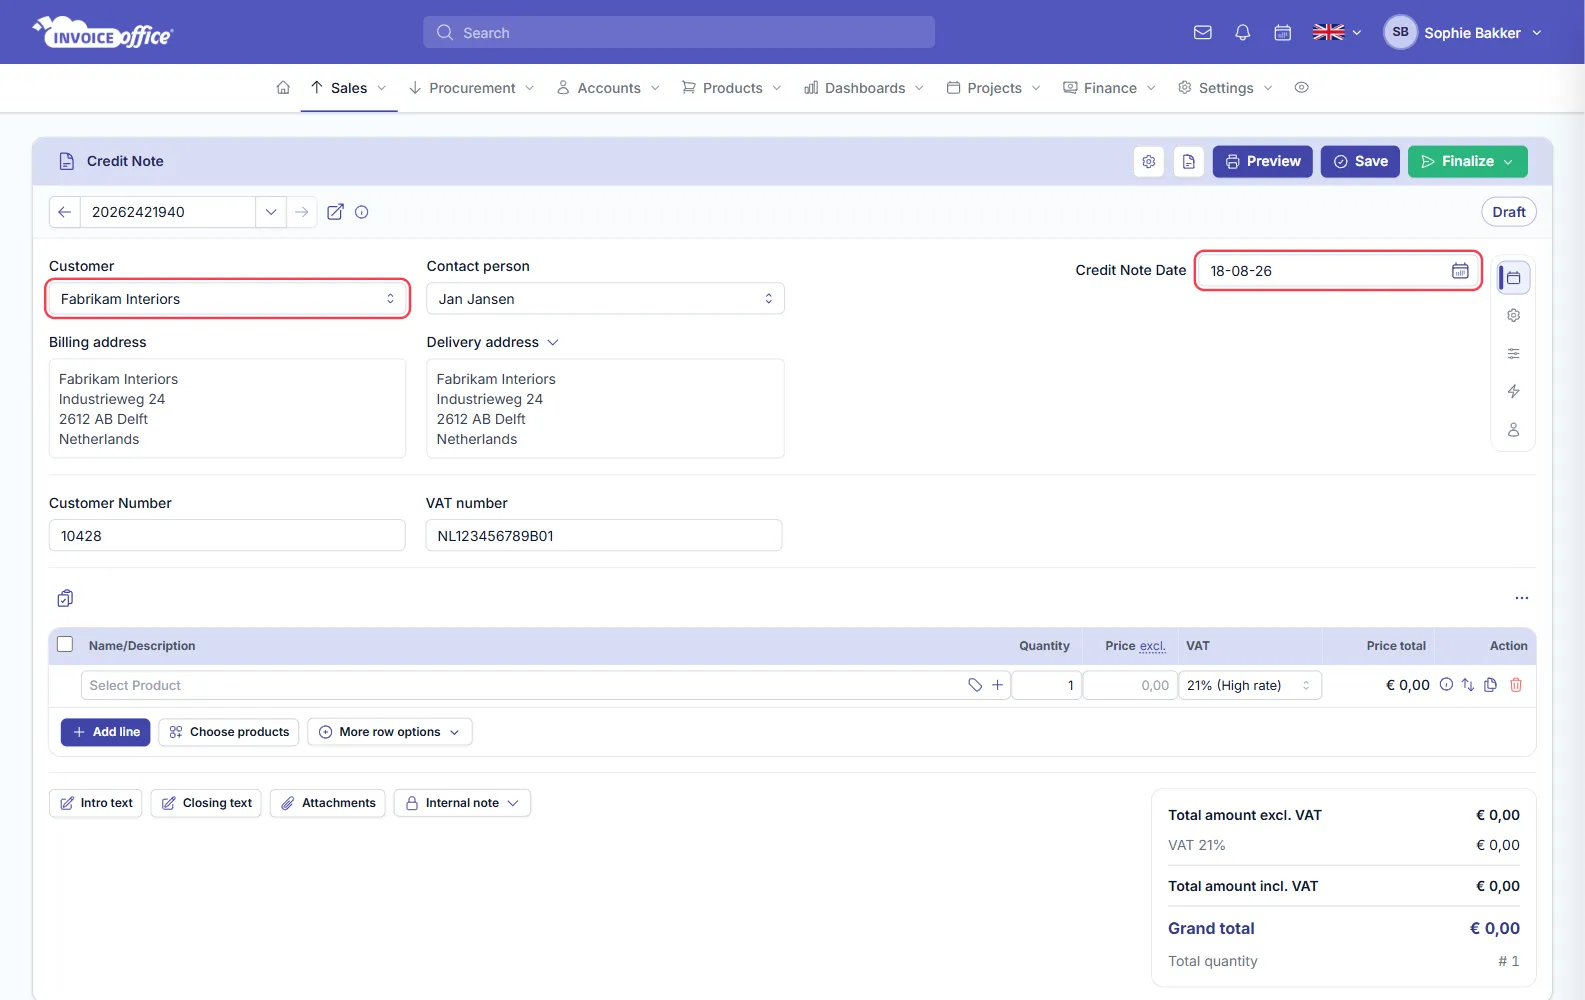
Step 1 — Fill in the basics
Complete the customer and the credit note date — that is the only date on this document. Selecting the customer fills in the contact person, delivery address and billing address from their record.
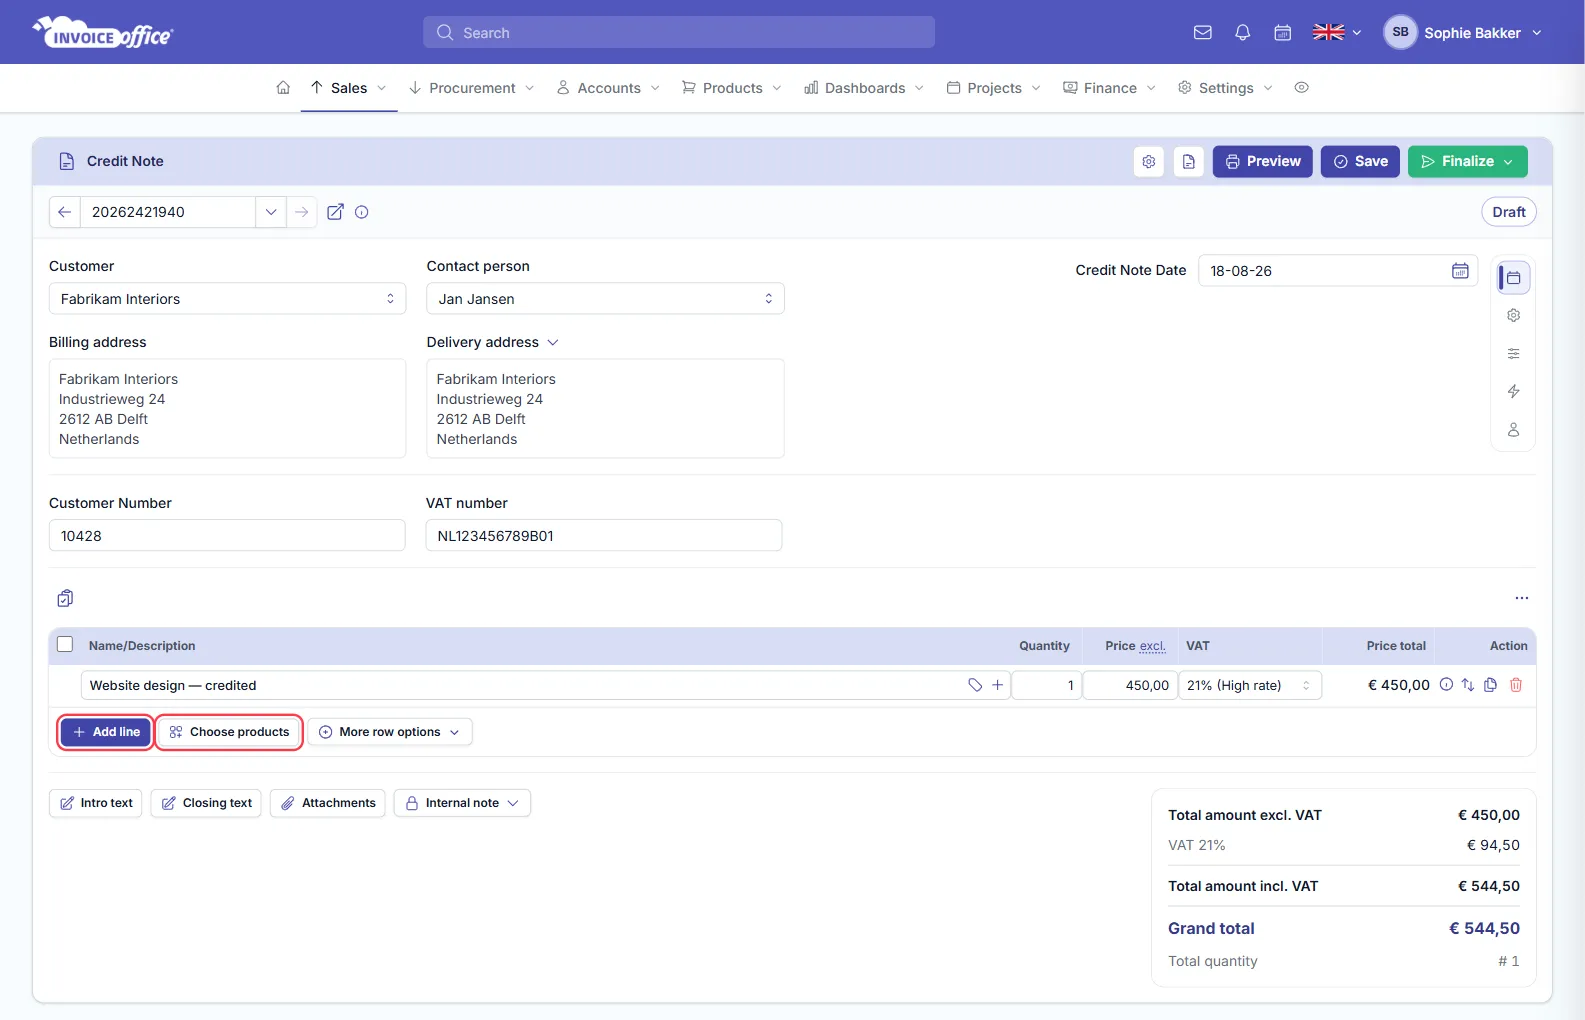
Step 2 — Add what you are crediting
Add the lines being credited with Add line, or Choose products to pick from your catalog. You can credit the whole invoice or only part of it — include just the lines and quantities that are actually being put right.
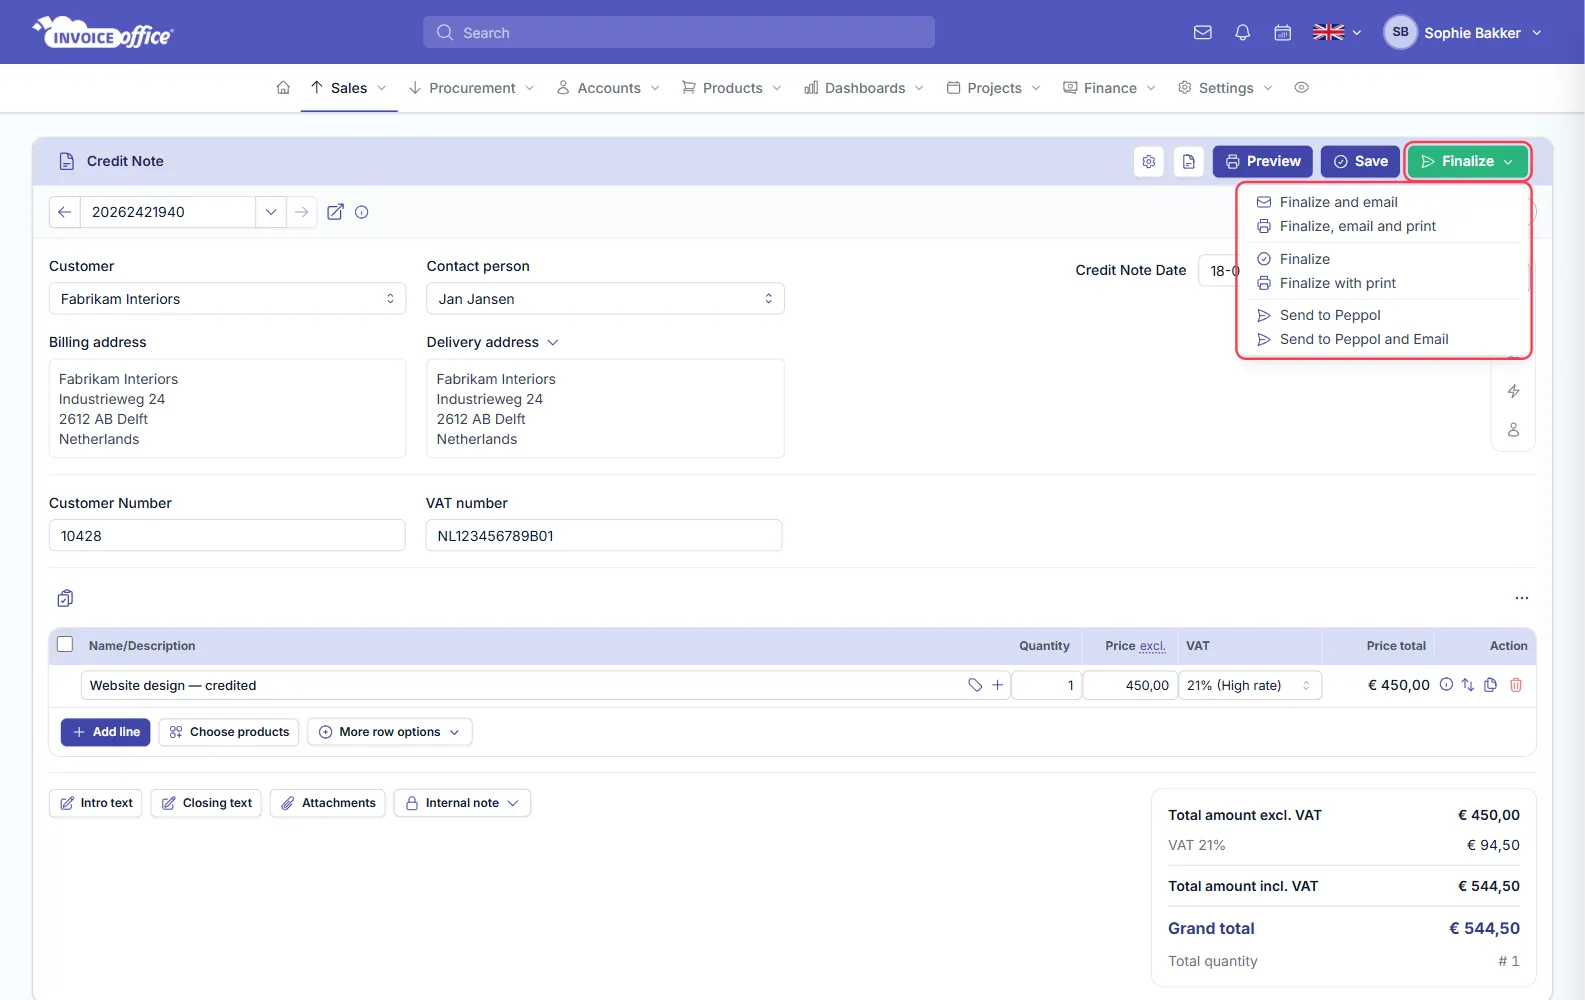
Step 3 — Preview, save or finalize
Three buttons sit in the top-right of the credit note card.
Preview shows it as your customer will see it. Save keeps it as a Draft. Finalize opens six options: finalize on its own, with print, with email, all three together, or over the Peppol network.
The VAT on the credited amount is reversed with it, so your VAT return reflects the correction without any manual adjustment.
Adjusting the layout
Open the ⋯ button at the top-right of the product table and choose Display Columns to show or hide individual fields on this document. For a permanent change, edit the document design.