When a customer accepts your offer, you can convert the quote to an invoice in Invoice Office in one click. The customer, addresses, product lines, quantities and prices are copied into a new draft invoice, so nothing is retyped, and the quote is marked as agreed and linked to the invoice it became. This guide walks through each step, from the accepted quote to a sent invoice.
Step 1 — Open the accepted quote
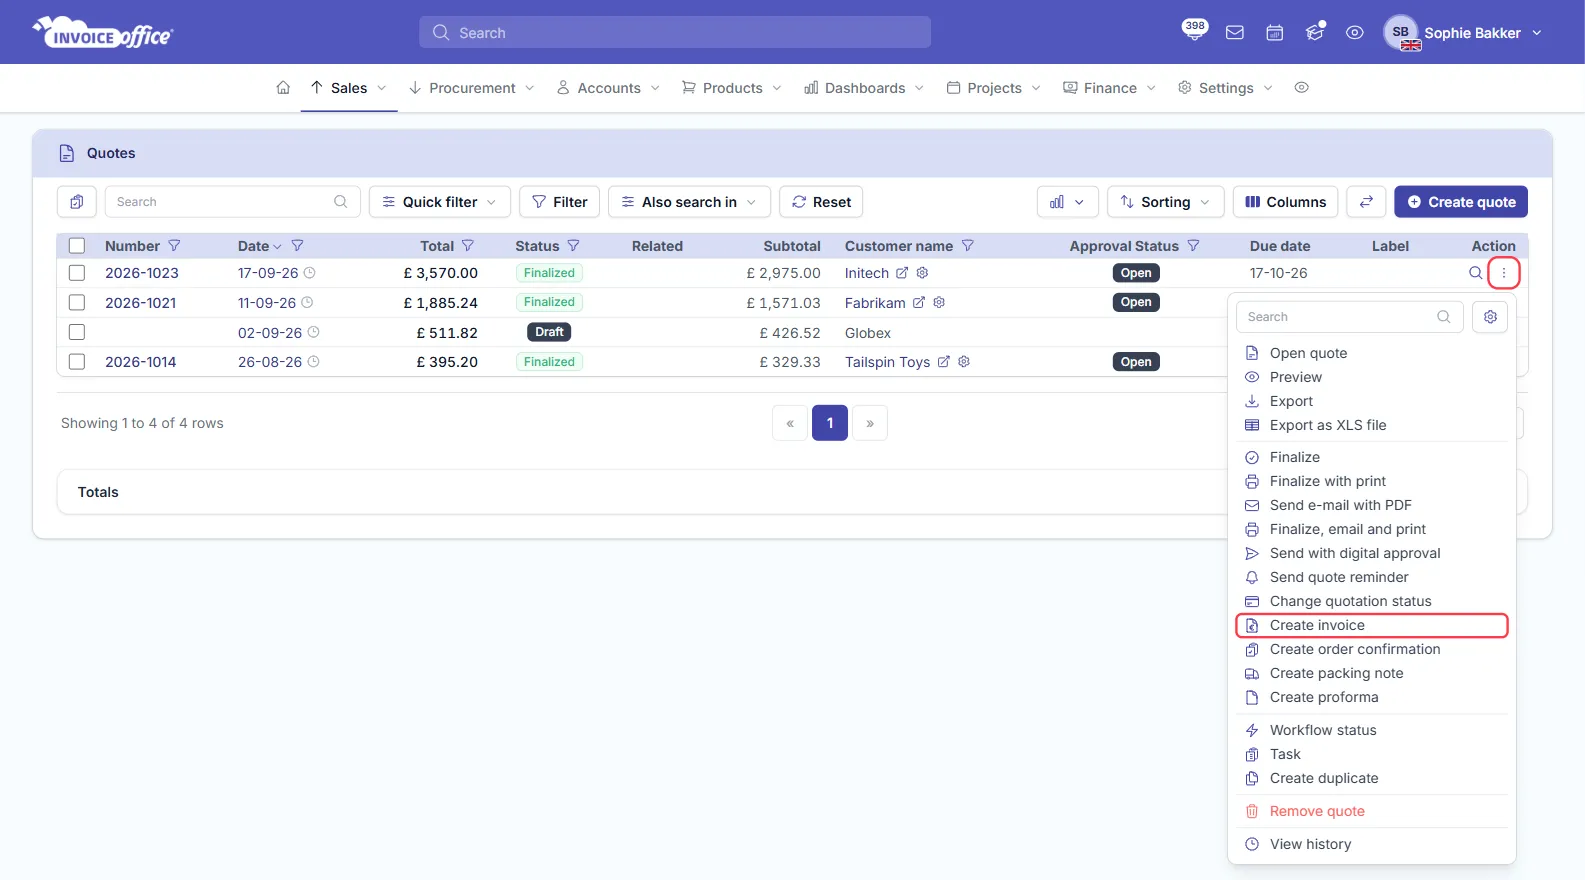
Go to Sales → Quotes. The Approval Status column shows where each quote stands, and the Action menu — the ⋮ at the end of the row — holds everything you can do with it.
You can convert from the list or from inside the quote, whichever you are already in.
Step 2 — Create the invoice
From the quotes list: open the Action menu on the quote and click Create invoice.
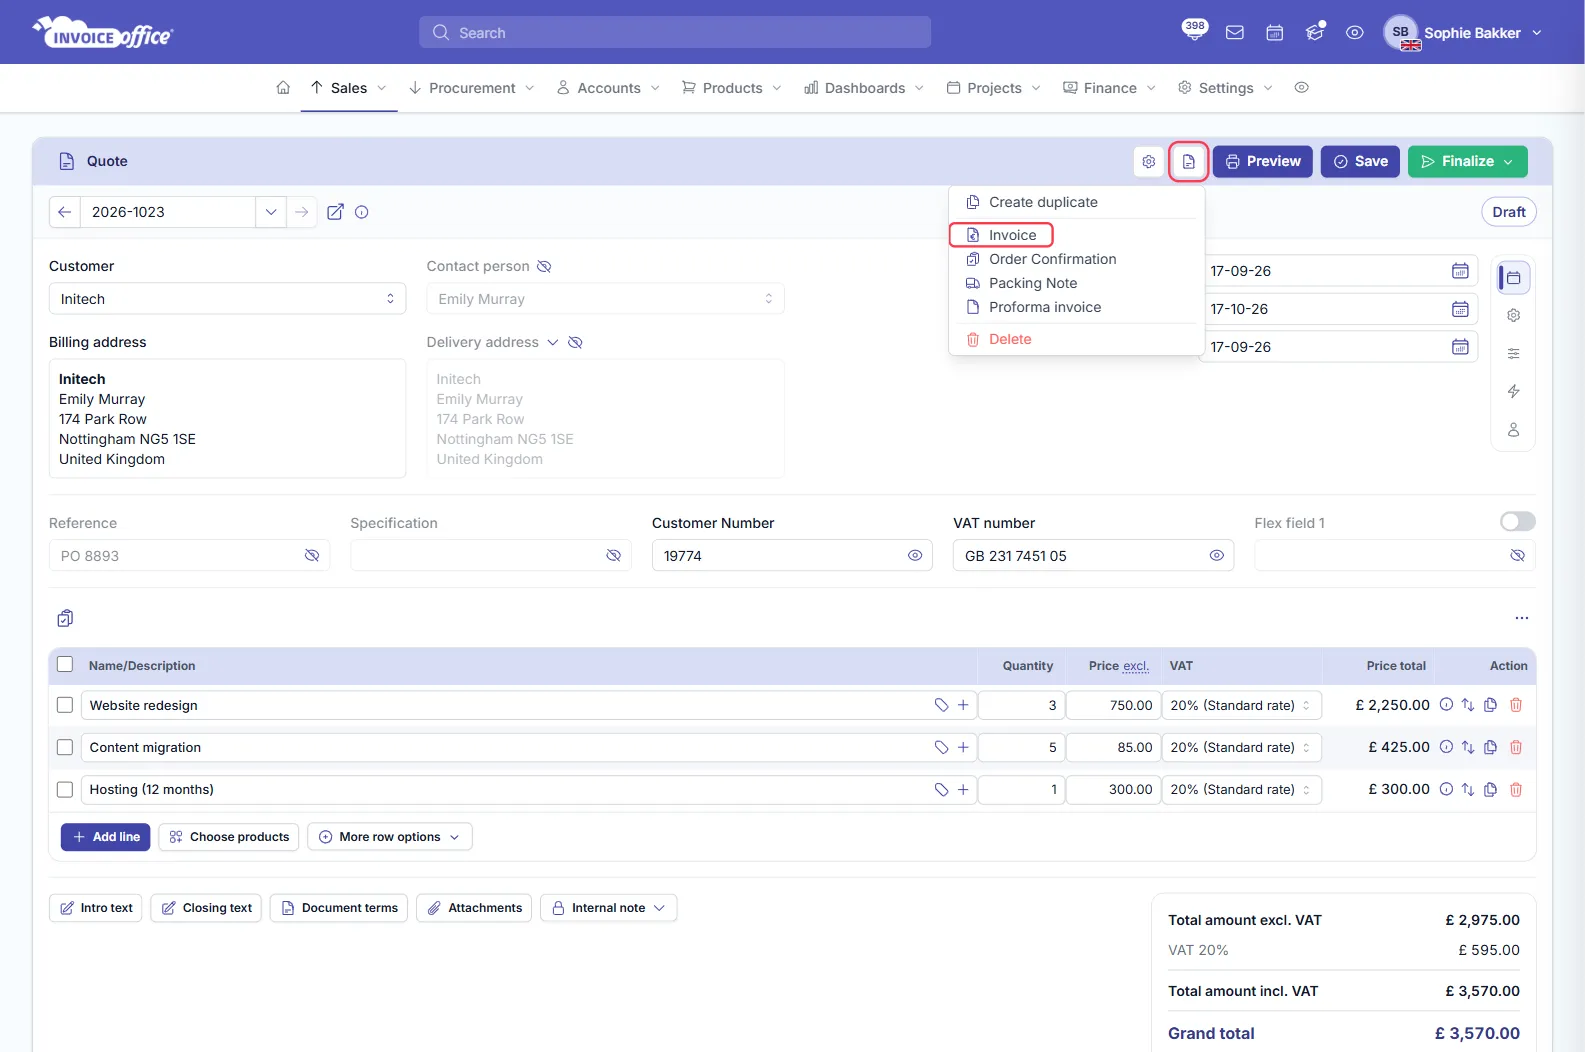
From inside the quote: click Action in the top-right of the quote. On a finalized quote this is the green Action button — choose Create invoice; the same menu also has Create partial invoices if you bill the work in instalments. On a draft quote it is the document icon beside the settings cog — choose Invoice, and the quote is saved first, then converted.
Either way, the invoice is created straight away and opens on screen. There is no confirmation step, so you do not need to click anything else.
The same menus turn a quote into an order confirmation, a packing note or a proforma invoice instead, if that is the next step for this customer — see Create an order confirmation.
Step 3 — Review the copied lines
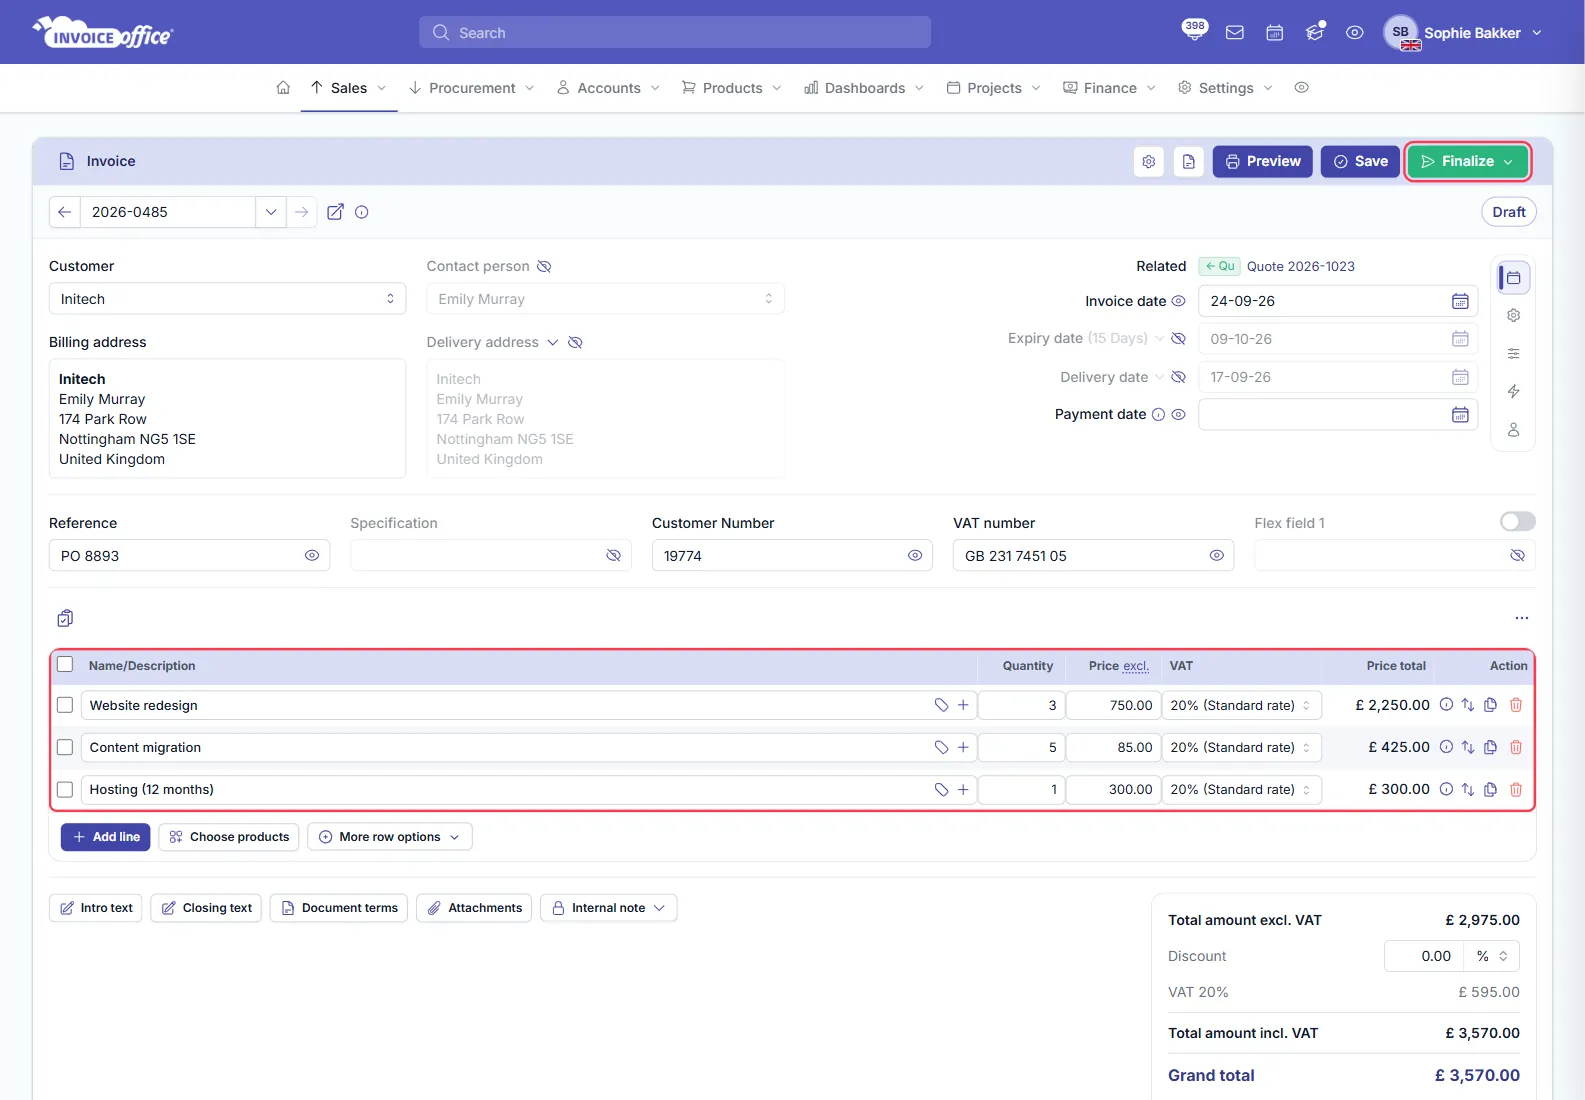
The new invoice is a Draft. Check it before it goes out:
- Customer and addresses — the customer, contact person, billing address and delivery address come from the quote.
- Lines — every product line is copied with its quantity, price and VAT code. Change a quantity, add a line for extra work, or remove one the customer did not take, exactly as you would on any invoice.
- Attachments — files attached to the quote are copied to the invoice too.
- Dates — the invoice date is today. The due date is today plus the Invoice expires after days of your invoice document term (Settings → Documents → Document terms), or of the customer’s own term — it does not come from the quote.
- Related — the invoice shows the quote it came from, with a link back to it.
The quote’s validity text does not come along — the invoice uses your own invoice document terms. Whether the introduction text, closing text, payment term and delivery term are copied from the quote is set in Company settings → Document copy on the Professional plan; see Duplicate a document.
The invoice gets its own invoice number when you finalize it. If you would rather the invoice reuse the quote’s number, tick Same as quote on your invoice sequence under Settings → Company → Sequence numbers.
Step 4 — Finalize and send the invoice
When the invoice is right, click Finalize in the top-right and choose how to send it — Finalize and email sends it to the customer straight away, and Finalize alone locks it so you can send it later. Create an invoice explains every option.
What happens to the original quote
Converting a quote to an invoice updates the quote for you:
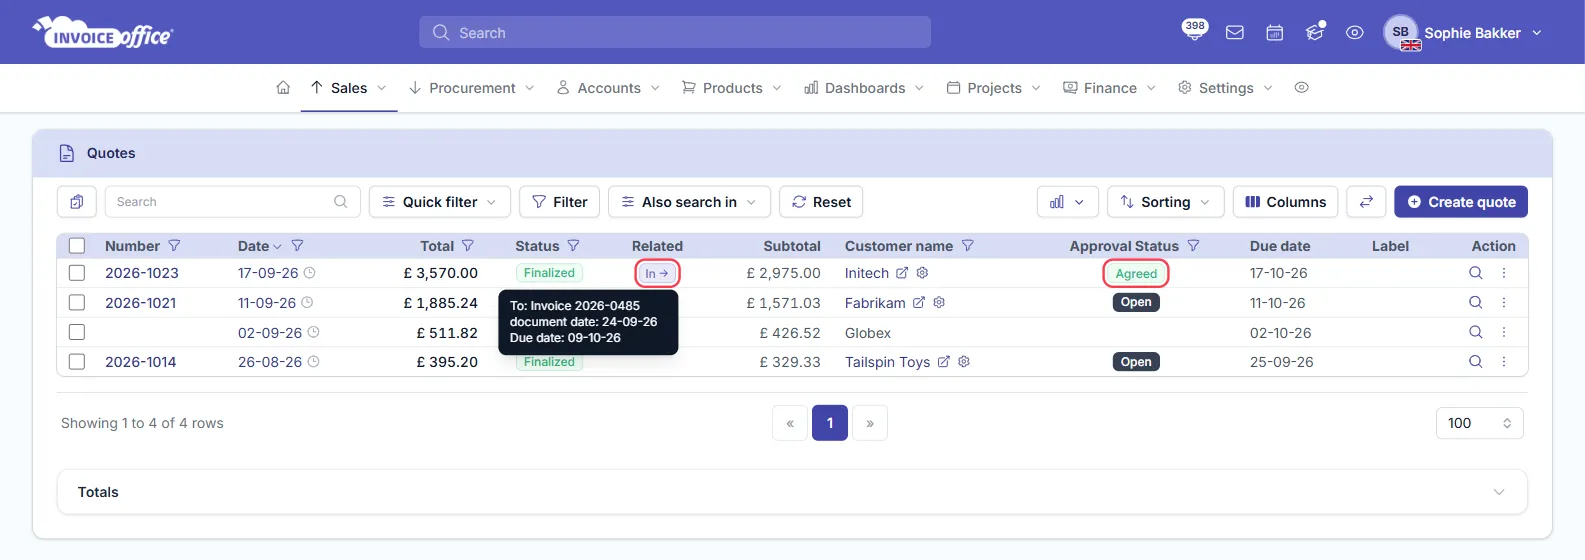
- Its Approval Status changes to Agreed.
- Its Related column gets a link to the new invoice. Hover over it to see To: Invoice with the invoice number — shown as (concept) until you finalize the invoice — and its document date and due date. Click it to open the invoice.
The quote itself is not changed or deleted — it stays in your quotes list as the record of what you offered. If the customer only accepted part of the offer, or you want to record their answer before you invoice, use Change quotation status in the quote’s Action menu. It offers Agreed, Partially Agreed, Not agreed, Negotiation and Discussion, with room for a description and an attachment.