If your product lines look cramped — or you want more of them to fit on one page — adjust the document table line height. It takes four quick steps.
Change the line height
- Go to Settings → Document designs, pick the language and open the design.
- Switch to Document template.
- Click the document table in the preview. The right-hand panel becomes the table’s inspector.
- Open its Style tab and change Line height, then click Save.
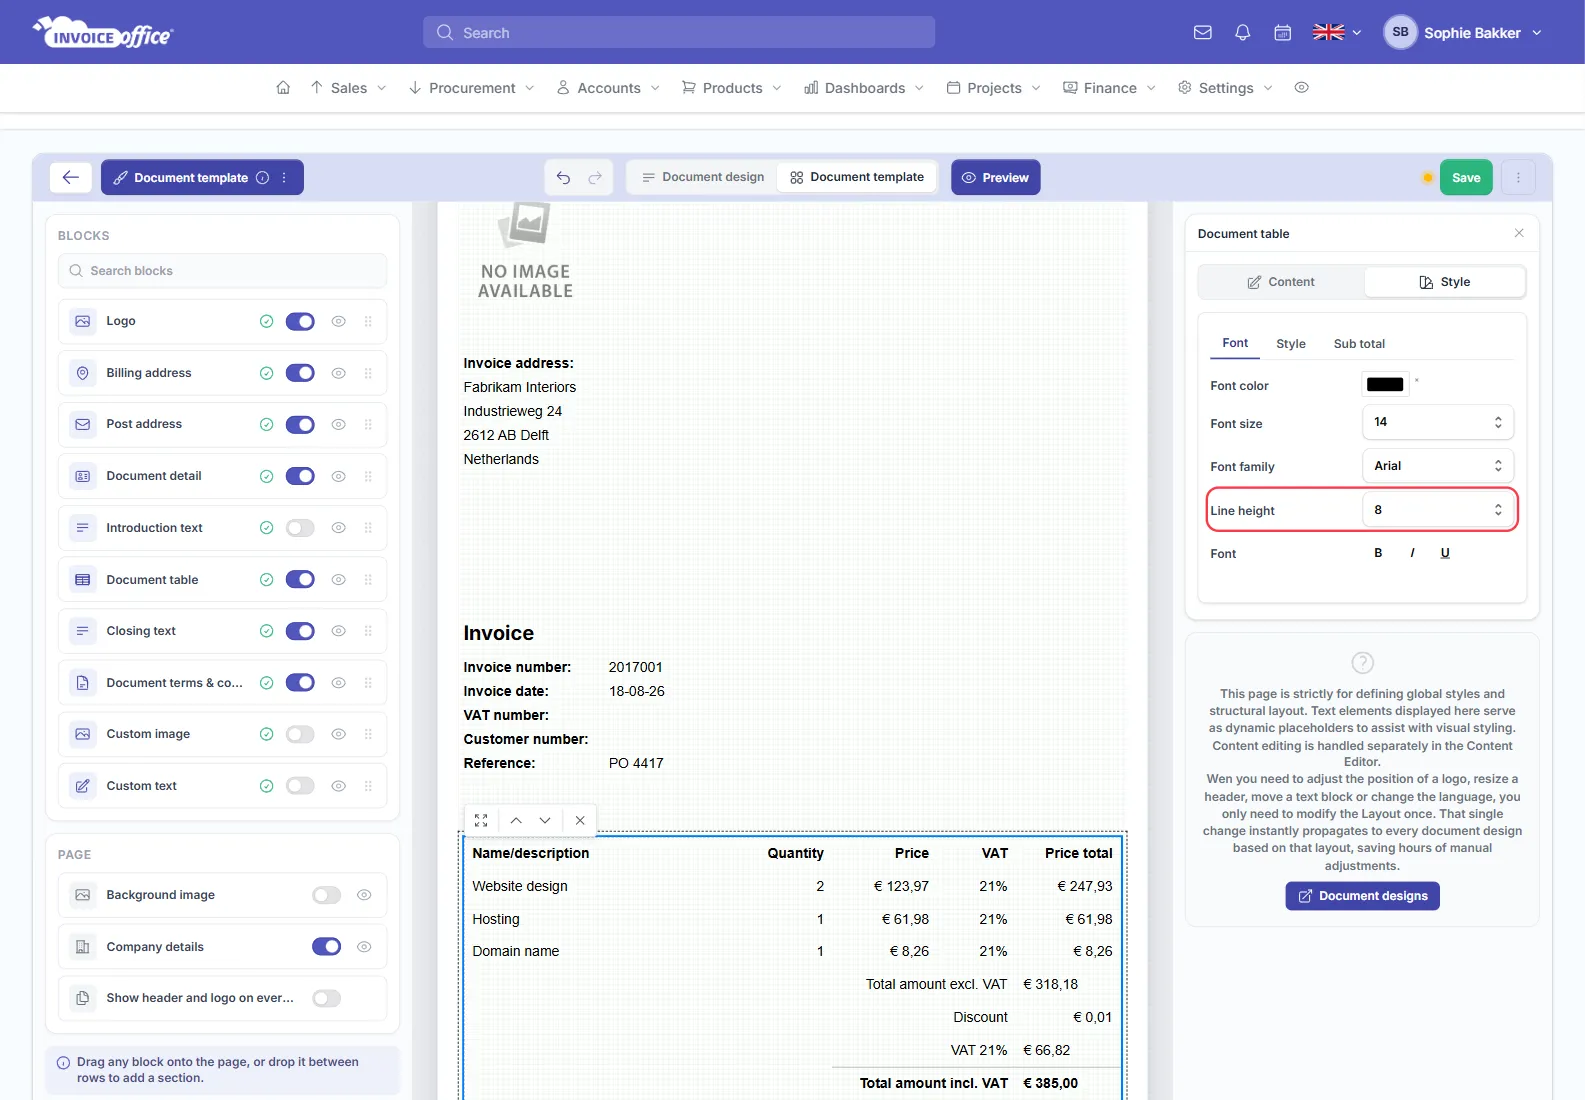
The preview redraws as you type, so you can see how many lines fit before you save.
Getting it right
- More room — raise the line height. Easier to read, and a good idea when your descriptions are short and the invoice looks sparse.
- More lines per page — lower it. Worth doing when a long invoice spills onto a second page for the sake of two rows.
- Check the preview before you save. Use Preview in the toolbar to see the real document, not just the editor’s rendering.
The same Style tab carries the table’s font colour, size and family, so if the table still looks tight after changing the line height, a smaller font is the other lever. Its Style and Sub total sub-tabs handle the table’s borders and its totals block.
It applies to the template, not one invoice
Line height is a template setting, so it changes every document design built on that template — and every document made from them. It is not something you set per invoice.