You can customize your invoice or document layout from your document design. The editor has two modes, and knowing which one you are in saves most of the confusion:
- Document design — the content of this one document type in this one language: its name, its terms, its field names.
- Document template — the layout and styling: which blocks appear, where they sit, and the fonts, colours and spacing. A template can sit under several designs, so a change here propagates to every design built on it.
Step 1 — Open your document design
Go to Settings → Document designs, pick the language, and open the design you want — the document type’s row, or its Action → Open.
Step 2 — Know which editor you are in
The Document design / Document template switch sits in the middle of the toolbar. Preview, the unsaved-changes dot and Save are on the right; undo and redo on the left.
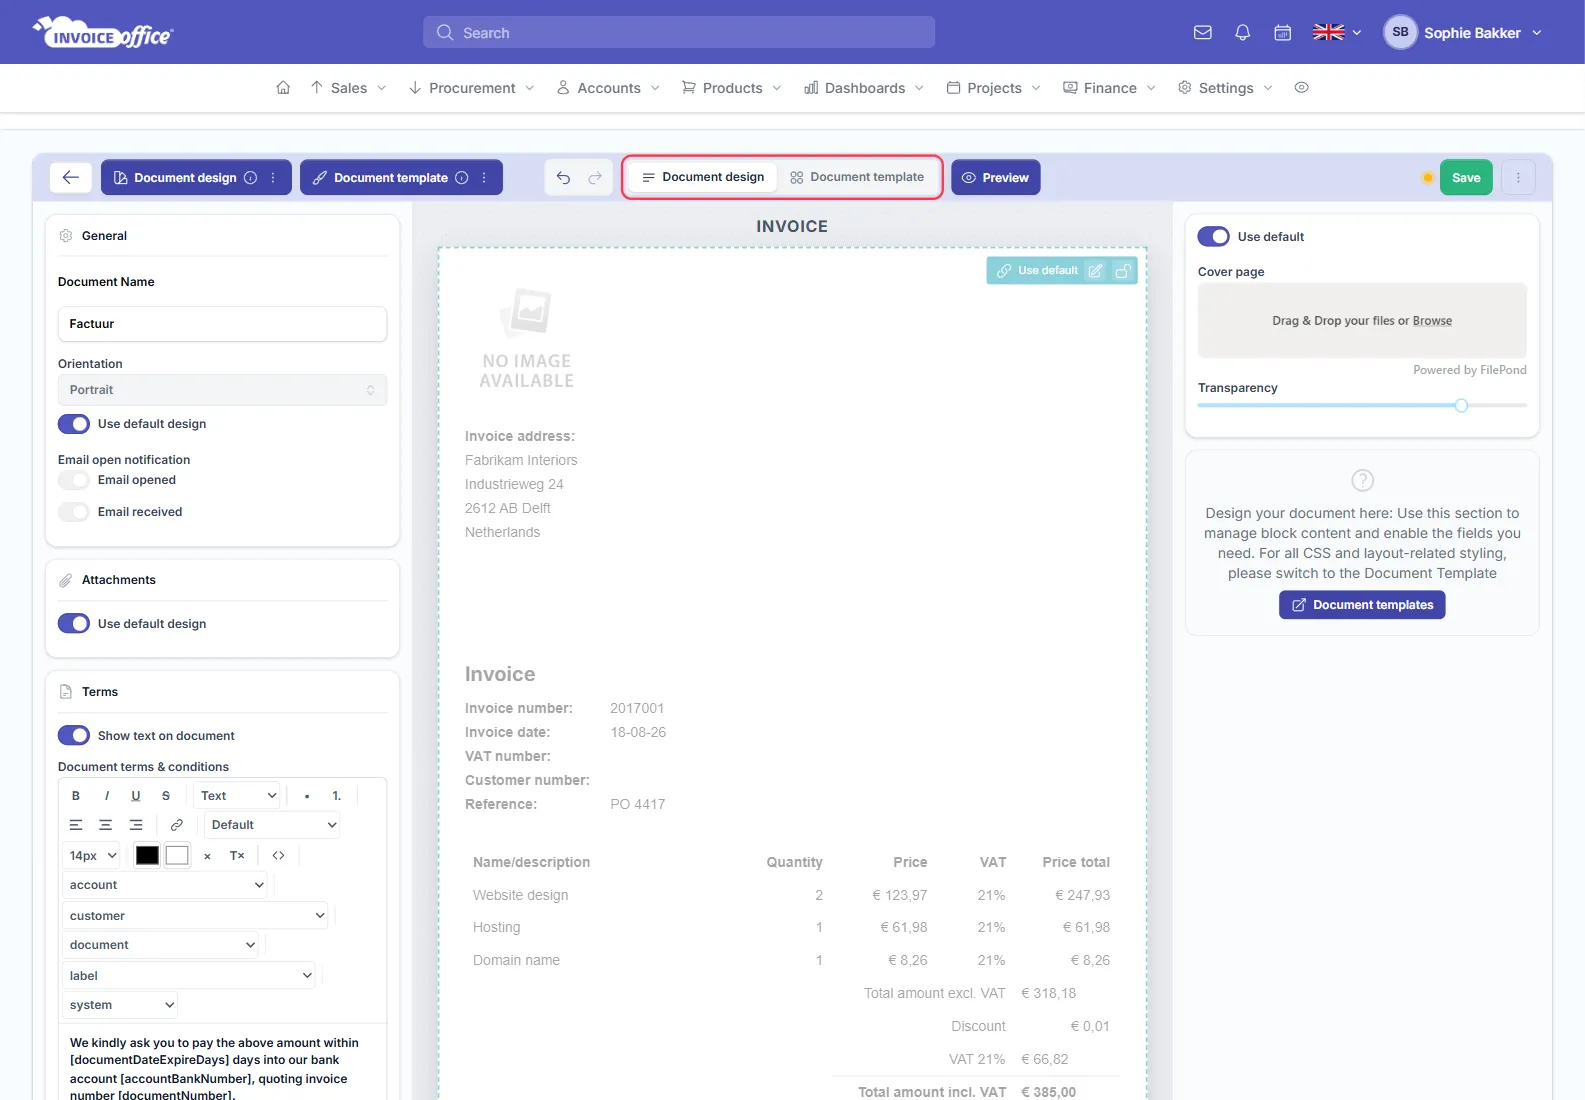
In Document design mode the left column holds:
- General — the document name, its orientation, whether it follows the default design, and the email opened and email received notifications; see How does the viewer status icon work with sent emails?.
- Attachments — files that travel with this document type.
- Terms — the terms and conditions printed on the document, with dropdowns that insert live
values (account, customer, document, label, system) as
[documentNumber]-style placeholders. - Field names and values — the labels printed on the document; see How to change the label name.
Step 3 — Turn blocks on and off
Switch to Document template. The left column becomes a list of blocks — Logo, Billing address, Post address, Document detail, Introduction text, Document table, Closing text, Document terms & conditions, Custom image and Custom text. Each row has a switch that shows or hides the block, an eye that isolates it in the preview, and a handle for dragging it into a new position.
Below them, PAGE carries the things that are not blocks: Background image, Company details (the footer strip) and Show header and logo on every page.
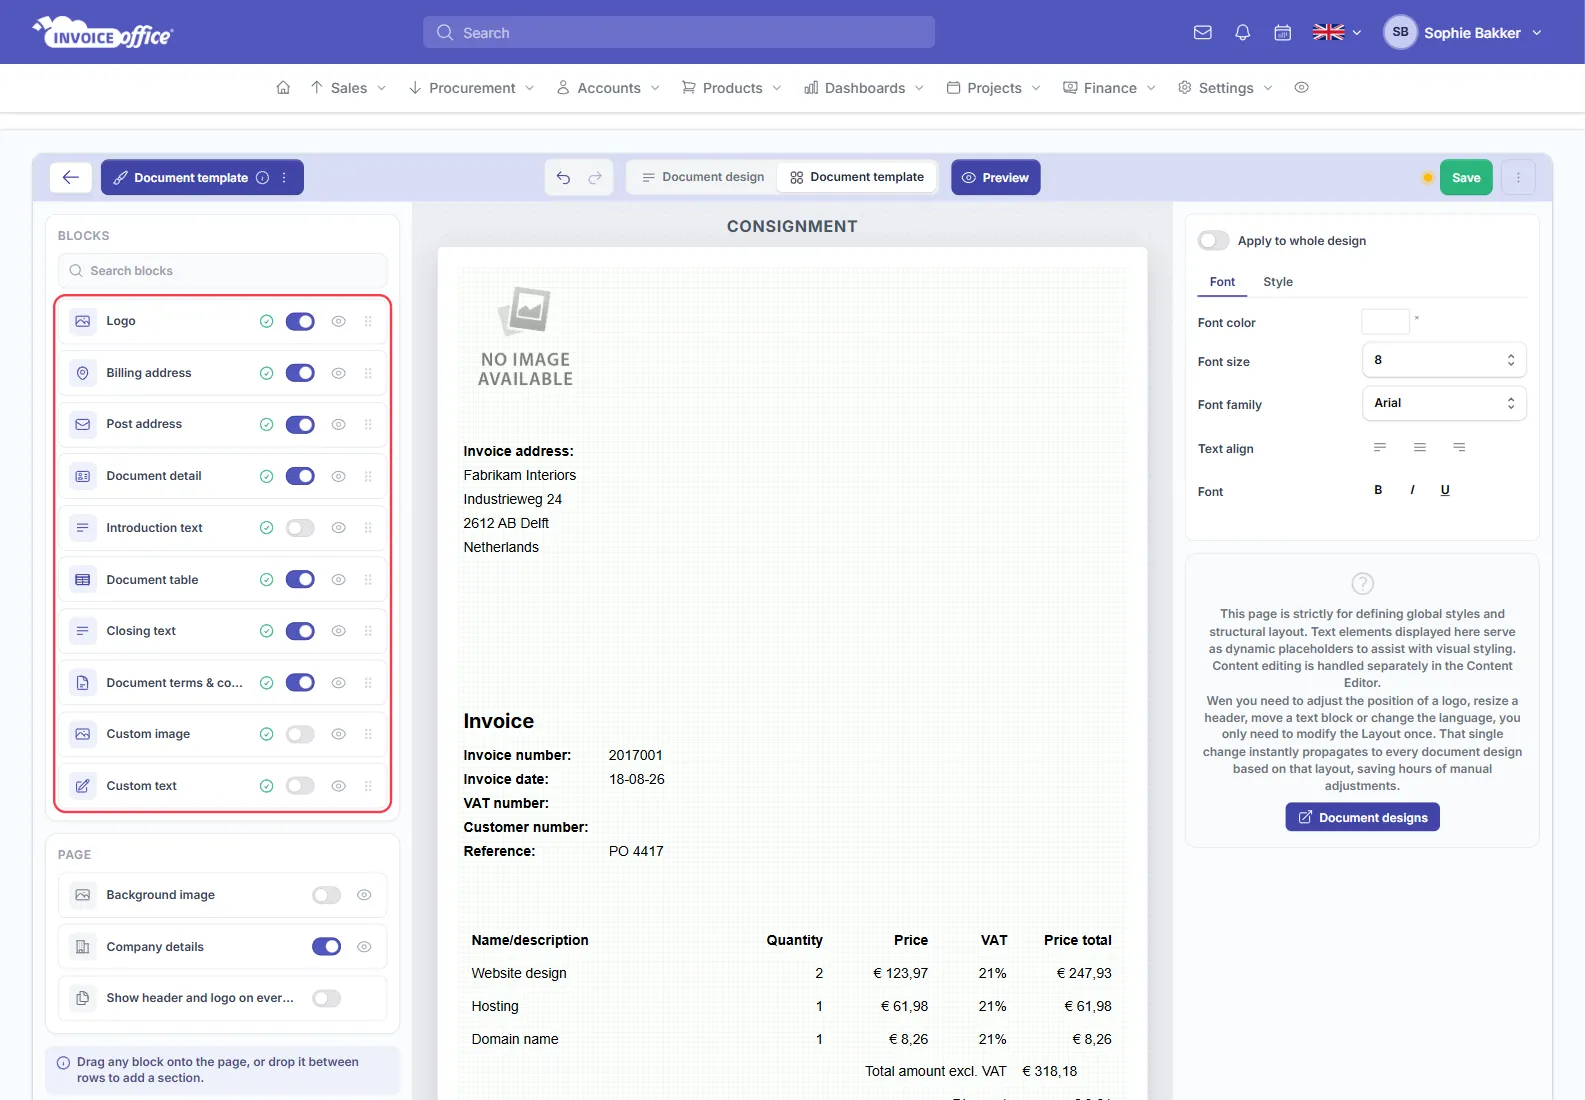
You can also drag a block straight onto the page, or drop it between rows to add a section.
Step 4 — Style a block
Click a block in the preview and it is selected: a small toolbar appears over it for aligning it, moving it up or down, growing or shrinking it and removing it, and the right-hand panel becomes that block’s inspector with Content and Style tabs.
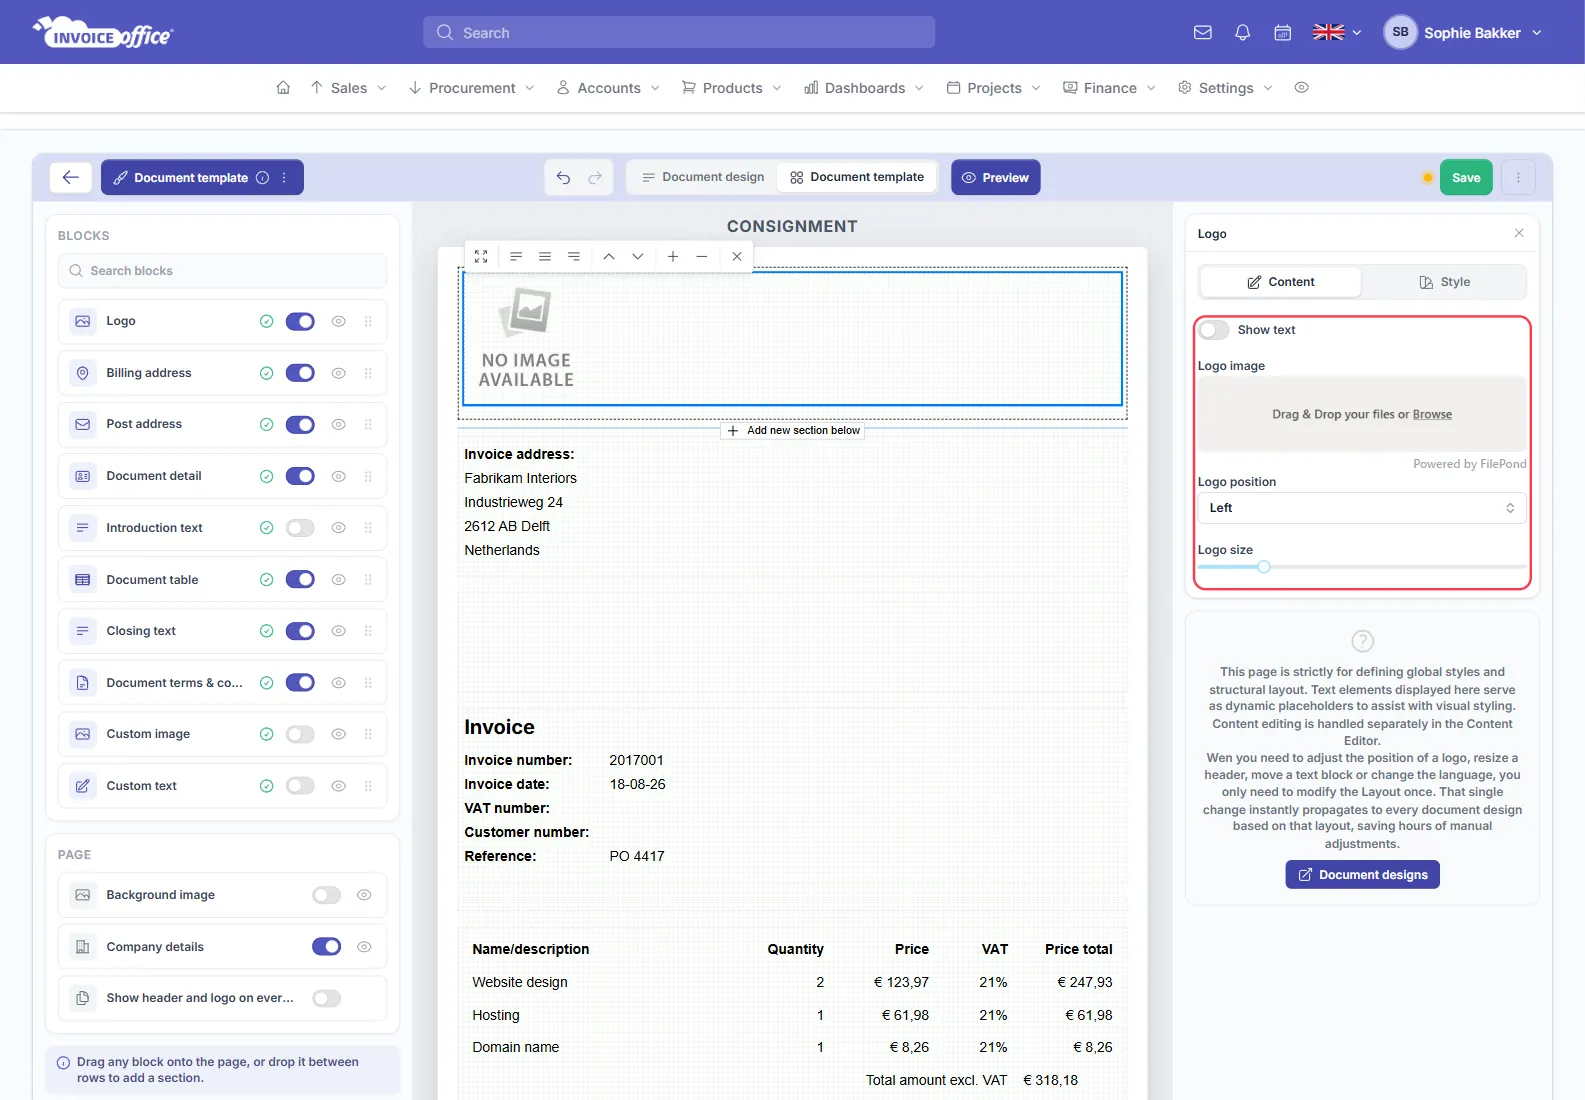
- Content is what the block shows — the logo image and its position, the table’s columns, and so on.
- Style is how it looks — font colour, size, family, line height and bold/italic/underline.
With no block selected, the same panel styles the whole page, and Apply to whole design pushes what you set there across the document.
Colours, fonts and spacing
Font colour, size and family live on the Style tab of whatever you have selected. How much room each product line takes is the Line height on the document table — see How to increase the document table line height.
Save
Click Save. The dot beside it turns amber while you have unsaved changes, and Preview shows the document as it will print.
Remember it is per language
A design belongs to one document type and one language. Setting up an English invoice does not touch your Dutch one — switch language on Settings → Document designs and do it there too.