Peppol e-invoicing in Invoice Office sends your invoices and credit notes as structured UBL files over the Peppol network, straight into your customer’s accounting software, and brings your suppliers’ e-invoices in as purchases. This guide covers the whole Peppol setup: registering your company, preparing your customers, sending an electronic invoice to a B2B customer, receiving invoices and checking what was delivered.
Before you start
- Your company must be based in Belgium, the Netherlands, France or Germany. Invoice Office registers you on Peppol under your country’s identifier scheme, based on your company’s country (shown as Billing country code on the connector’s Configuration tab).
- Your VAT number and CoC number must be filled in under Settings → Company → Company information. They are your Peppol ID: the numbers other businesses use to find you on the network.
- Peppol needs a paid plan. Without one you can’t switch the Peppol connector on. Every document you send or receive uses one Peppol credit. See pricing for what each plan includes.
Step 1 — Turn on the Peppol connector and register your Peppol ID
- Go to Settings → Company → Integration connectors and click Settings on the Peppol card.
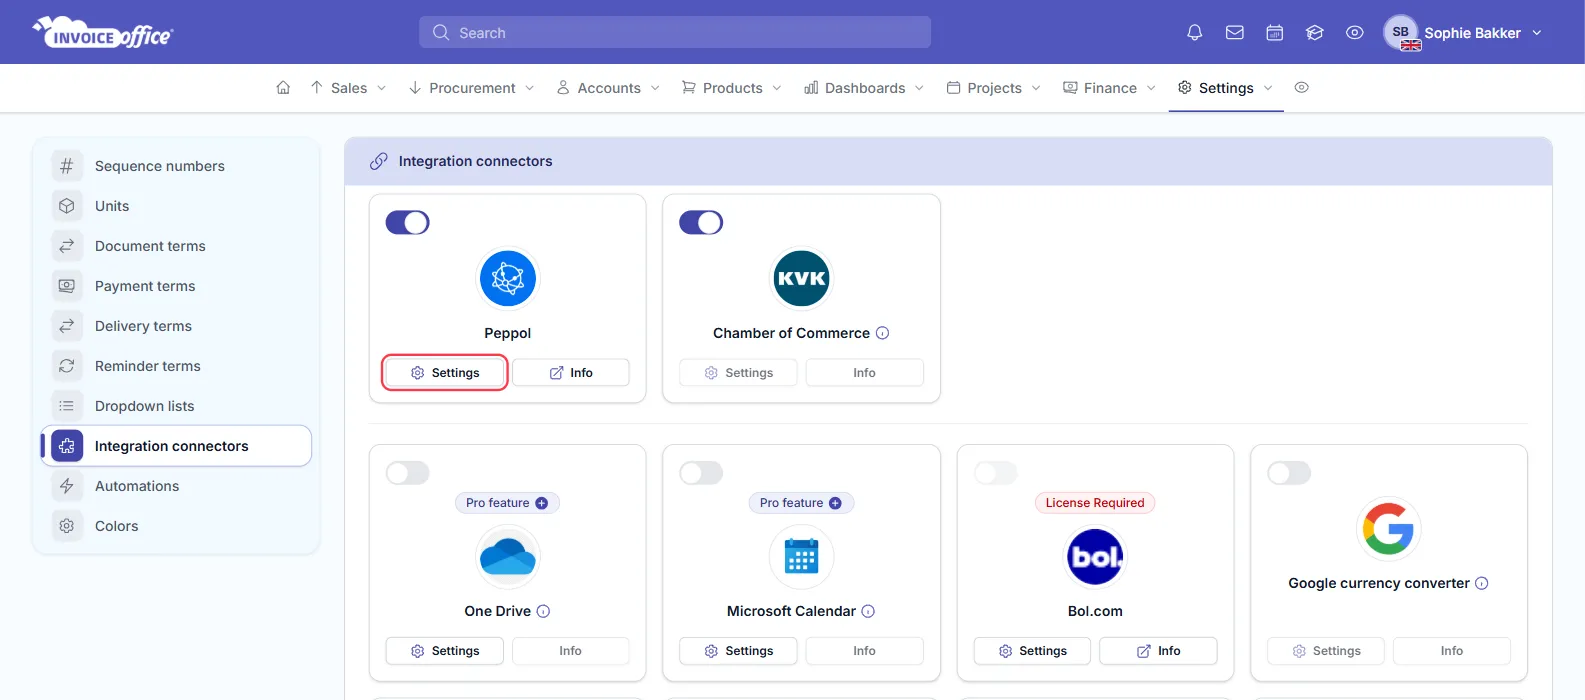
- On the Connect tab, switch Active on.
- Check VAT number and CoC Number. They are read-only here; to change one, click the link icon next to the label, which opens your company information.
- Switch Activate outgoing invoices on to send invoices and credit notes to customers over Peppol.
- Switch Activate incoming invoices on to receive purchase invoices from suppliers over Peppol. This registers your VAT number and CoC number on the Peppol network straight away. If the registration fails, the switch turns itself off again and the reason is shown under it.
- Click Save.
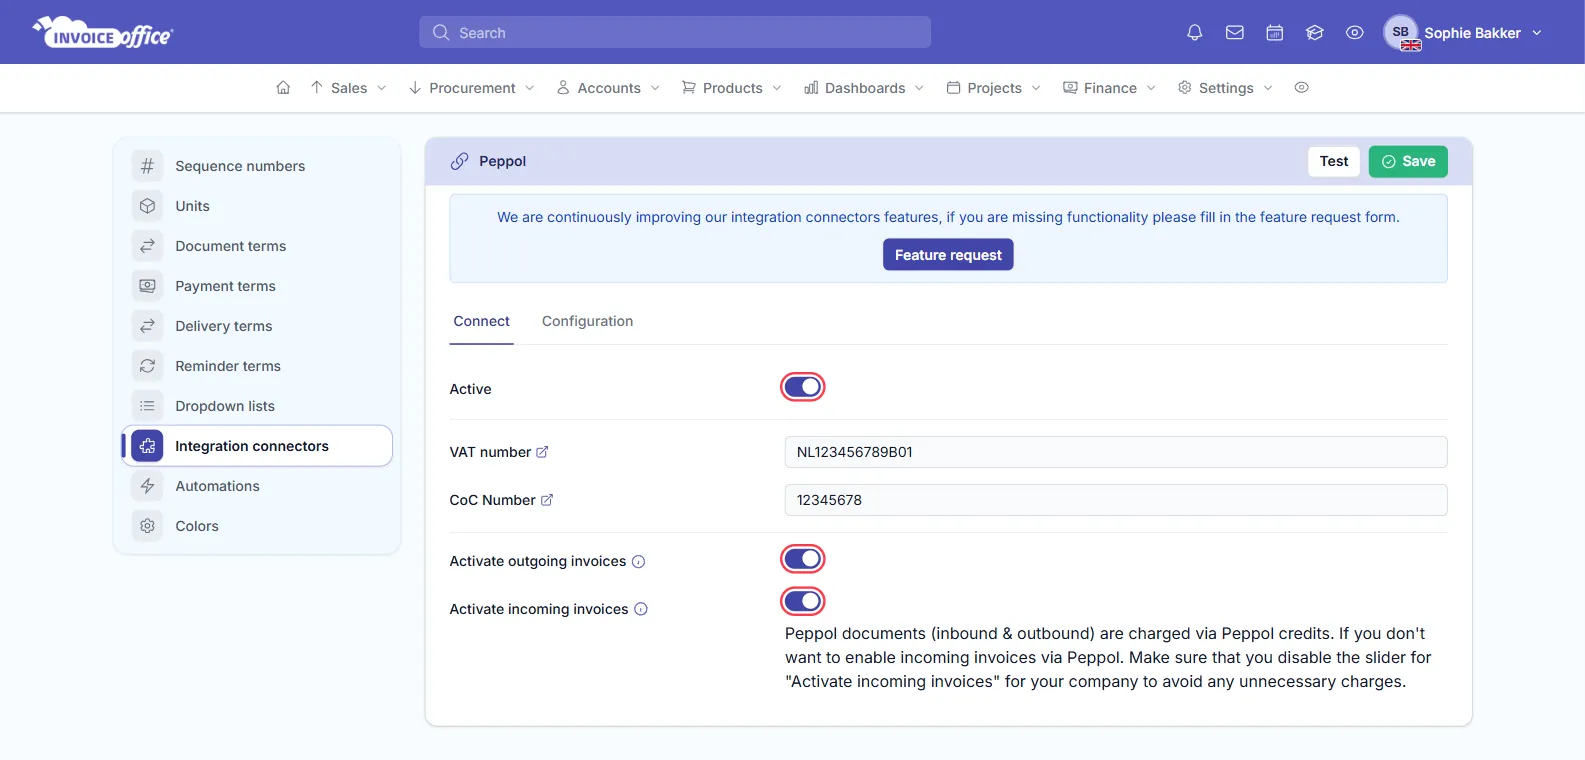
Once incoming invoices are on, click Test to check that your company can be found on the Peppol network. The Configuration tab shows the company details the connector uses: company name, email, billing country code and bank account number.
Received invoices cost credits too. If you only want to send, leave Activate incoming invoices off.
Step 2 — Add the Peppol identifier to each customer
Invoice Office delivers an e-invoice to the Peppol identifier saved on the customer, so set it before you send the first one. The Peppol identifier section appears on the customer once the Peppol connector is active.
- Open the customer (Accounts → Customers) or create a new one.
- Under Account details, fill in the customer’s CoC Number and VAT number.
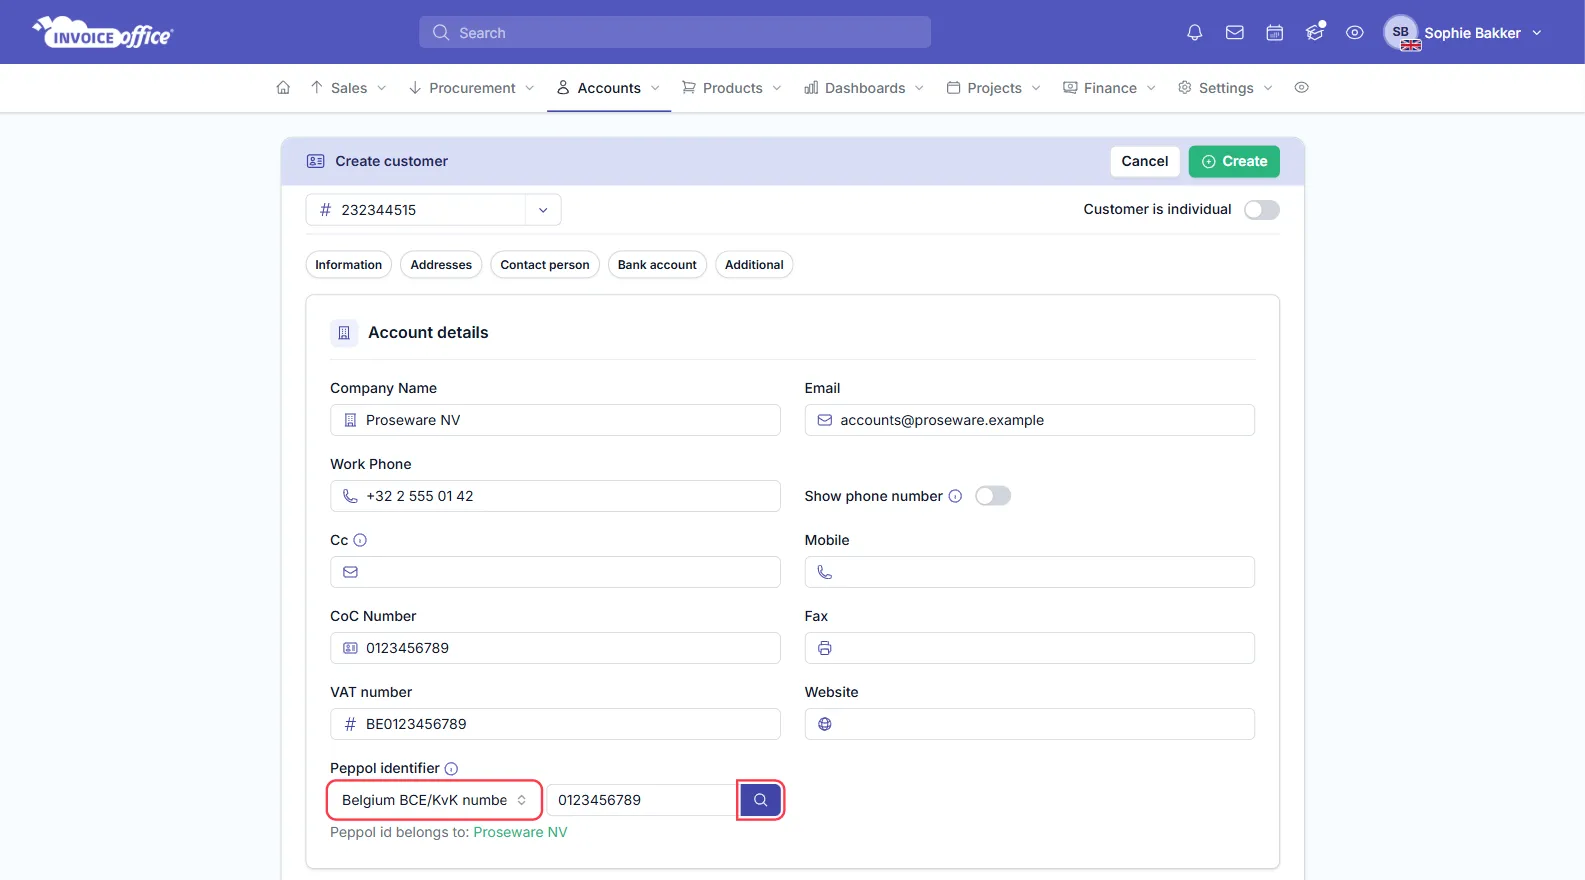
- Under Peppol identifier, choose the identifier type. Invoice Office fills in the number for you: the VAT number for a VAT type, otherwise the CoC number. The number field is read-only: to use a different ID, change the customer’s VAT number or CoC Number.
- Click the magnifying glass. If the customer is on Peppol, their registered name appears under the field, after Peppol id belongs to:. If not, the app says the Peppol id was not found.
- Save the customer.
Step 3 — Send an invoice via the Peppol network
Create the invoice as usual (see how to create an invoice). To send it over Peppol:
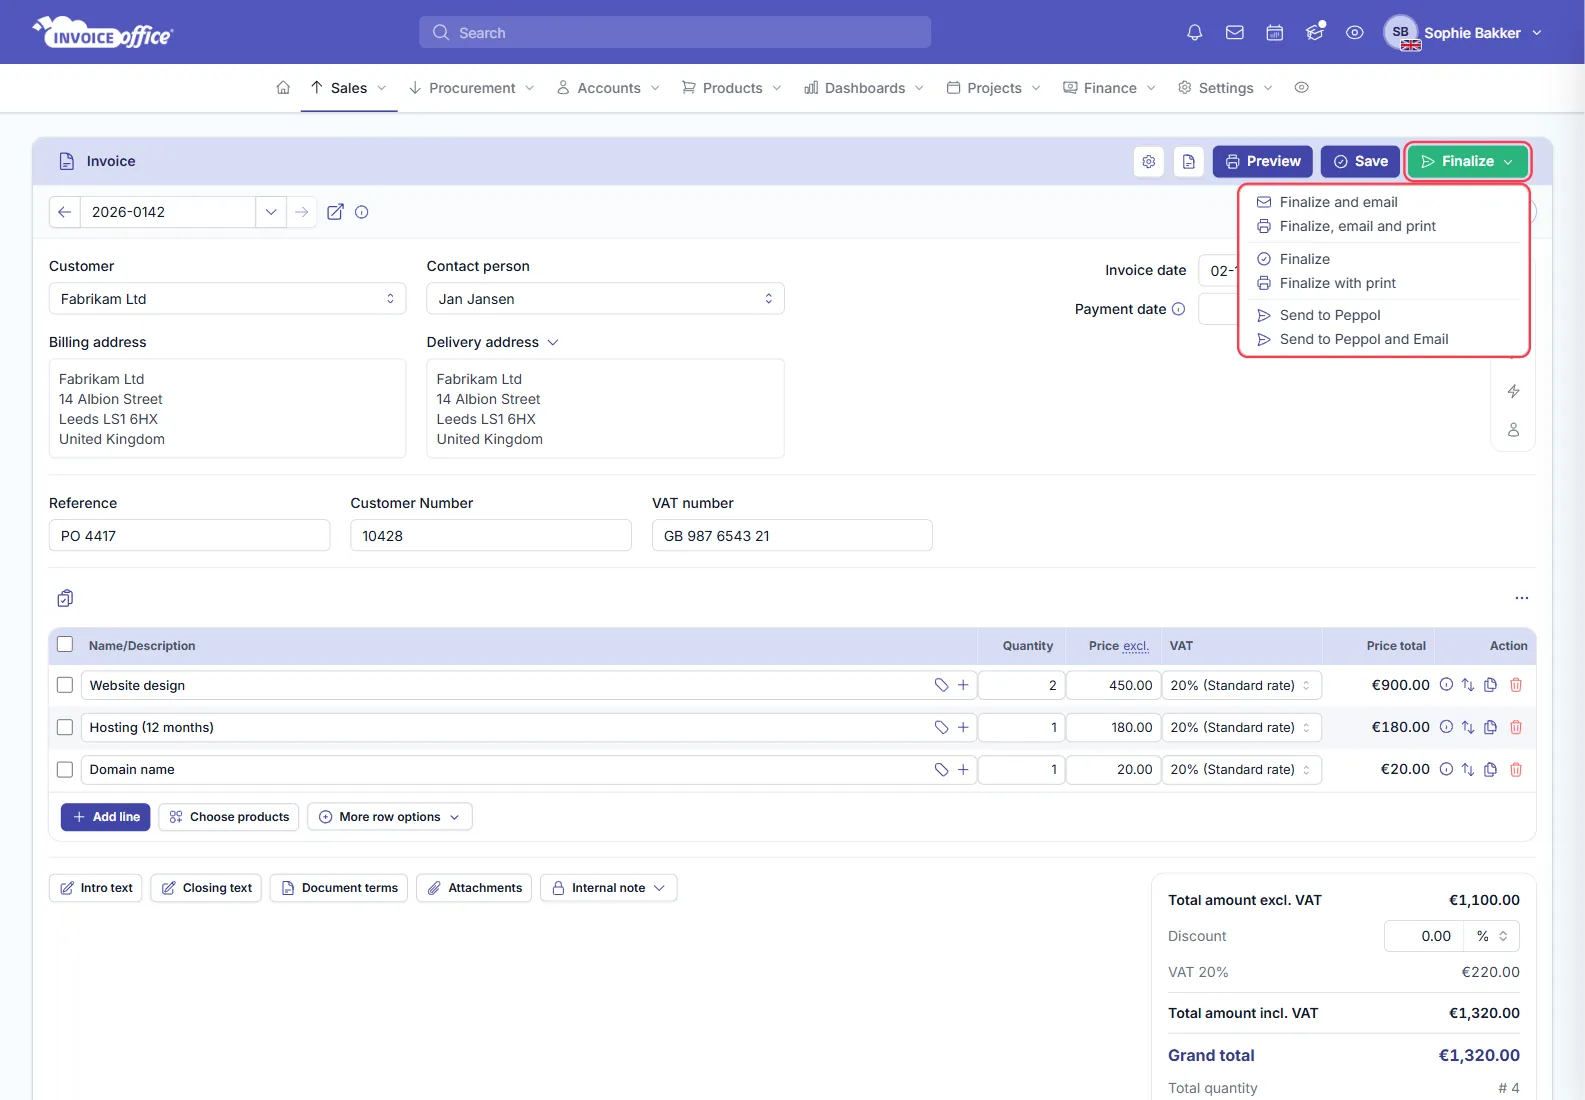
- A new invoice: open the Finalize menu and choose Send to Peppol, or Send to Peppol and Email if the customer also wants a PDF by email. The invoice is finalised and sent in one step.
- An invoice that is already final: go to Sales → Invoices, open the invoice’s Action menu and choose Send to Peppol.
Credit notes go over Peppol the same way. See create a credit note.
Before anything is sent, Invoice Office checks that:
- the Peppol connector is Active with Activate outgoing invoices on;
- the customer has a Peppol identifier type and number;
- the invoice has a number, at least one product line, and complete name, country and postal-code details;
- the customer is registered on Peppol. If not, you see The recipient is not registered on the Peppol network and no credit is used;
- you have Peppol credits left.
The e-invoice goes out in the UBL format set under Settings → Company → Company settings, on the Finance tab, under UBL protocol. The default is Peppol BIS Billing UBL Invoice V3. UBL.BE Invoice 3.0 - Belgium and SimplerInvoicing are also available.
Step 4 — Check Peppol delivery status
In Sales → Invoices, the status column shows a Peppol badge on every invoice you sent:
- Processing Peppol — sent and on its way.
- Delivered by Peppol — delivered over the Peppol network.
- Peppol not processed — delivery failed.
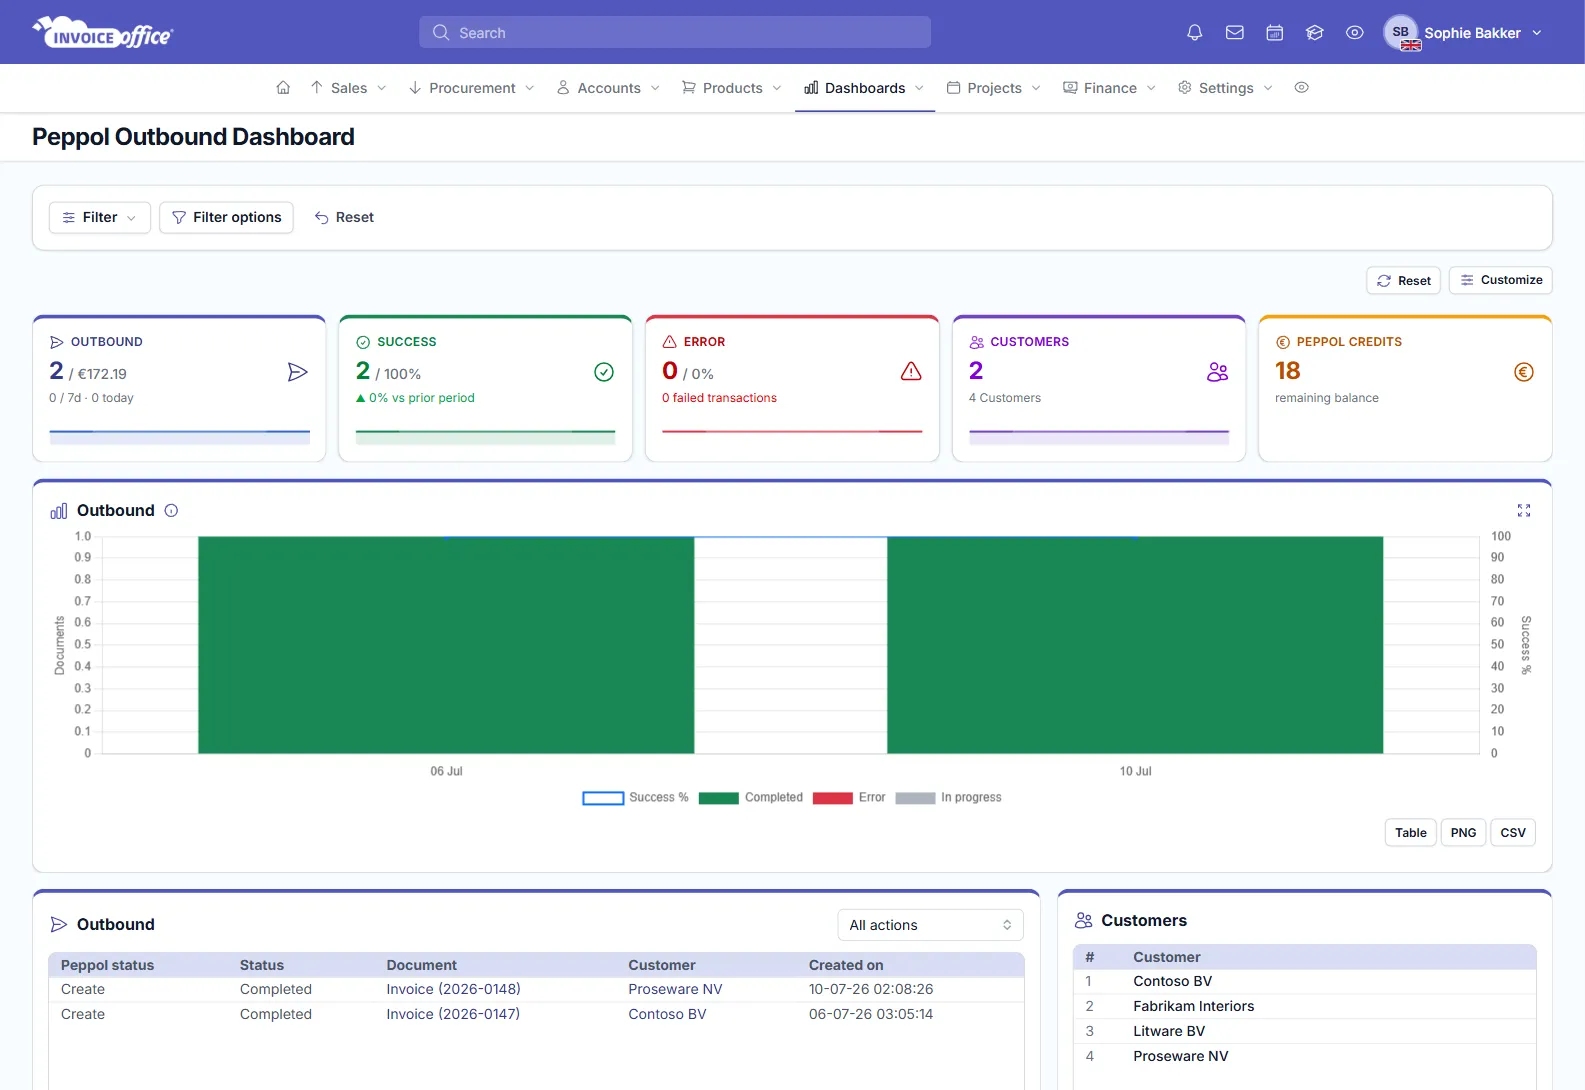
For an overview, go to Dashboards → Sales → Peppol. The Peppol Outbound Dashboard shows how many documents you sent, the success and error counts, the customers you send to and your remaining Peppol credits. The Outbound table lists each document with its Peppol status, Status, Customer and Created on date. A failed send shows the error message under its status.
If an invoice failed because the customer’s Peppol identifier was wrong, correct it on the customer. Then open the invoice: its Peppol tab shows the identifier the invoice was sent to. Click the refresh button (Refresh from account) to pull in the corrected identifier, then click Send to Peppol to send it again.
Step 5 — Receive inbound Peppol invoices
With Activate incoming invoices on, suppliers can send their invoices to your Peppol ID. Each one arrives in Procurement → Purchases as a concept purchase:
- Invoice Office links it to the supplier with the same CoC or VAT number. If there is none, it adds the supplier from the details on the invoice.
- The invoice lines, quantities, prices and VAT rates are copied in, and a PDF of the invoice is saved as an attachment.
- You get a notification: Received new document by peppol.
Check the purchase and finalise it like any other purchase. Dashboards → Procurement → Peppol shows everything received, with success, error and queued counts and a list of suppliers.
To refuse an incoming invoice, open the purchase’s Action menu and choose Reject purchase invoice via Peppol. Pick a reason and, optionally, a proposed action, such as asking for a new invoice. The supplier is notified over Peppol and the purchase is removed.
Country-specific requirements (NL, BE, DE)
The rules below cover Belgium, the Netherlands and Germany. Companies in France can register too (with their SIRET and VAT number) and address French customers by SIRENE, SIRET or VAT number.
Invoice Office registers your company and addresses your customers with these Peppol identifier types:
| Country | Your company is registered with | Customer identifier types in Invoice Office |
|---|---|---|
| Belgium | Enterprise (BCE/KBO) number (0208) and VAT (9925) | Belgium BCE/KvK number (0208), Belgium VAT number (9925) |
| Netherlands | KvK number (0106) and VAT (9944) | Netherlands Chambers of Commerce number (0106), Netherlands VAT number (9944), government OIN (0190) |
| Germany | VAT number (9930) | None yet |
Belgium. Since 1 January 2026, VAT-registered businesses in Belgium must send and receive structured e-invoices for domestic B2B sales, over Peppol (European Commission). Turn on both outgoing and incoming invoices. For Belgian customers, prefer the enterprise number (Belgium BCE/KvK number); Invoice Office rejects one that isn’t 10 digits or has an invalid check digit. You can also choose UBL.BE Invoice 3.0 - Belgium as your UBL protocol.
Netherlands. Address Dutch government bodies with their OIN (20 digits); a KvK number must be 8 digits. A general Dutch B2B e-invoicing obligation is planned for July 2030 but is not law yet (VATupdate).
Germany. Since 1 January 2025 every German business must be able to receive e-invoices. Issuing them becomes mandatory from 1 January 2027 for businesses with a turnover over €800,000, and from 2028 for all (EDICOM). Germany does not require Peppol specifically. A German company can register on Peppol in Invoice Office and receive invoices. But the customer Peppol identifier list has no German type yet, so you cannot address a German customer over Peppol from Invoice Office.
If a VAT number starts with a country code, write it in capitals (BE, NL, DE). A lowercase prefix such
as be0123…, or a VAT number in the wrong format, stops the invoice from being sent.
Common Peppol errors
- Your peppol id not configured — your company has neither a VAT number nor a CoC number. Fill one in under Company information (Step 1).
- Integration connector not active — switch Active and Activate outgoing invoices on (Step 1).
- Peppol identifier is not set for this customer — add the identifier to the customer (Step 2).
- The recipient is not registered on the Peppol network — the customer cannot receive e-invoices under that ID. Check the number and type with the magnifying glass, or send by email instead.
- Peppol credits limit exceeded — you have no Peppol credits left. See pricing.
Want a copy of what you sent? Every final invoice has Invoice UBL XML in its Action menu, and you can export your records as described in how to export your data.