You can export data from Invoice Office straight from the list it lives in — customers, suppliers, products, invoices, quotes and the other document lists under Sales. Pick the columns you want, choose Excel, CSV or PDF, and the file downloads to your computer. Filter the list first and the export follows it, so you get exactly the rows you are looking at: this month’s invoices, only unpaid ones, or customers in one city.
Step 1 — Open the list you want to export
Go to the list that holds the data:
- Customers — Accounts → Customers
- Suppliers — Accounts → Suppliers
- Products — Products → Products
- Invoices, quotes and other documents — Sales → Invoices, or Quotes, Credit notes, Order confirmations and the other document lists under Sales
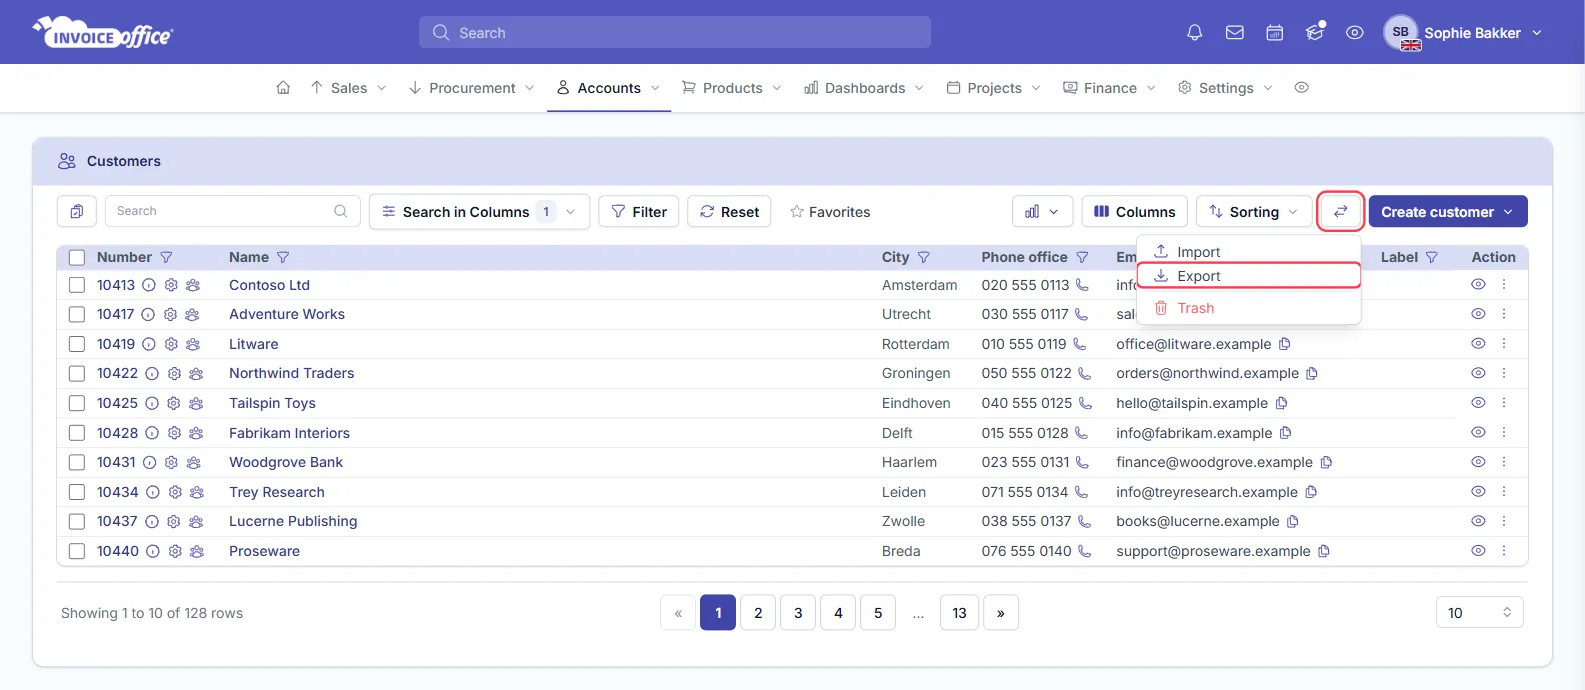
Each of these lists has an Import / Export button in its toolbar — the ⇄ icon near the right end of the toolbar. Click it and choose Export.
Step 2 — Filter the list first
The export contains what the list shows, so narrow it down before you export:
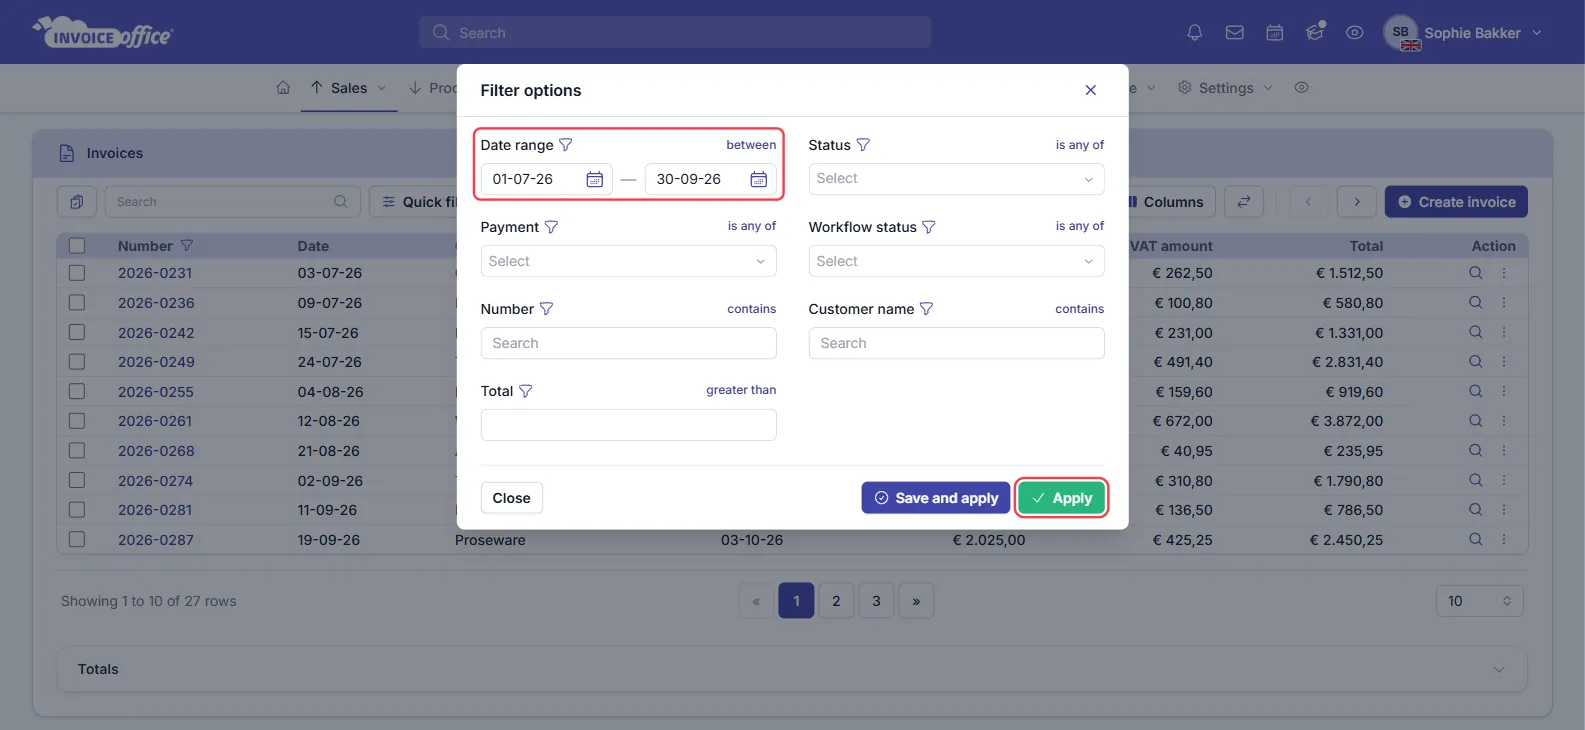
- Filter opens Filter options. On a document list, set a Date range — between two dates, before or after one — and add Status, Payment, Customer name or Total if you need them. Click Apply.
- Quick filter (on document lists) gives one-click sets such as Unpaid, Paid, Expired invoice or Concept invoices on the invoice list.
- Search narrows the list by text.
- Tick rows to export only those rows. With nothing ticked, the export starts from the first row of your filtered list, whatever page you are on — see how many rows an export holds.
Step 3 — Choose the columns and the format
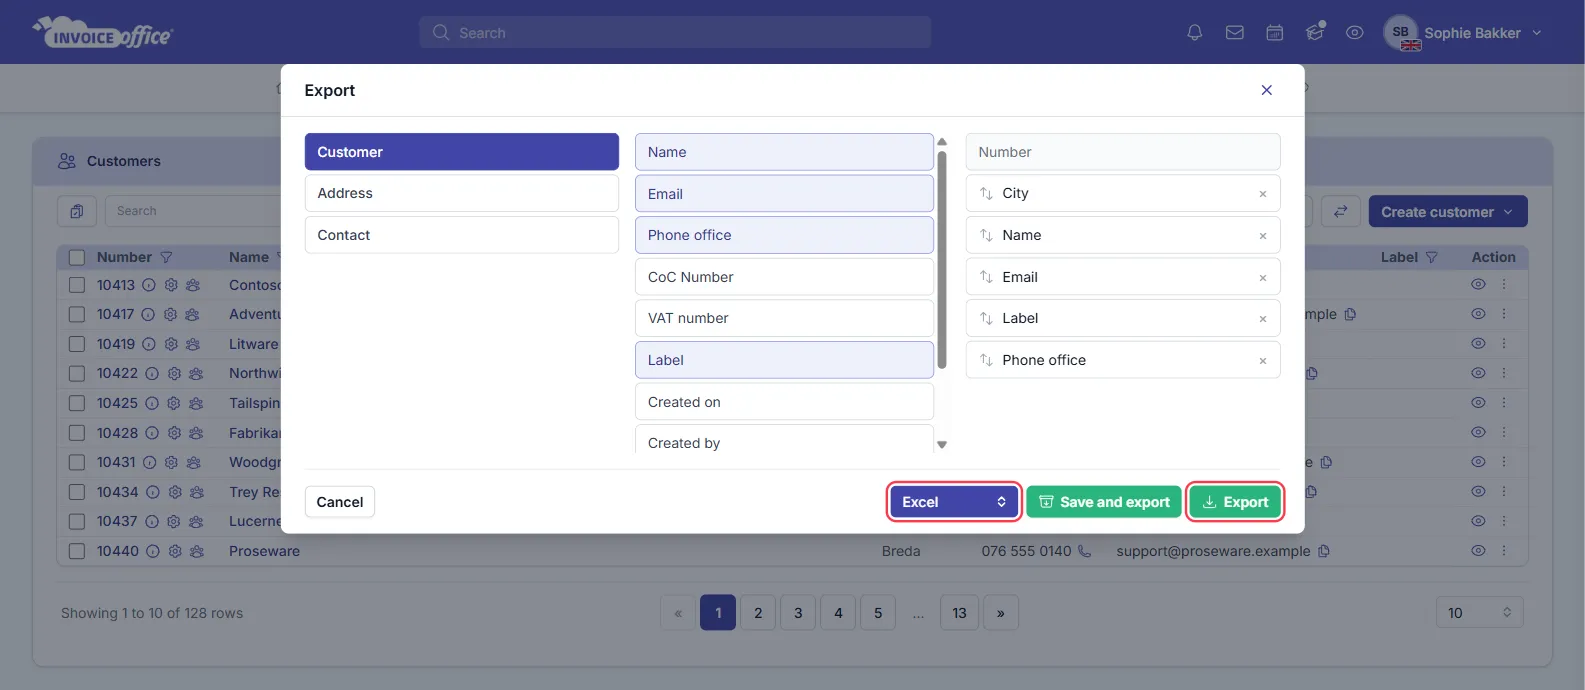
The Export window has three parts:
- On the left, the groups of fields. For customers these are Customer, Address and Contact; for invoices Invoice, Invoice line, Customer and Workflow status; for products Product and Stock.
- In the middle, the fields in that group. Click a field to add it to your export.
- On the right, the columns your file will have. Drag them into the order you want, or click × to remove one. The first column — the number — always stays first.
Then pick the format at the bottom — Excel, CSV or PDF — and click Export. Use Save and export instead to keep this column choice for the next time you export the same list.
Choose Invoice line fields on a document list to get one row per product line — useful when you need quantities, prices and VAT per line rather than per invoice.
Step 4 — Find the downloaded file
The file downloads straight away through your browser, into your usual downloads folder — the same place any other download goes. Open it in Excel, Google Sheets, Numbers or any program that reads CSV.
Download invoices and other documents as PDF
To download the documents themselves — as PDFs or one ZIP file — rather than a table of them, tick them and use the Selected lines menu. See Bulk send or export documents.
Export financial reports for a date range
The finance reports export too. Go to Finance → Reports and open Profit & loss, VAT declaration or Balance. Click Filter options and set the Date range — a month, a quarter or a year — then click Export at the top of the report table and choose PDF, Excel or CSV. The file covers the same date range as the report on screen: Excel or CSV to work the numbers further, PDF to hand to your accountant.
How many rows an export holds
For customers, products and document lists, one export holds at most as many rows as your rows-per-page setting — up to 250. It takes the first rows of your filtered list, whatever page you are on. To export more:
- Raise the setting to 250. On a document list, pick 250 in the rows-per-page selector at the bottom right of the list. For customers and products, open your name at the top right → Account settings and set Number of rows per table to 250 — the selector on those lists only goes up to 100.
- Split larger sets with a filter — for example one Date range per month or quarter — and export each one.
Supplier exports are not limited this way.
Related articles
- Import customers, suppliers and products — the reverse: bring an export from other software into Invoice Office
- Import and export data in Excel, CSV and UBL
- Profit and loss and the tax return report
- Bulk send or export documents
- Create an invoice