The Mollie payment link connector creates payment links automatically and adds them to your invoices and emails. Each link carries the invoice amount already filled in, and your customer pays with whichever methods you have enabled in Mollie.
Setting it up has two parts: the integration connector itself, and the Document terms & conditions block in your document design, which is where the link is printed. Skip the second part and the link still reaches your customer’s email, but not the invoice.
Why use a payment link
- Easier for the customer. One click from the invoice they already have.
- Faster payment. The customer pays straight from the invoice instead of setting up a manual transfer.
- No extra Invoice Office cost. It is part of the Professional plan.
- Registered for you. When a link is paid in full, the payment is registered against the invoice automatically.
- No technical set-up. Your API-key and Profile-key are all you configure — no developer needed.
- Multiple payment methods at checkout, handled by Mollie.
- No manual work. You never create a payment link by hand.
Part 1 — Set up the integration connector
-
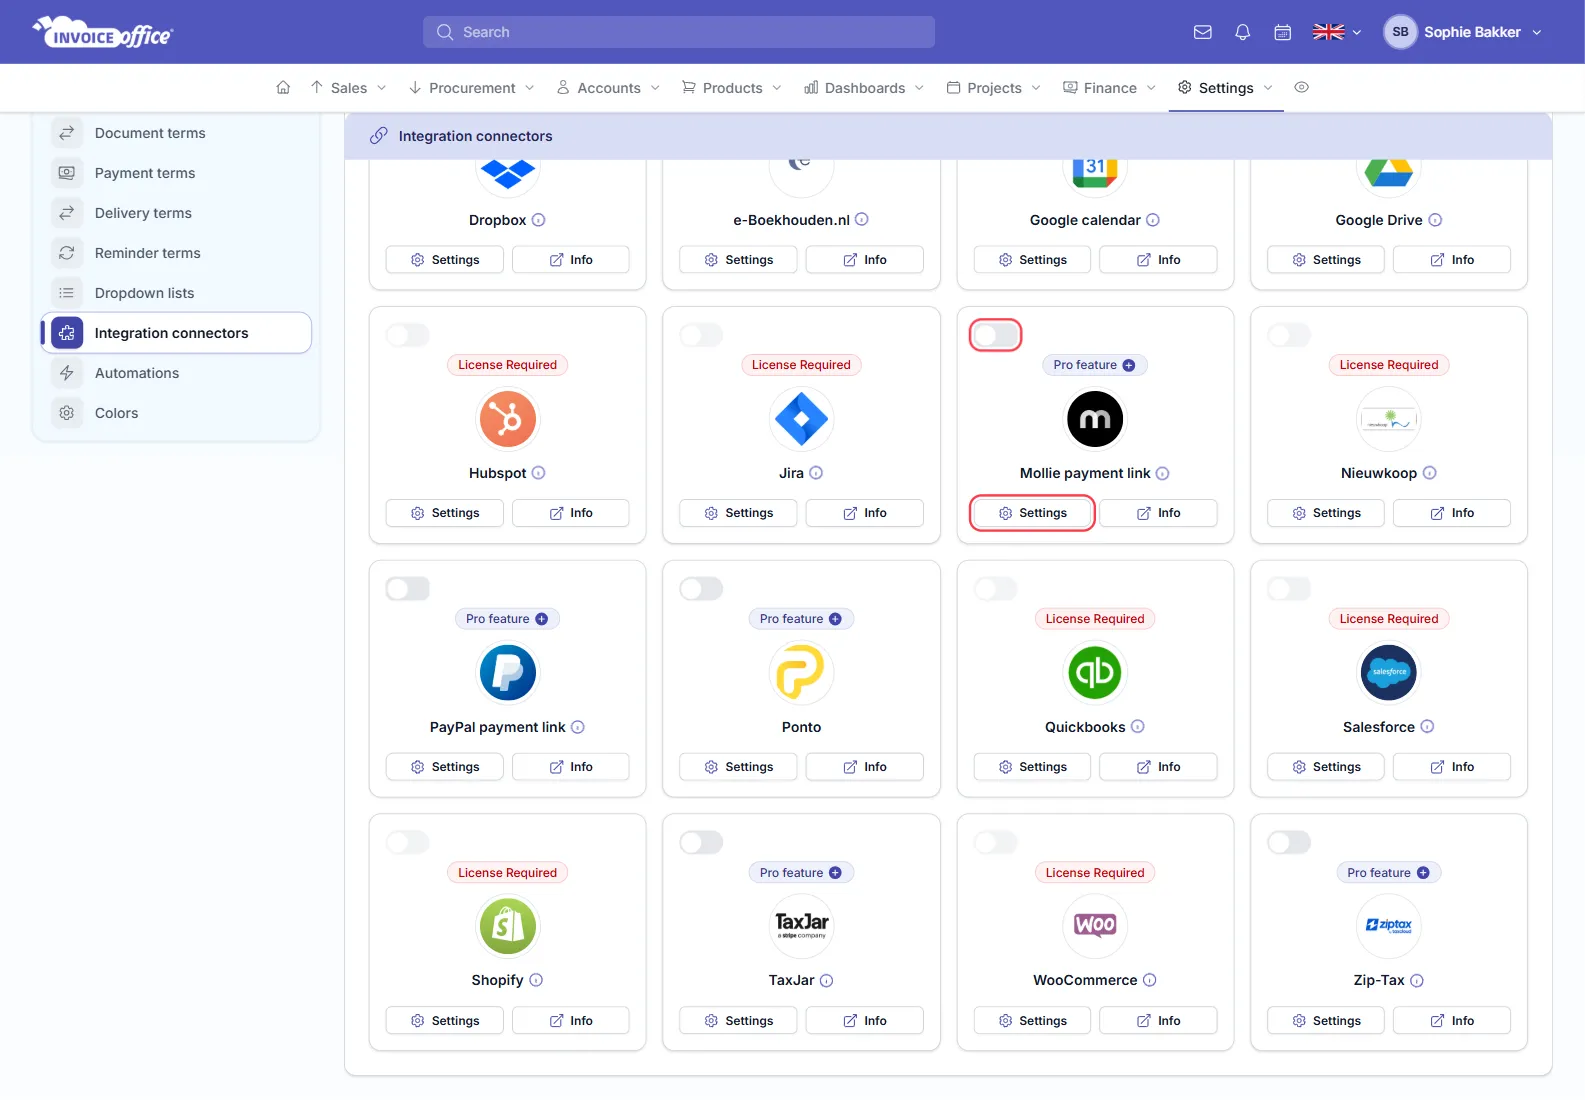
Go to Settings → Integration connectors.
-
Find the Mollie payment link card and click Settings.
-
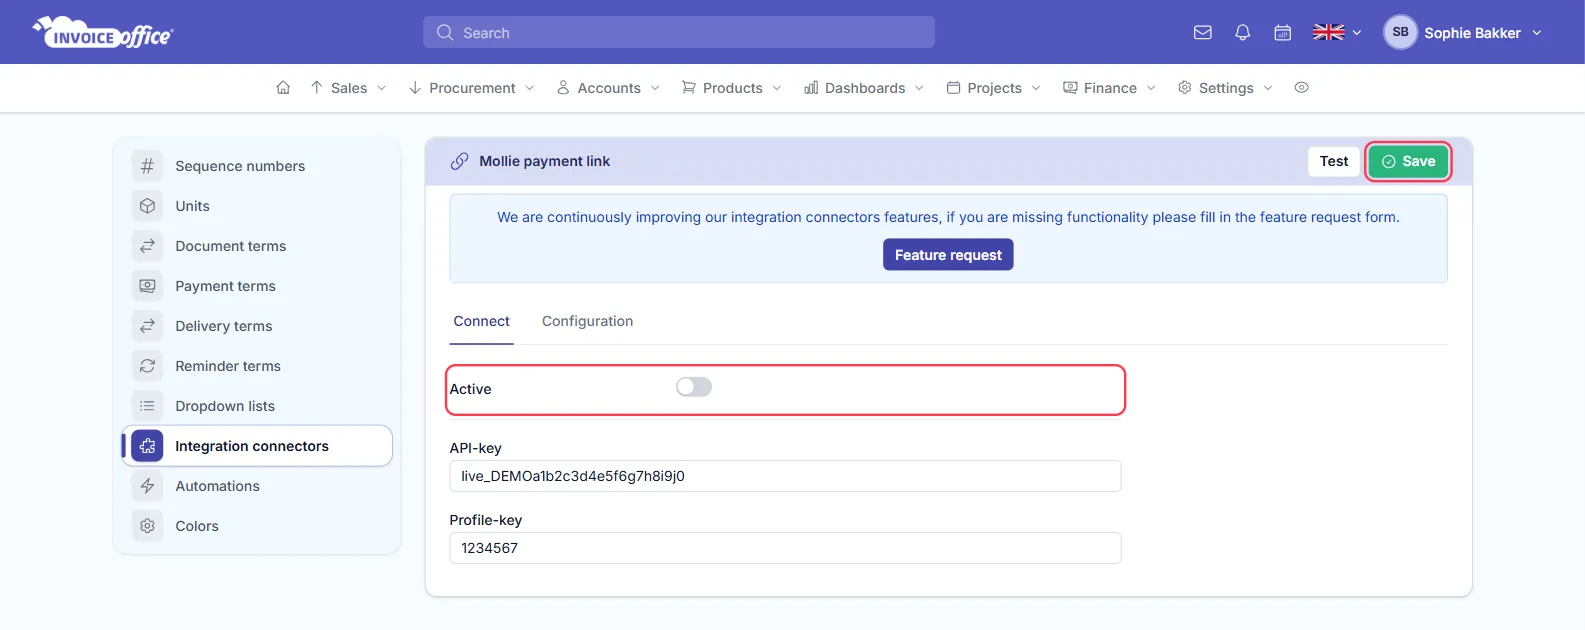
On the Connect tab, switch Active on and fill in the two credentials (see below for where to find each):
- API-key
- Profile-key — your Mollie ID.
-
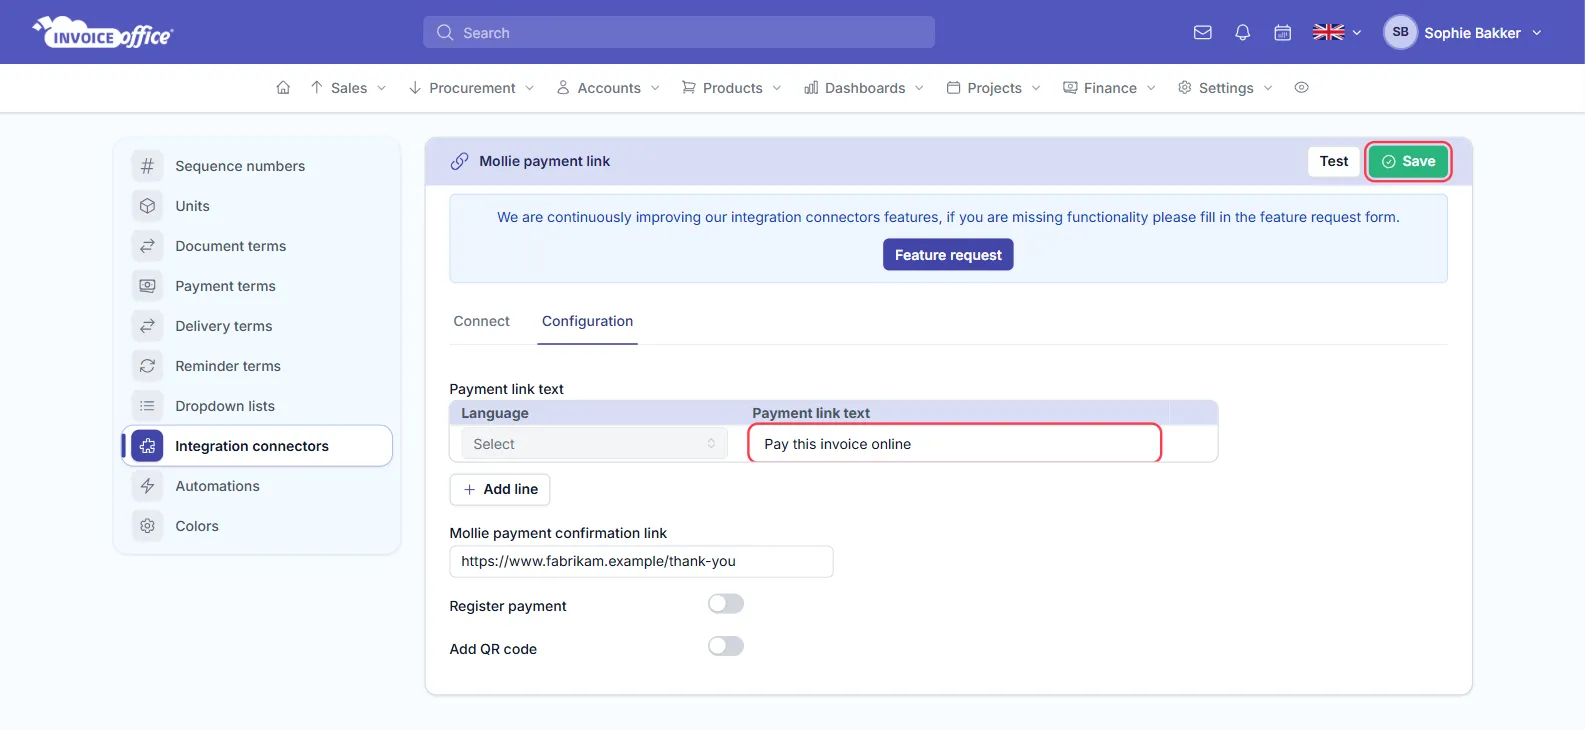
Open the Configuration tab and set the Payment link text — the wording used as the link text in your invoice and email template, so write something your customer will recognise as “pay here”. It is a table with one row per language; use Add line for each further language you invoice in.
The same tab also carries:
- Mollie payment confirmation link — the page your customer lands on after paying.
- Add QR code — print a QR code on the invoice as well as the link, so a paper copy can be paid from a phone.
- Register payment — a switch you can leave as it is: a payment made in full through the link is registered against the invoice automatically either way.
-
Click Save in the top-right.
To switch the connector off later, turn Active off — or use the card’s own switch on the connectors page.
Part 2 — Switch on the Document terms & conditions block
Invoice Office prints the payment link — and its QR code, if you switched that on — inside the Document terms & conditions block of the invoice, beneath any terms text. If that block is switched off in your document design, the link does not appear on the invoice at all.
- Go to Settings → Document designs and open the design your invoices use.
- Open the Blocks tab at the top of the editor’s side panel. In the two-mode editor, switch the toolbar to Document template first.
- Switch Document terms & conditions on.
- Click Save.
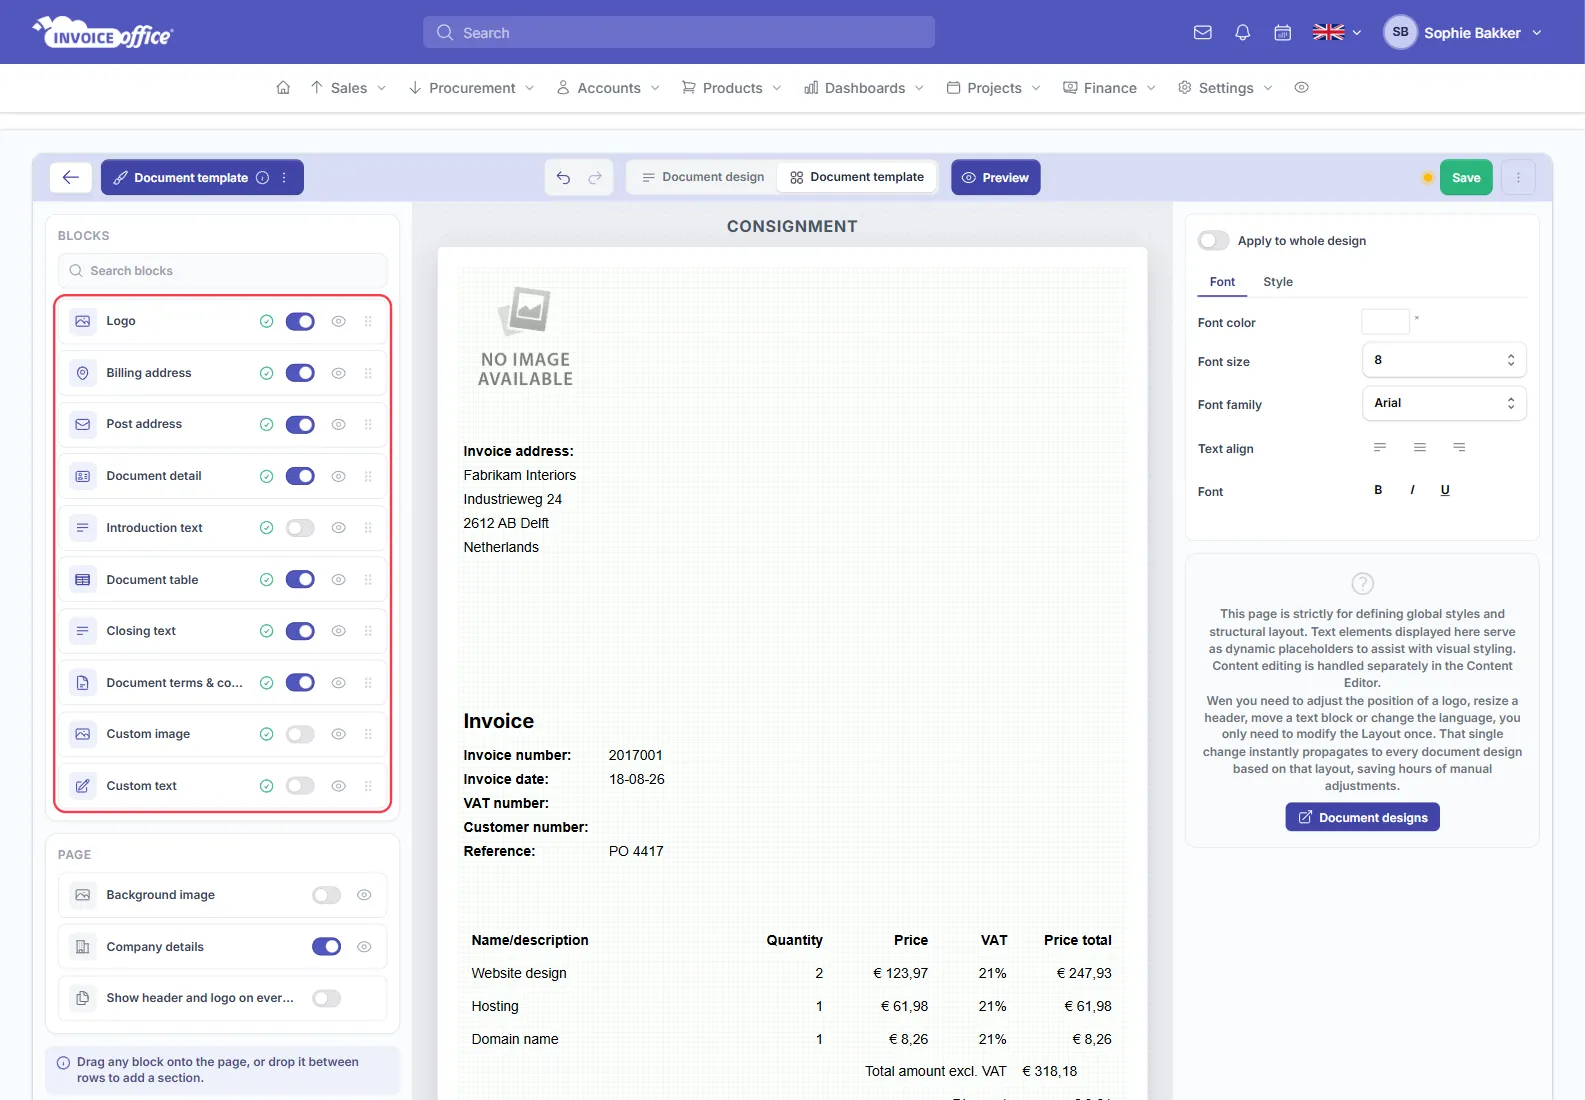
Three things to know about this block:
- Switch it on before you create the invoice. An invoice takes its layout from the document design when it is created.
- In the two-mode editor the blocks belong to the template, and a template can sit under several designs — so the change applies to every design built on it.
- It does not need any terms text. The Show text on document switch on a document term only hides the terms text; the payment link is printed either way.
More on blocks and the two editor modes: How to customize the document layout.
Where the link appears
Once you finalise the invoice, the Mollie payment link is printed in its Document terms & conditions block and added to the email text your customer receives.
While the connector is Active, it switches the payment link on for every invoice and recurring invoice you create, so there is nothing to tick per invoice. Only invoices carry a payment link — a quote, order confirmation or proforma invoice does not.
What goes in the Profile-key?
Your Mollie ID. In your Mollie dashboard it is at the top left, below your organisation’s name, and starts with a hash (#). Copy the number without the # and paste it into the Profile-key field.
Where do I find my API key?
In Mollie, go to Developers → API access tokens and create a live API key. Mollie shows a key only once, when you create it, so copy it straight into the API-key field in Invoice Office.
Which payment methods your customers actually see is decided in Mollie, not in Invoice Office. Enable the ones you want on the account whose key you used here.
Keep an eye on the key
If the API key is revoked or expires, finalising an invoice no longer creates a link: Invoice Office shows a Mollie link failure notification and notes the error in the invoice’s history. The invoice itself is still finalised and sent, just without a payment link — so replace the key quickly.
Why is the payment link in the email but not on the invoice?
The Document terms & conditions block is switched off in the invoice’s document design. The email gets the link regardless, but the invoice only prints it inside that block. Switch the block on as in Part 2, then create the invoice.
Why is the payment link missing on a concept invoice?
The connector creates the payment link when you finalise an invoice, not while it is in concept. The link is created for the final invoice total, so finalise the invoice and the link is there.
Why can’t I enable the Mollie payment link?
The payment link needs a Professional plan. Check which plan your subscription is on: if you are on Basic, you can upgrade online.
After they pay
When Mollie reports that a link has been paid in full, Invoice Office registers the payment against the invoice for you, so your books and your reminders stay correct without registering it by hand. For any other payment, see How do I register a payment?.
Any doubts? Contact us and we will help.