You can import your data for customers, suppliers and products rather than typing it in again, which saves a lot of time when you are moving from other software.
The import runs as a six-step wizard — Source → Upload → Map fields → Preview → Import → Done — and nothing is written to your administration until the last step.
Step 1 — Open the import wizard and get the template
Go to Settings → Company → Import.
Pick the format you are bringing in: CSV or Excel. If you do not have a file yet, click Download template and start from that — it already has the columns in the right shape.
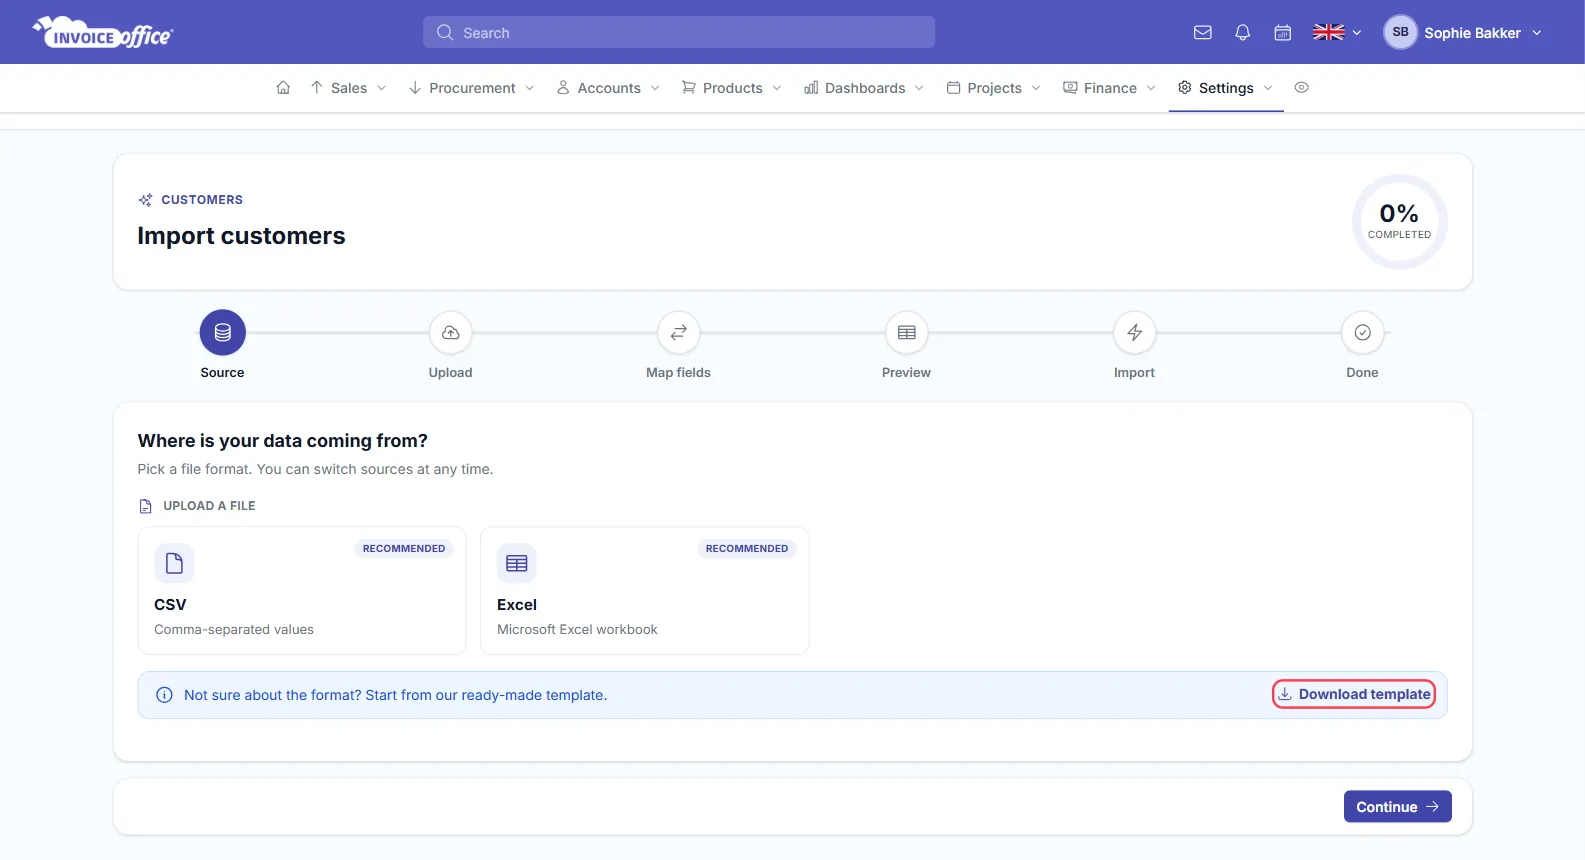
Then click Continue.
Step 2 — Prepare your file
If you already have an export from your old software, use it as it is — you match its columns to ours in Step 4, so they do not have to be in any particular order. If you started from the template, enter your data one row per customer.
Either way, one thing is worth the care:
- Watch the formatting. Points, commas and date formats are where most imports go wrong, and they are the one thing field mapping cannot fix for you.
Save the file when you are done.
Step 3 — Upload it
Drag the file onto the drop zone, or click it to browse. CSV and XLSX are both accepted. The file is read at this point, not imported.
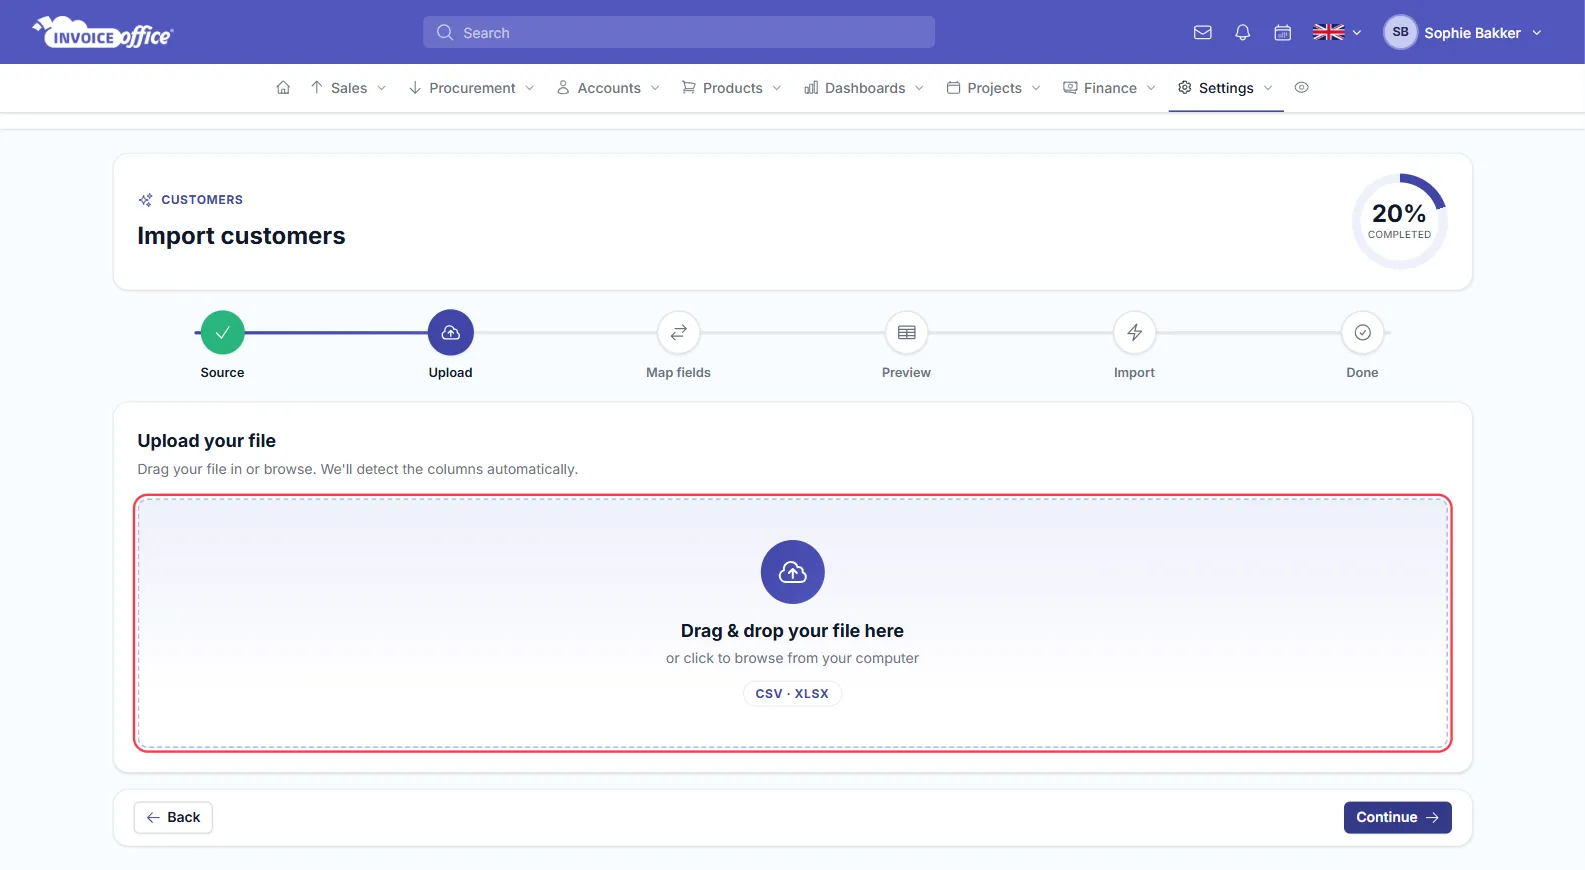
Step 4 — Check the columns
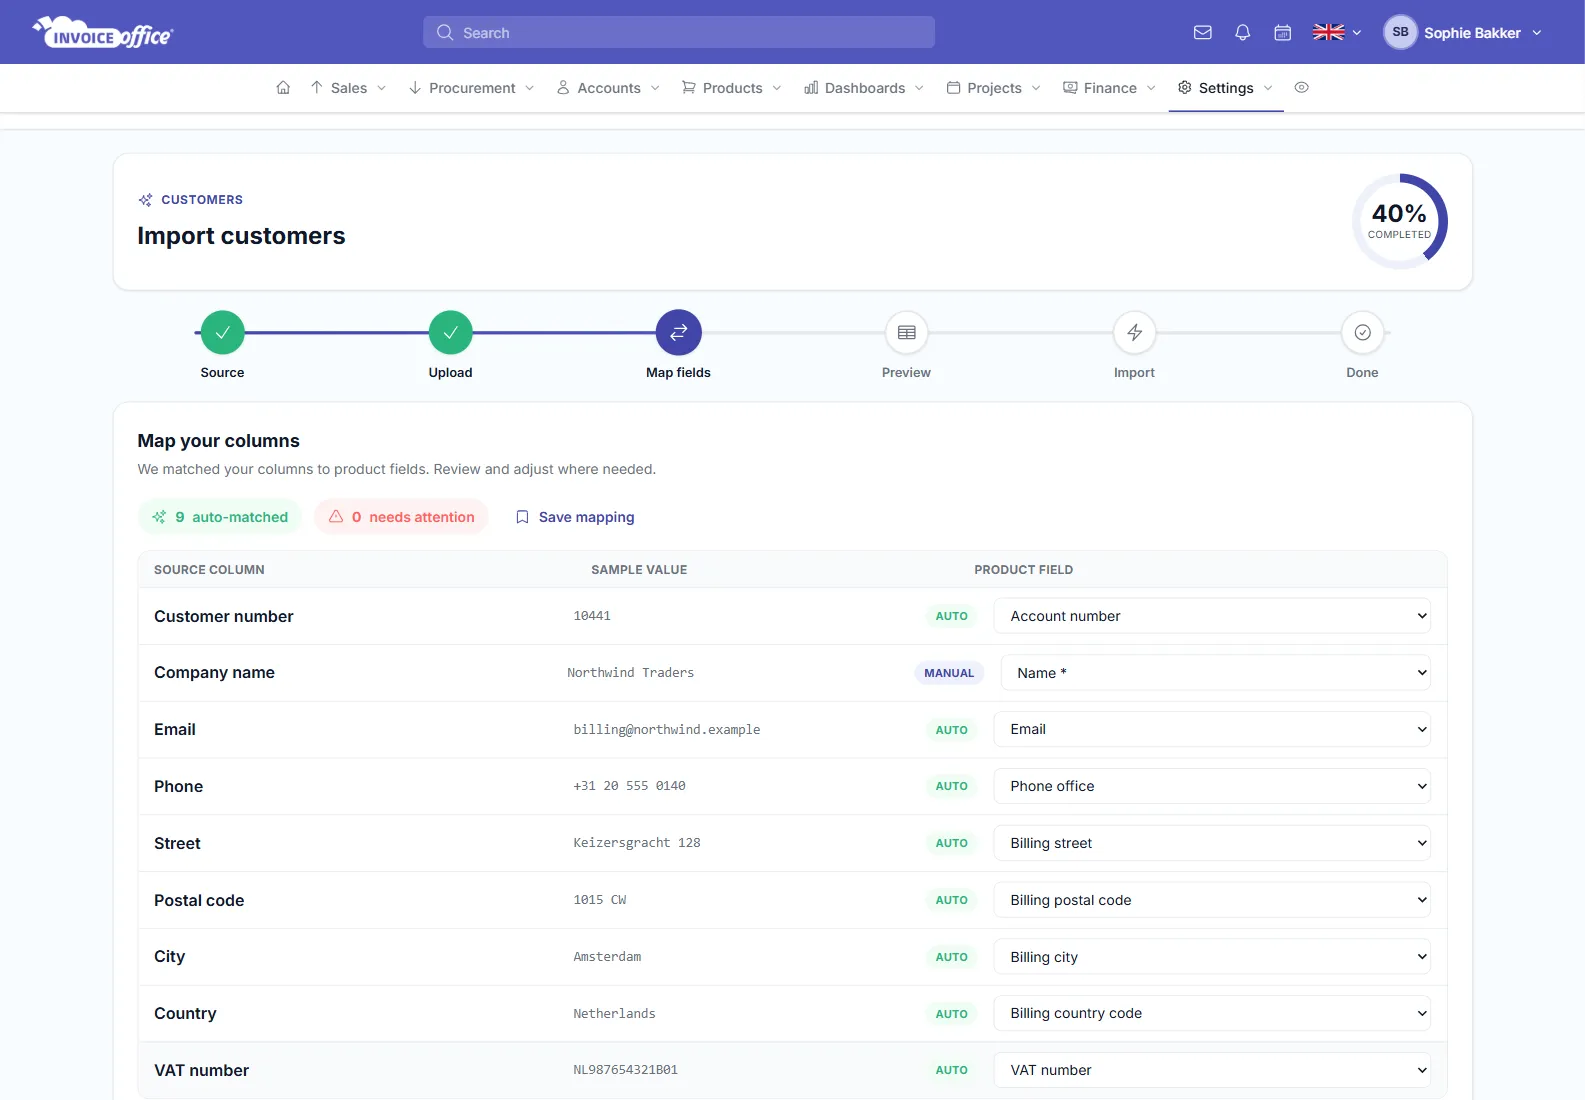
The wizard matches your columns to Invoice Office fields on its own and tells you how many were auto-matched and how many need attention. Each row shows your source column, a sample value from your file and the field it will be written to, so you can see at a glance that the data lands where you expect. Change any of them from the dropdown; required fields are marked with an asterisk and the wizard will not let you past until they are mapped.
Save mapping keeps this arrangement for the next import of the same file layout.
Step 5 — Preview and validate
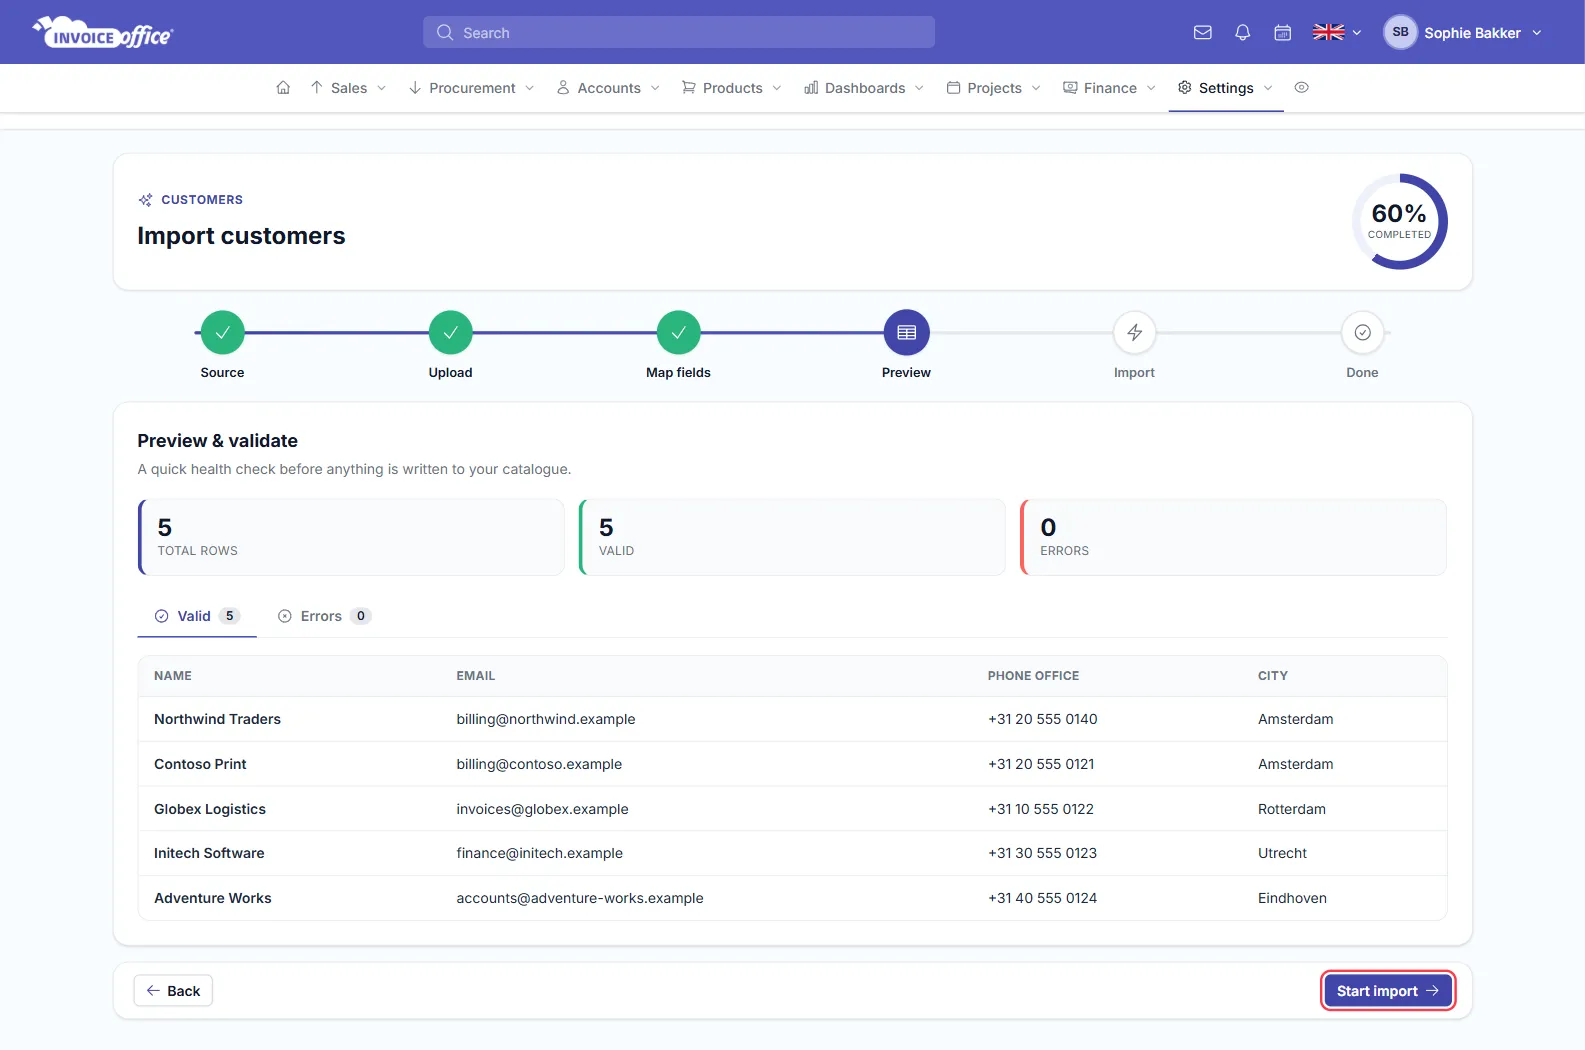
Before anything is written you get a health check: total rows, how many are valid and how many have errors, with the valid rows listed out. Fix the file and come back if the error count is not zero.
Step 6 — Import
Click Start import. The rows are written to your administration and the wizard finishes on Done, from where you can go straight to the customer overview and check the result.
Getting a clean import
- Bring your own layout. A column in an unexpected position is not a problem — Map fields reads your columns and lets you correct anything it matched wrongly.
- Check the formatting, not the order. Mapping solves the columns; it cannot tell that a decimal comma was meant to be a point, or that a date is in another order.
- Act on the errors count. Preview separates valid rows from errors before anything is written, so fix the file and come back rather than importing and unpicking.
- Save the mapping. If the same export arrives every month, Save mapping means the next file of that shape maps itself.