To manage supplier contacts and addresses in Invoice Office, open the supplier and use its Contact persons and Addresses pages. This supplier profile holds the people you deal with and the supplier’s locations: any number of contacts, one billing address and any number of shipping addresses. On a purchase order, you then choose which contact and delivery address to use.
This guide covers supplier contact management, adding vendor addresses, what fills in on a purchase order, and how to set where your purchase orders are emailed. New supplier? Start with add a new supplier.
Step 1 — Open the supplier
- Go to Accounts → Suppliers.
- Click the ⋮ (Action) button at the end of the supplier’s row.
- Choose Contact persons or Addresses.
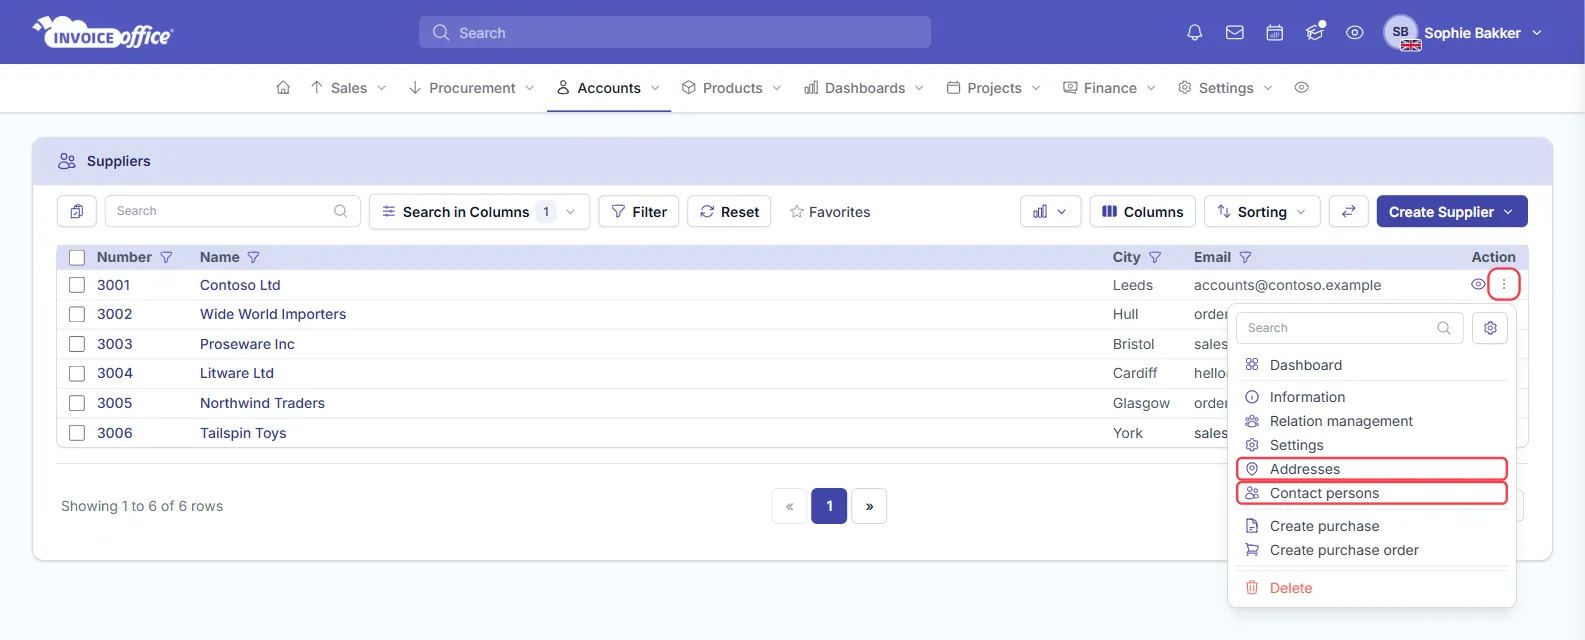
Both pages are also in the supplier’s menu on the left. A private supplier has no Contact persons page.
Step 2 — Add a contact person
-
On the Contact persons page, click Create Contact. If the supplier already has contacts, choose Create Contact in the menu that opens.
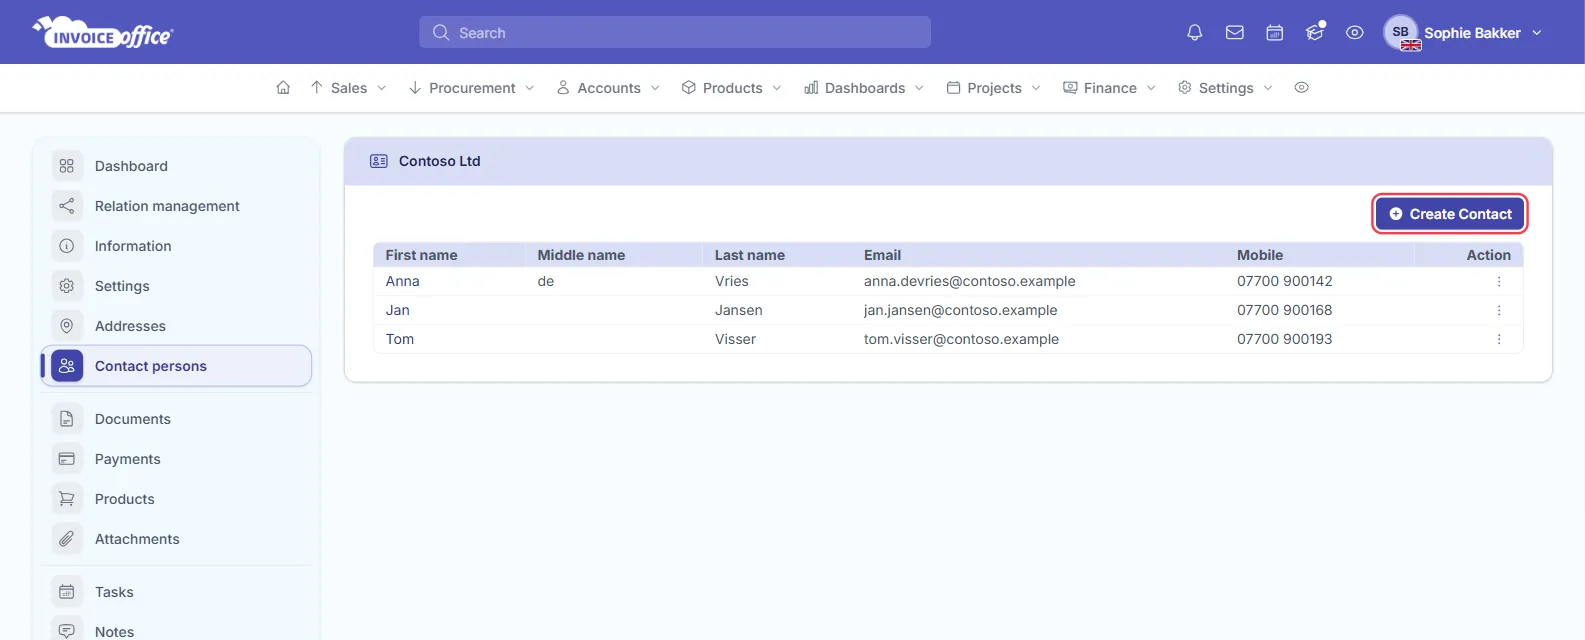
-
Fill in the name, Email and phone numbers. The form also has Salutation, Title and Description.
-
Click Create, or Save if the form opened in a window.
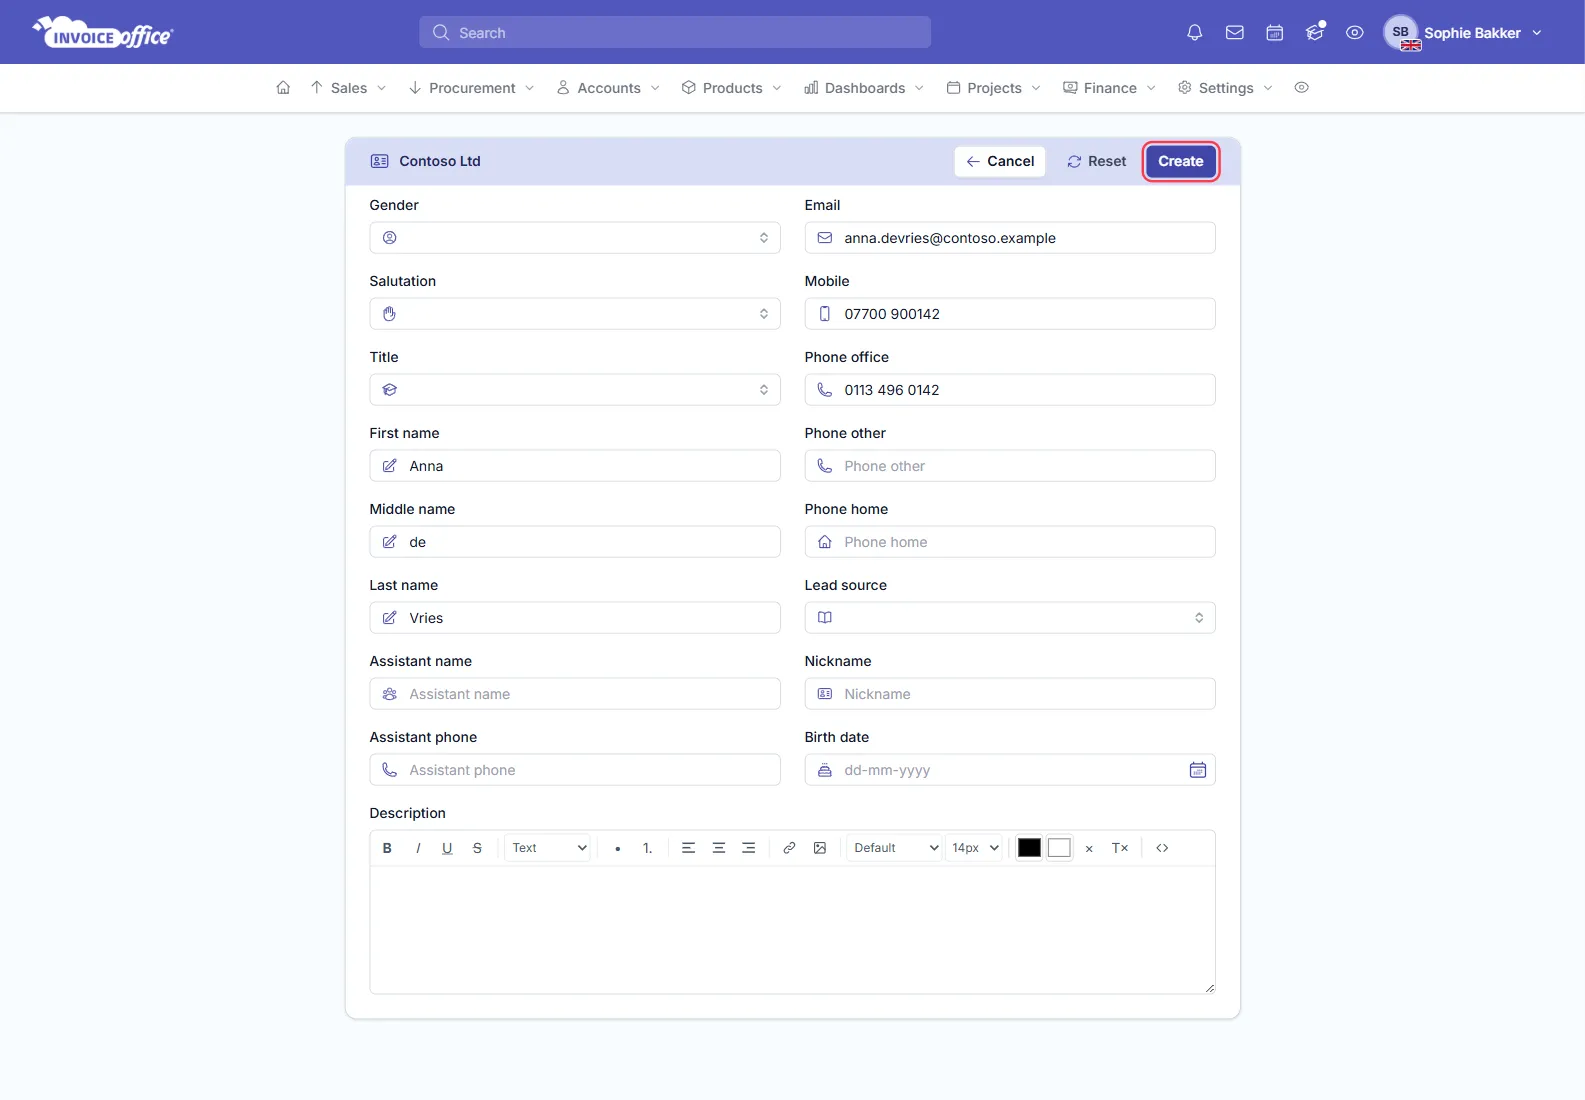
Add as many contacts as you need. To change or remove one, click the ⋮ (Action) button in the contact’s row and choose Open or Delete.
Have a lot of contacts? See import and export supplier data.
Step 3 — Choose the contact on a purchase order
There is no default contact for a supplier. You can’t mark one contact as the main one. When you select the supplier on a purchase order, Invoice Office fills in one of the supplier’s contacts, so with several contacts it may not be the person you want. Check it every time:
- Click Contact person on the purchase order.
- Choose the contact from the list, or click Create Contact to add a new one.
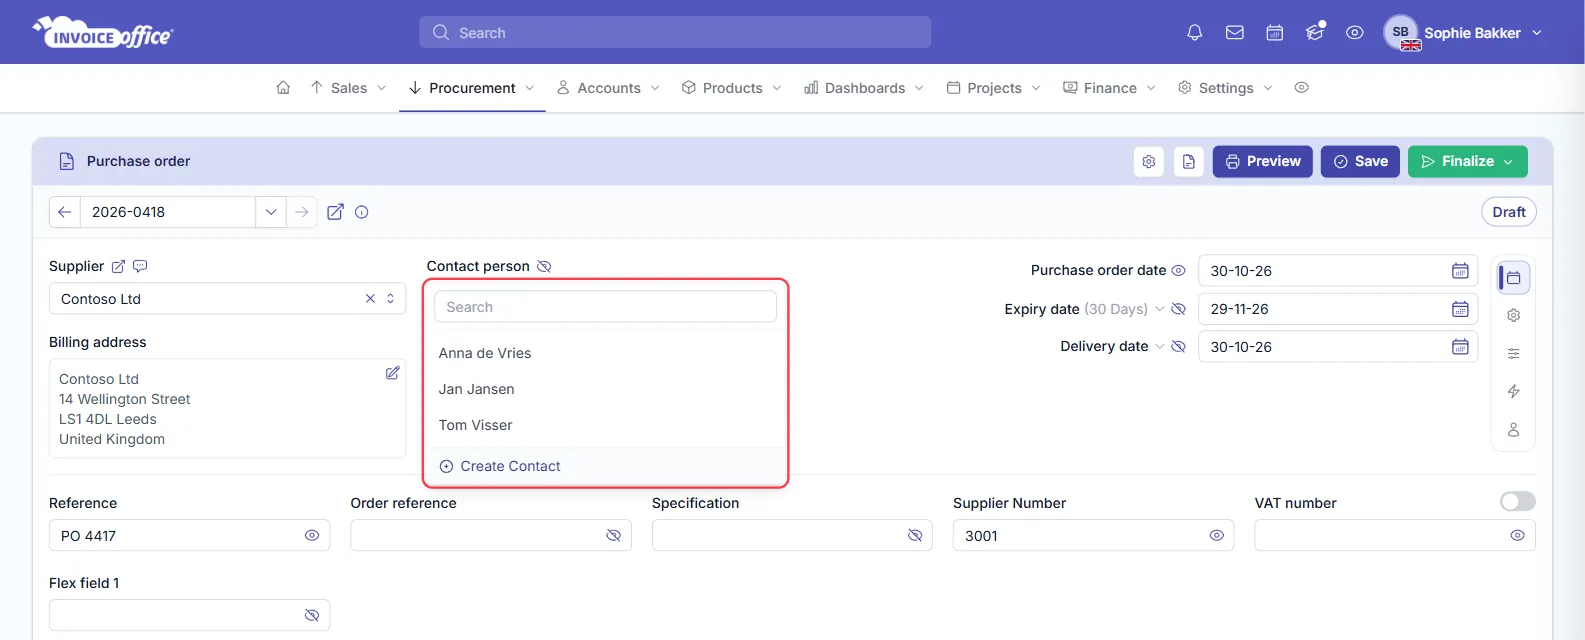
The eye icon beside Contact person decides whether the contact is printed on the document.
Step 4 — Set where purchase orders are emailed
You can set one fixed address for the purchase orders you email to a supplier, such as a shared purchasing inbox.
- Open the supplier’s ⋮ (Action) menu and choose Settings.
- Open E-mail address and name per document.
- Fill in Default send to e-mail address and Default send to name.
- Click Save.
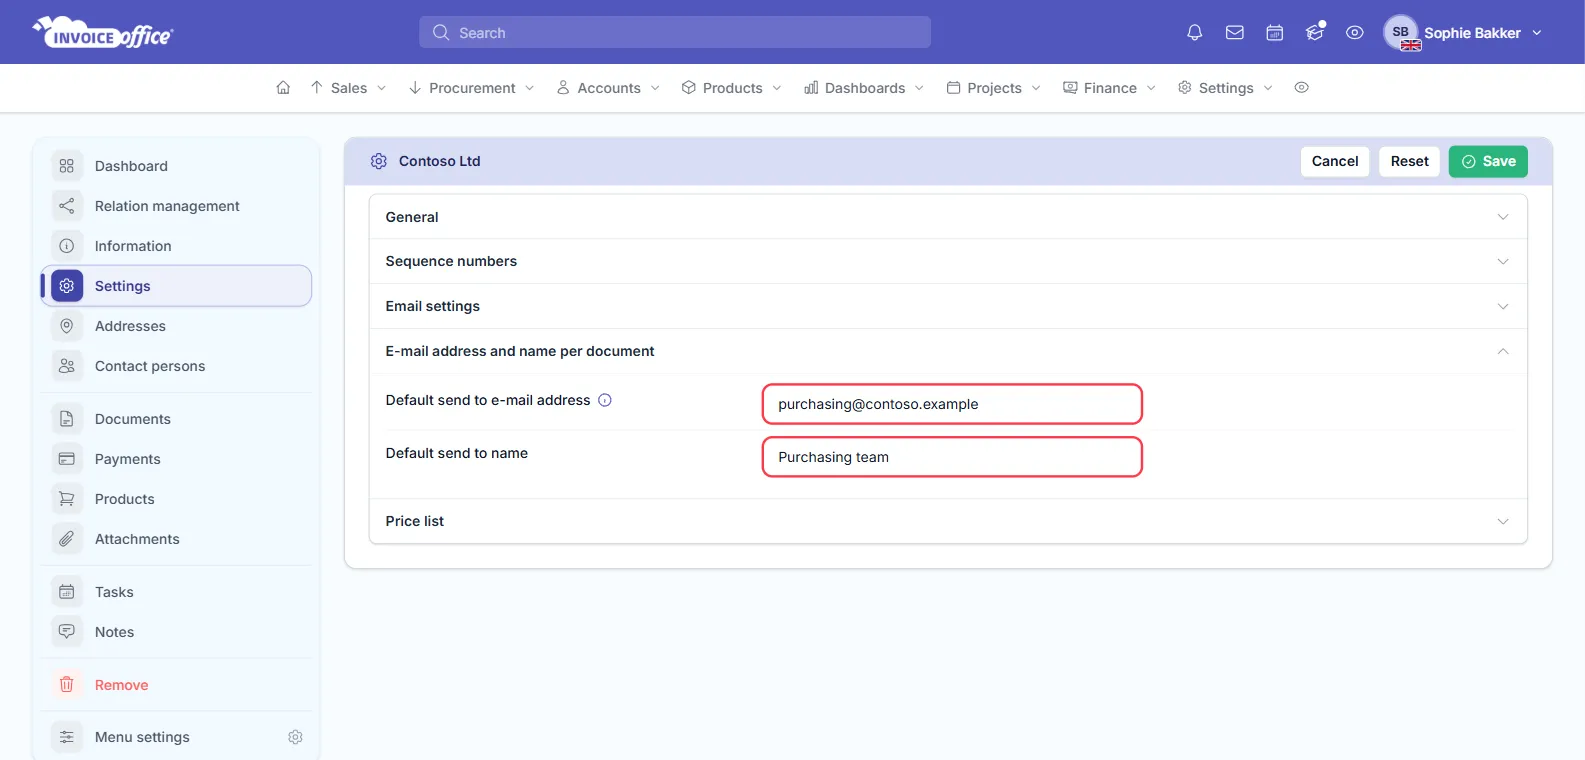
When you email a purchase order, the To field starts with this address. If it is empty, Invoice Office uses the email of the contact on the purchase order, and then the supplier’s own email address. So with this setting filled in, the email goes to that address, whichever contact you chose on the purchase order. On a paid plan, you can still change the To field before you send.
Step 5 — Add the billing address
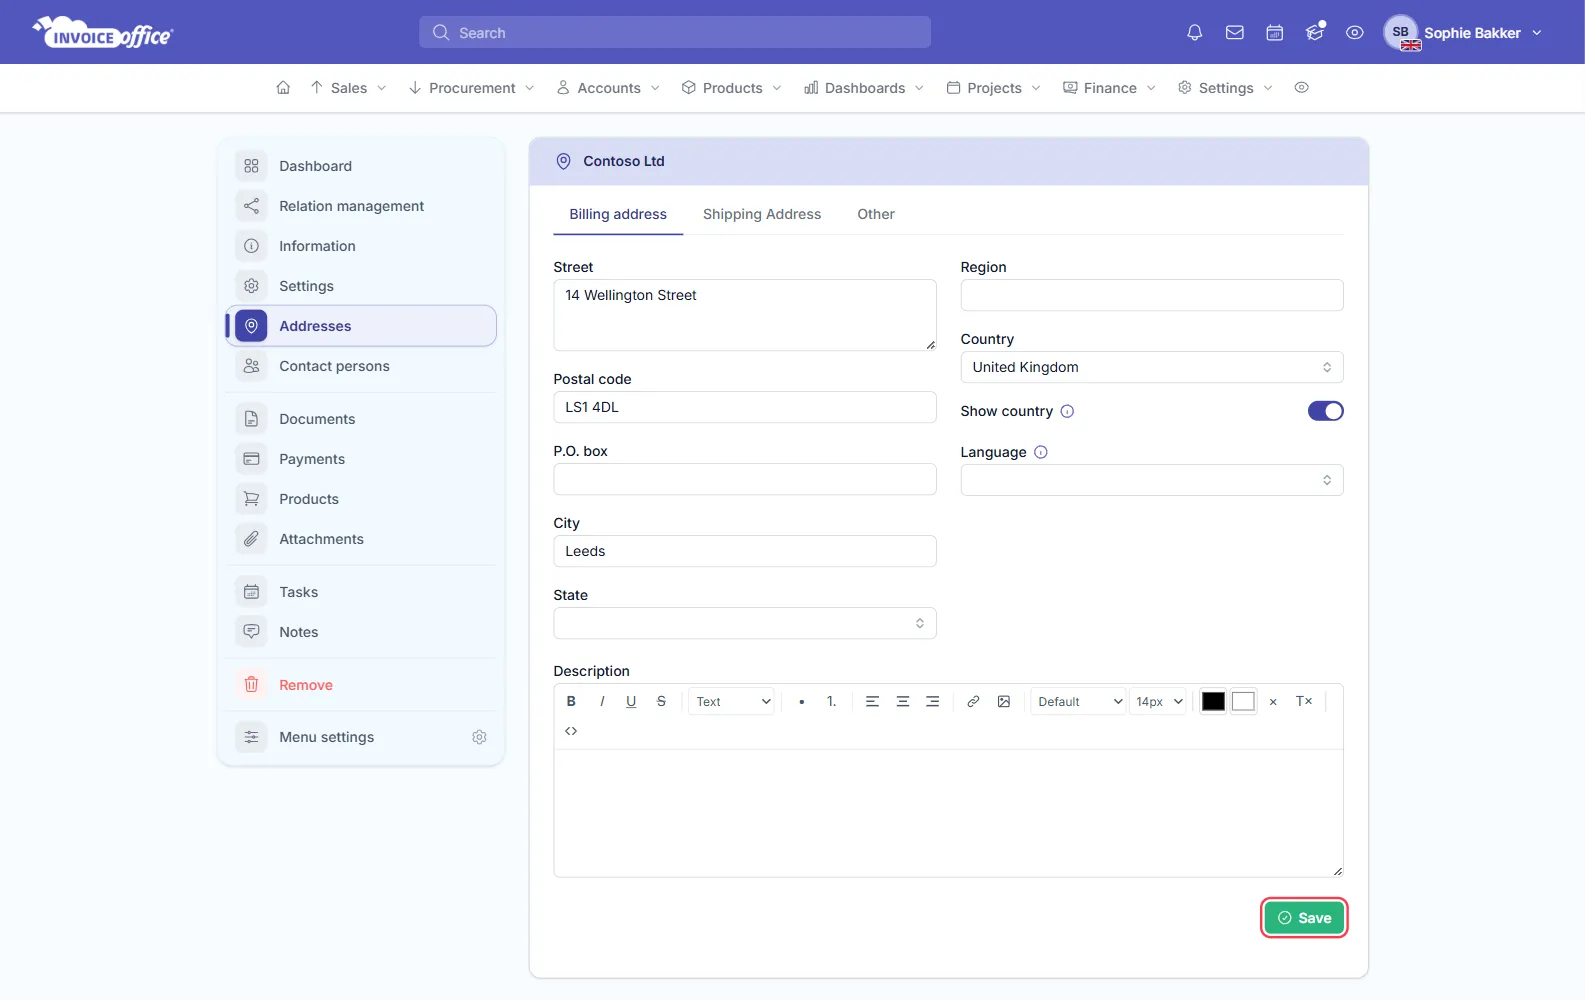
A supplier has one billing address. You can’t add a second one, so change this address if the supplier moves.
- Open the supplier’s Addresses page. The Billing address tab is first.
- Fill in Street, Postal code and City, and choose the Country.
- Switch on Show country to print the country in the address.
- Click Save.
Step 6 — Add shipping addresses
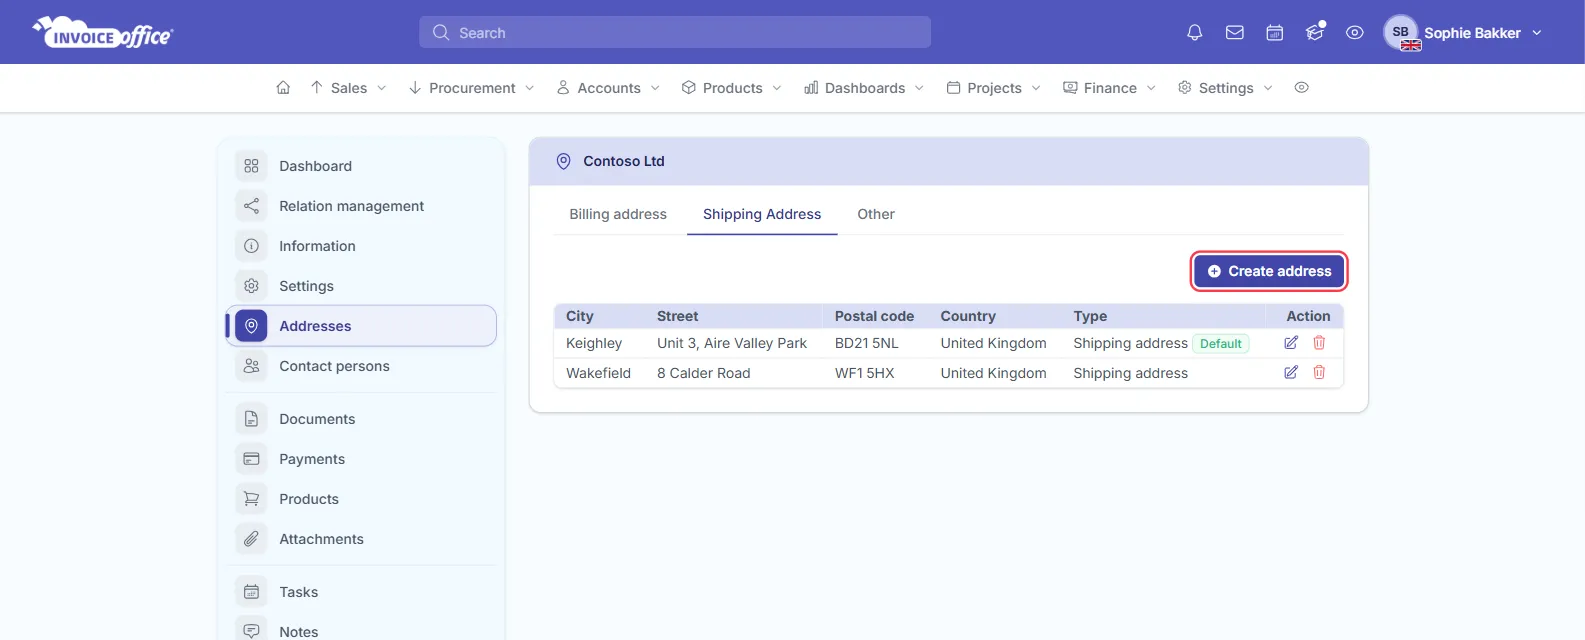
A supplier can have as many shipping addresses as you need, such as a warehouse or a second branch.
-
Open the Shipping Address tab and click Create address.
-
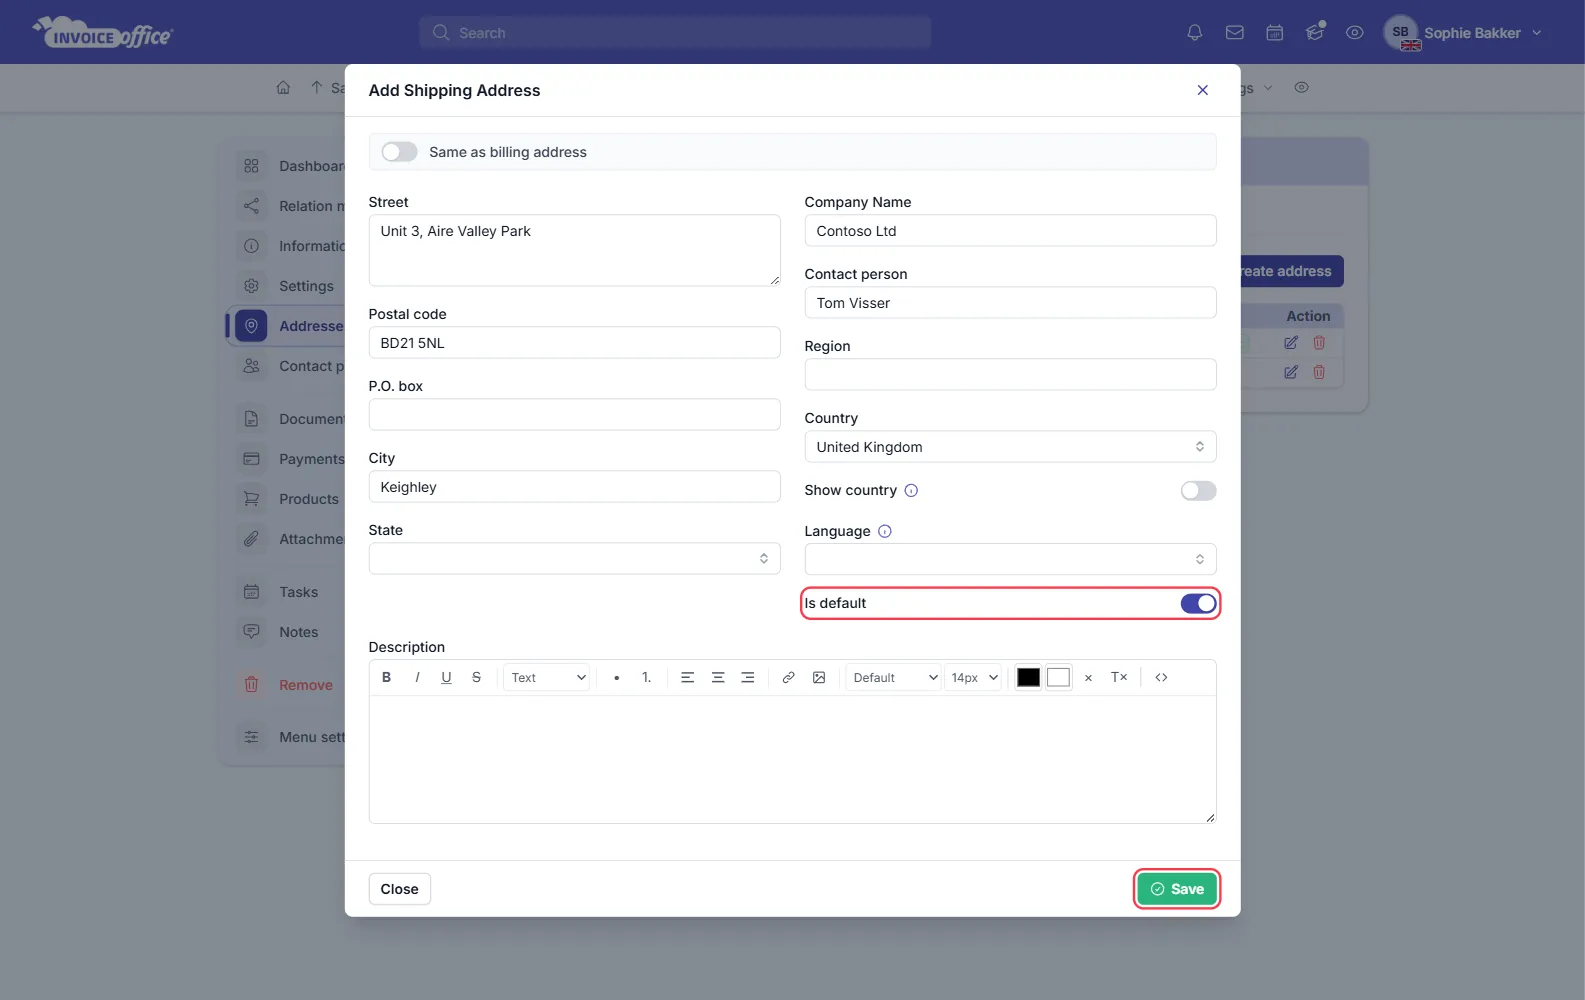
In Add Shipping Address, fill in the address yourself: Same as billing address doesn’t copy it. Add a Company Name and Contact person if they differ from the supplier’s.
-
Switch on Is default to give the address a Default label in the list.
-
Click Save.
To change or delete a shipping address, use the pencil or bin icon in its row.
The Other tab lists further addresses, each with an Address type: Contact address, Mailing address, Marketing address or Other address.
Step 7 — Choose the delivery address on a purchase order
When you select the supplier on a purchase order, the Billing address is filled in, and so is a Delivery address if the supplier has a shipping address. Is default doesn’t decide which one is used, so check it when a supplier has several:
- Click the arrow beside Delivery address.
- Choose an address from the list.
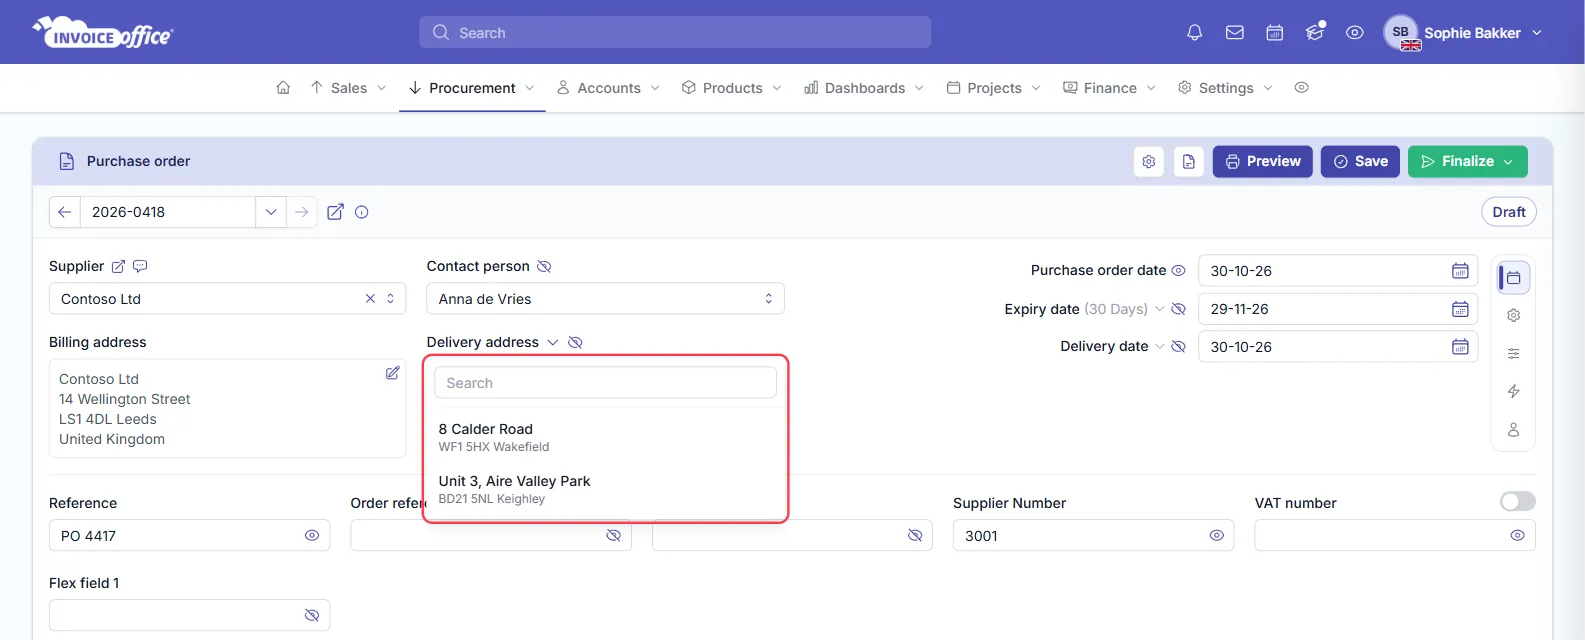
The list shows the supplier’s shipping addresses, not your own locations. The eye icon beside Delivery address decides whether it is printed on the document.
Any doubts? Contact us and we will help.