When you assign ledger accounts to your products and tax codes in Invoice Office, every invoice line is booked to the right revenue account and the VAT on it to the right VAT account, automatically. You set the accounts once: on the product for revenue, costs and stock, and on the VAT code for the VAT. This guide shows where to set them, which account wins when a customer has its own, and how to check the postings of a finalized invoice.
The accounts you can choose come from your chart of accounts. Add any account you’re missing there first.
Set the ledger accounts on a product
- Go to Products and open the product.
- Open the Settings tab.
- Under Ledger accounts, choose:
- Profit account: the revenue account the product’s sales are booked to. Only revenue accounts are offered.
- Cost account: the account its purchases are booked to.
- COGS ledger account: the cost of goods sold account. It lists your accounts of type cost of goods sold, so it stays empty if your chart has none.
- Stock account: the account its stock value is booked to.
- Click Save.
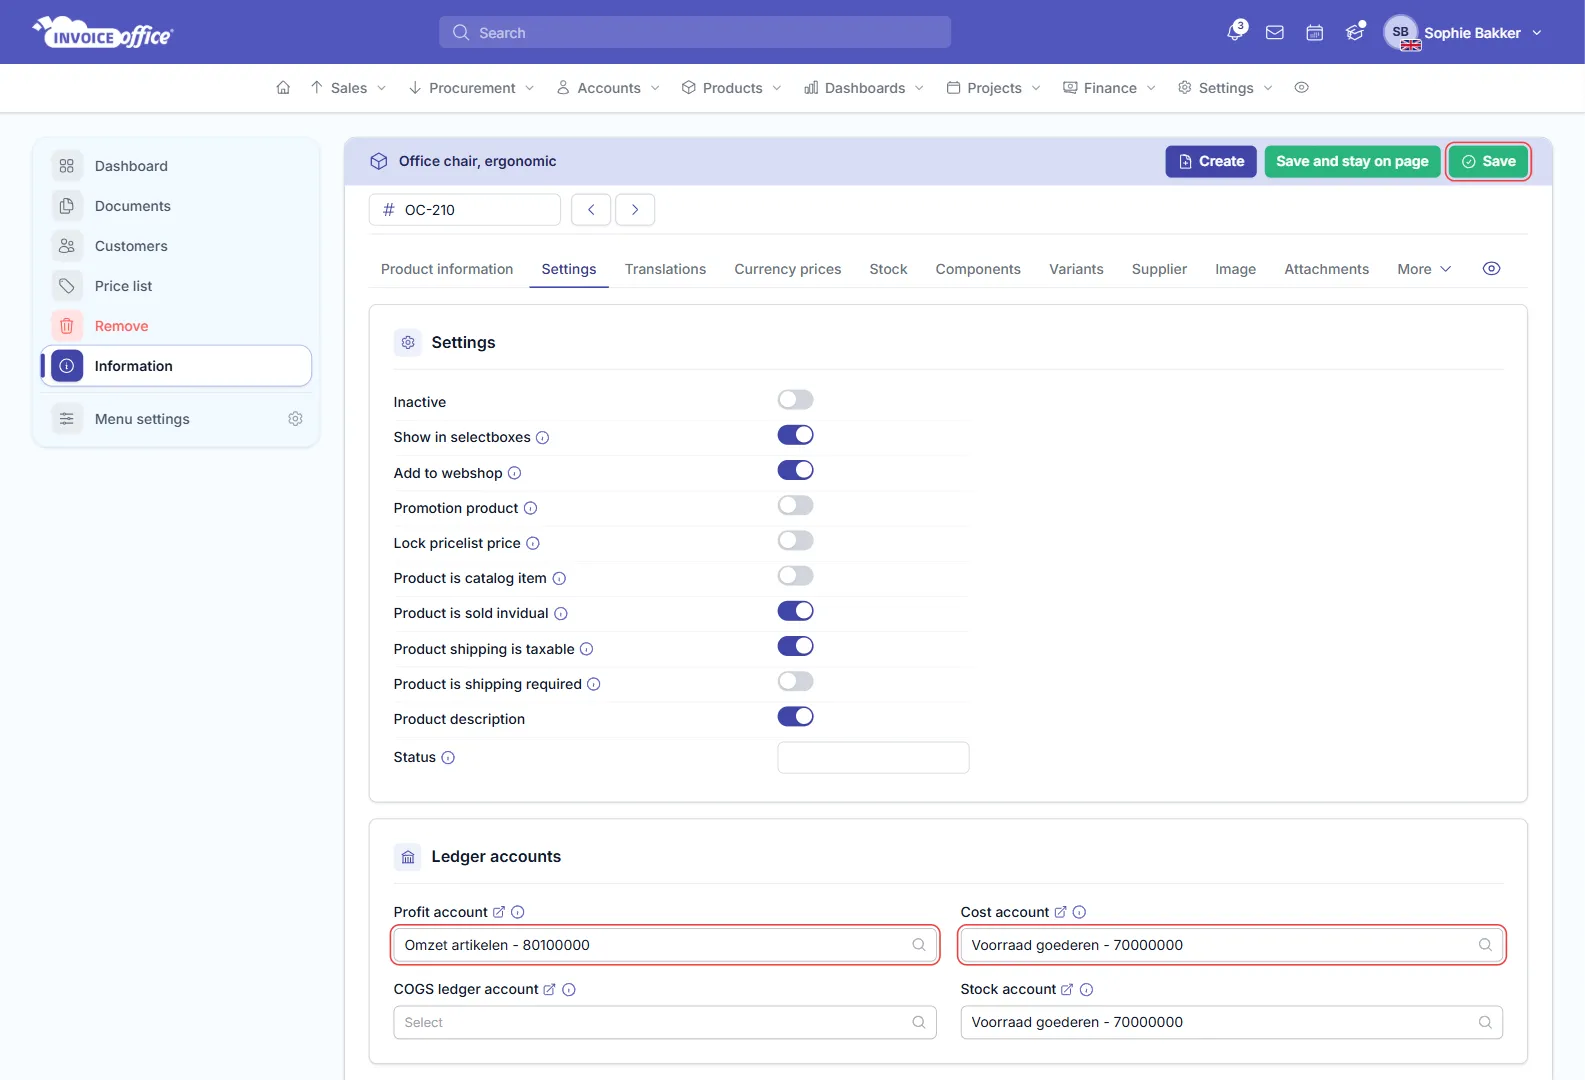
When you add the product to an invoice, its Profit account is filled in on the line. On a purchase, the line gets the product’s Cost account.
Which account an invoice line gets
Each invoice line has its own ledger account. When you pick a product, Invoice Office fills it in this order:
- The customer’s Profit account, if the customer has one.
- Otherwise, the product’s Profit account.
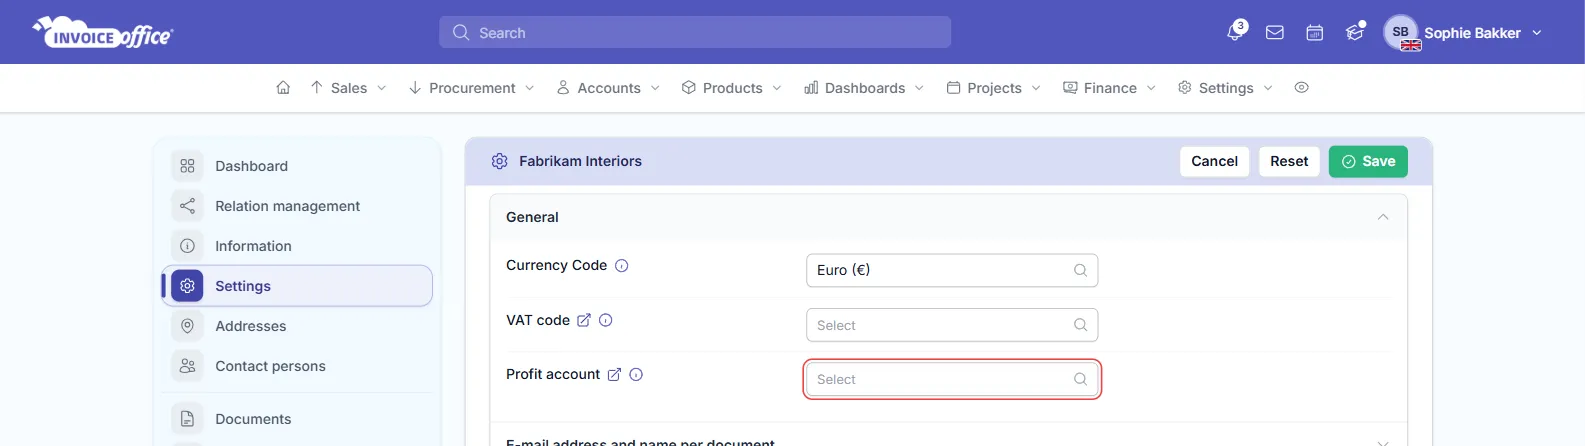
So a Profit account on the customer overrides the product’s for every line on that customer’s invoices. Leave it empty if your products should decide. You’ll find it under the customer’s Settings → General.
You can still change the account on a single line. Click the tag icon on the line, or use the ledger account column if you show it, and pick another account.
The account is saved on the line when you add the product. Changing the product’s Profit account later only affects new lines, not invoices you’ve already made.
Assign a ledger account to a VAT code
- Go to Settings → VAT codes and open the VAT code.
- Choose the ledger account the VAT is booked to:
- Account vat to pay: for sales VAT codes (shown when VAT type is Sales or Both).
- Account vat to claim: for purchase VAT codes (shown when VAT type is Procurement or Both).
- Click Modify.
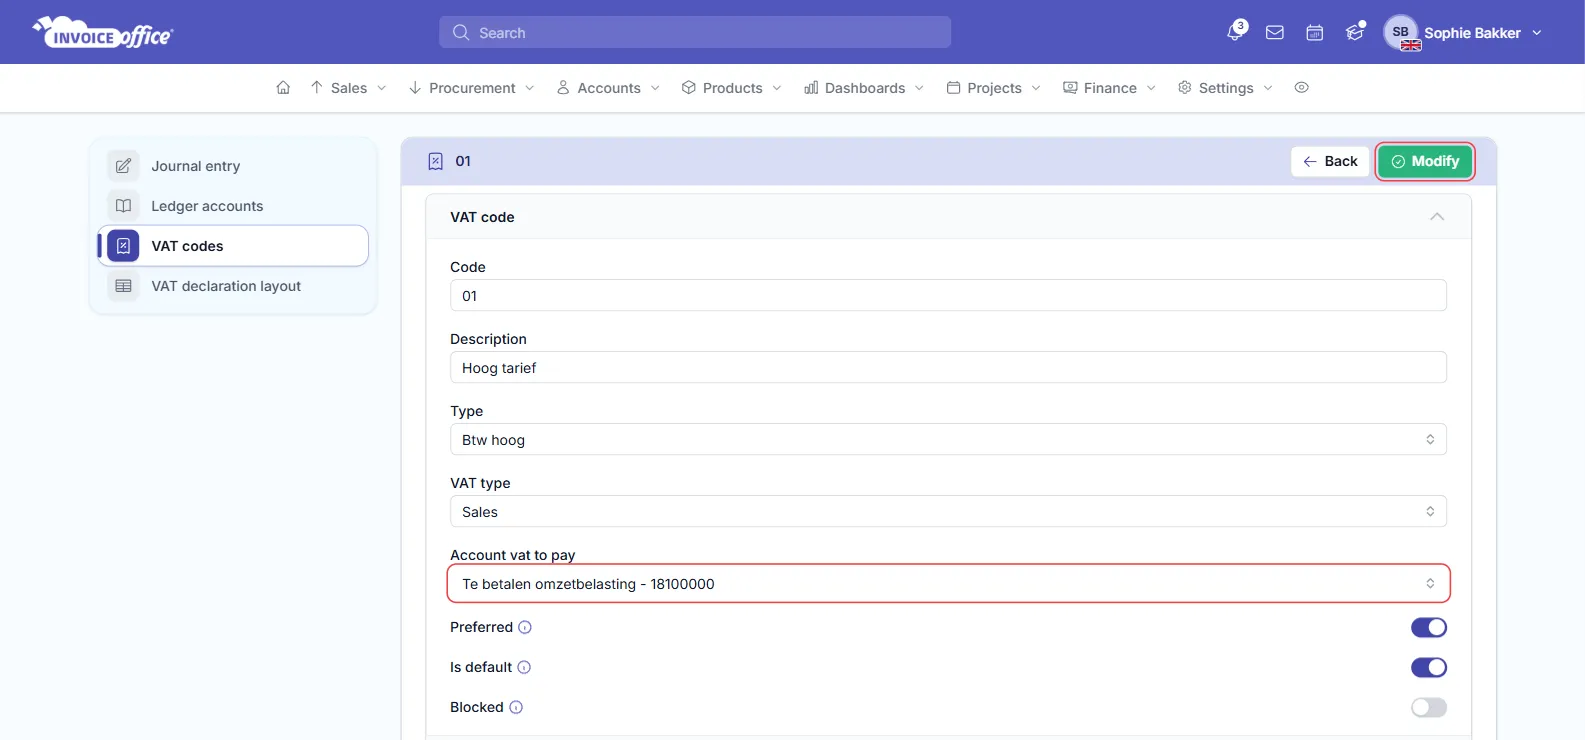
The VAT on every invoice line with this VAT code is then booked to that account, separately from the revenue. For more on the other fields, see how to create a VAT code.
Check the postings of an invoice
Postings are made when you finalize an invoice. A concept invoice has none yet.
- Open the finalized invoice.
- In its Action menu, choose Journal data.
The page lists every line booked for the invoice, with its Date, Ledger account, Ledger account code, Document, Document number, Account, Debit and Credit. Check that the revenue lands on the product’s (or customer’s) Profit account and the VAT on the VAT code’s account. You can filter the list by Document and Ledger account, and export it with Export.
Booked something to the wrong account? Fix the product, customer or VAT code first, so new invoices are right. For an invoice that’s already finalized, a memorial journal entry moves the amount to the right account.