When a customer pays several invoices in one transfer, you can allocate that bank transaction to multiple invoices in Invoice Office. You link the payment to each open invoice, split the amount over them, and Invoice Office registers a separate payment on every invoice. This guide shows how to open the transaction during your bank reconciliation, divide the amount across invoices (even of different customers), and confirm the allocation so each invoice is marked as paid.
It starts from a transaction on Bank transactions, so import your bank statement first. See how to import and reconcile bank statements.
Open the transaction
- Go to Finance → Bank transactions.
- Click Unprocessed to see only the transactions that aren’t linked to a document or booking yet.
- On the transaction card, click Register payment.
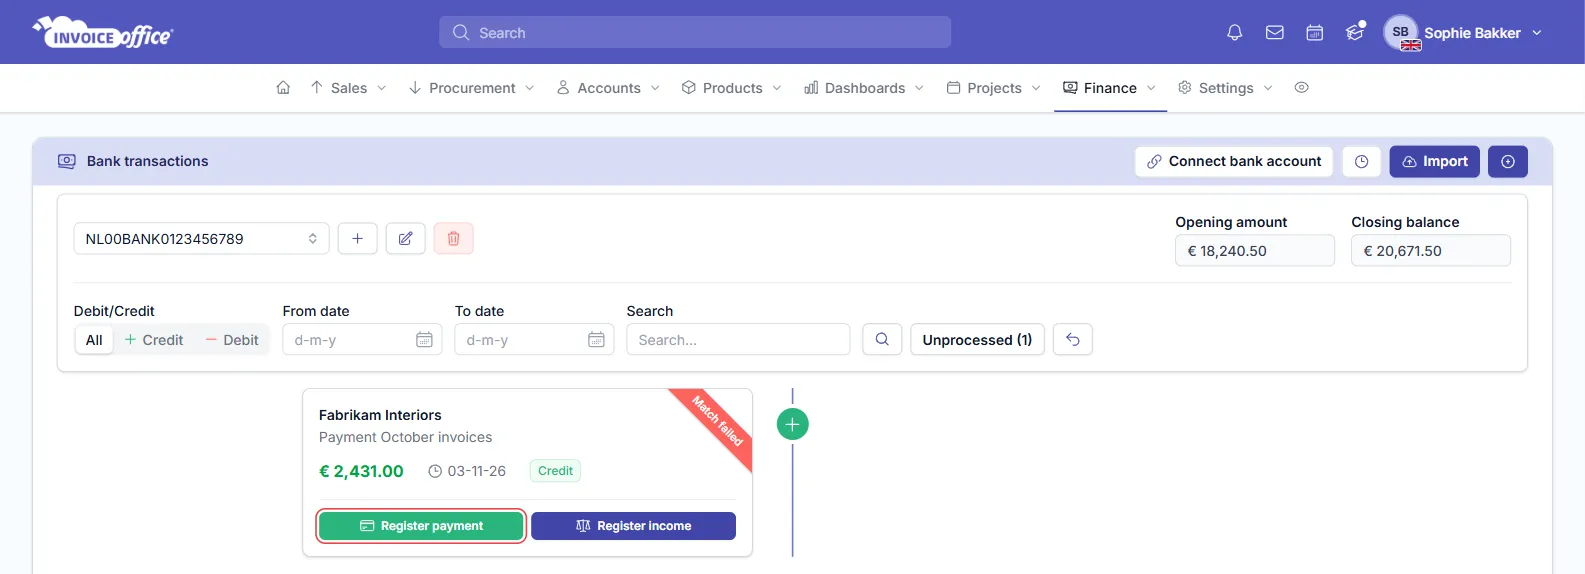
A transfer that covers several invoices usually shows Match failed or Suggested match: automatic matching only links a transaction whose amount equals one invoice’s total.
Split the amount across the invoices
The Register payment window opens on the Payment tab, with the transaction’s date, contra account and description at the top. Amount payment is the transaction amount.
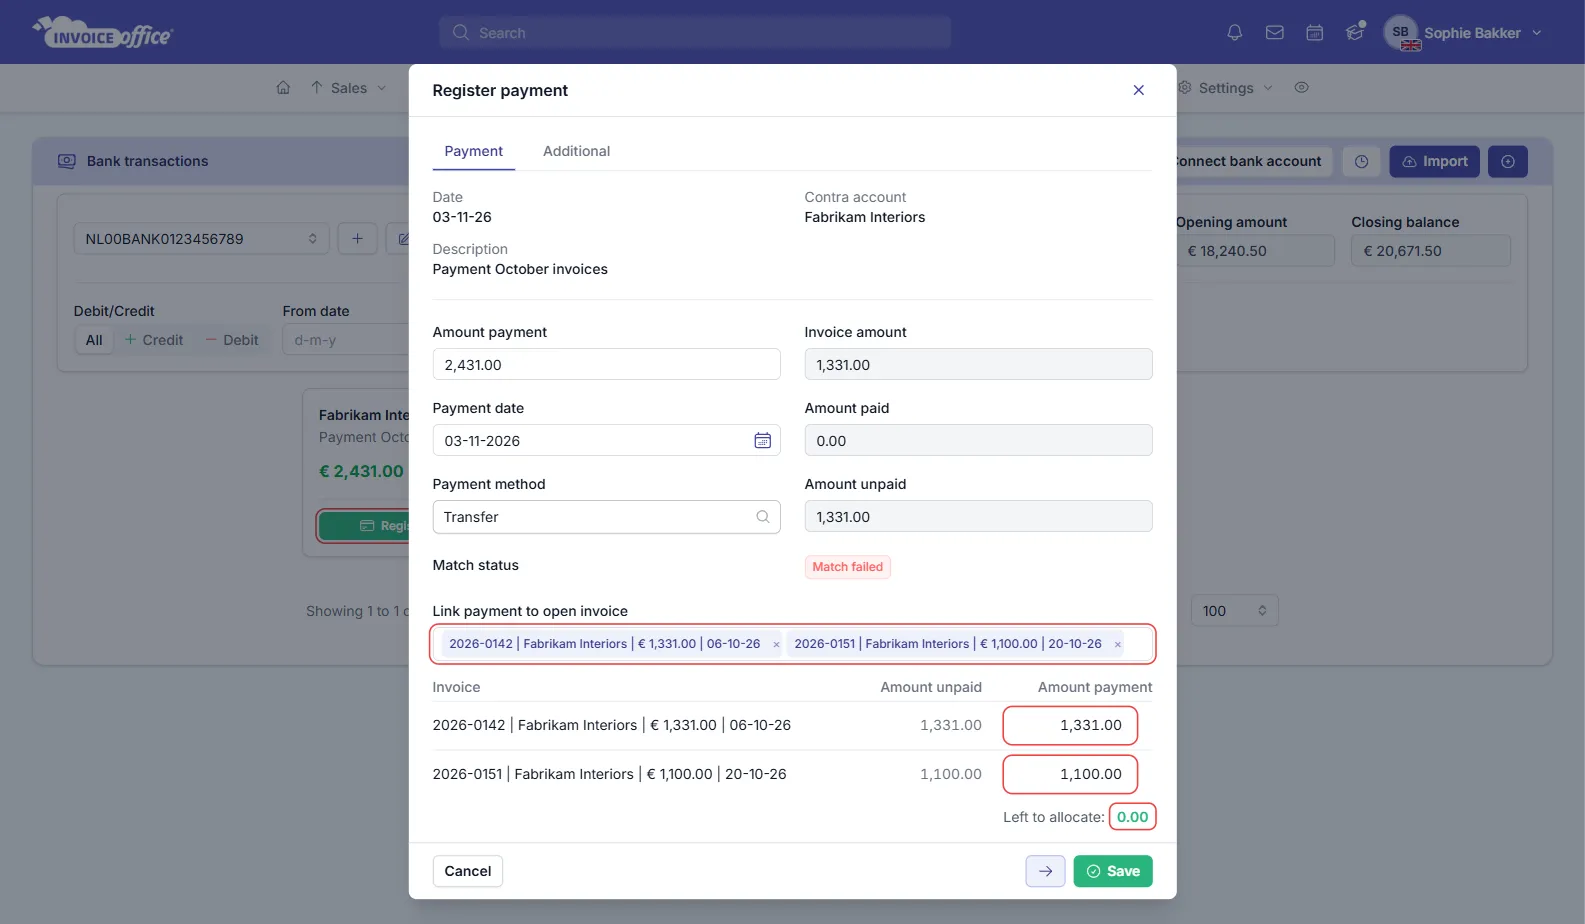
- Under Link payment to open invoice, select every invoice the transfer pays. The list shows each open invoice with its number, customer, amount and date, and you can type to search it. It holds the open invoices of all your customers, so one transfer can also cover invoices of different customers, for example when a parent company pays for its subsidiaries.
- For each invoice you select, a row appears with its Amount unpaid and an Amount payment. Invoice Office fills the amounts in for you, in the order you selected the invoices: each invoice gets its full unpaid amount until the payment runs out.
- Change an Amount payment if the customer divided the money differently, for example when they paid one invoice in full and another only in part.
- Check Left to allocate. It must be 0.00: the amounts on the invoices have to add up to the transaction amount exactly. Anything else shows in red, and Save stays disabled until it’s 0.00.
Invoice amount, Amount paid and Amount unpaid on the right show the figures of the first invoice you selected.
If you change Amount payment at the top, Invoice Office divides the new amount over the invoices again, in the same order.
Small differences and payment notifications
The Additional tab has two options for the whole allocation:
- Write off payment difference: pick a cost ledger account to book a small over- or under-payment to. The invoice is then closed as Paid instead of staying partly open. Leave it on None to keep the difference open on the invoice.
- Send notification: when you switch it on, choose an Email template. Each customer then gets an email that their payment was received.
Confirm the allocation
Click Save. Invoice Office registers one payment per invoice, each with the amount you allocated to it:
- An invoice that’s now paid in full gets the status Paid.
- An invoice that’s paid in part gets Paid too less, and stays open for the rest.
- The transaction is marked Manually matched and drops out of Unprocessed.
Each payment shows on its invoice like any other payment, so you can check or remove it there. See how to register a payment.
The arrow button next to Save moves on to the next transaction without saving, which is handy when you’re working through a whole statement.
Payments to suppliers
A transfer to a supplier that pays several purchases works the same way. Use Register payment on the outgoing (debit) transaction, select the purchases, and make sure Left to allocate is 0.00 before you save.