This Microsoft 365 SMTP setup lets Invoice Office send your invoices, quotes and payment reminders
through your own Microsoft 365 (Office 365 / Outlook) mailbox, so they go out from your own address, such as
accounts@yourcompany.com. You use Microsoft 365 as your own email server: switch on
Authenticated SMTP for the mailbox, enter Microsoft’s SMTP settings in Invoice Office, use an app
password if the account has multi-factor authentication (MFA), and send a test email.
Before you start: SMTP or Connect?
Invoice Office has two ways to send through Microsoft 365:
- Outlook / Office 365 provider (recommended). You sign in to Microsoft once and click Connect. You don’t need SMTP settings or an app password. See Configure Outlook / Office 365 for email.
- Custom provider with SMTP (this article). Invoice Office logs in to
smtp.office365.comwith the mailbox’s username and password.
Microsoft is retiring password-based SMTP (Basic authentication for SMTP AUTH). According to Microsoft’s updated timeline, it is disabled by default for existing tenants at the end of December 2026, though administrators can still turn it back on. It is not available by default in tenants created after that date. A final removal date is due in the second half of 2027. If you are setting this up now, the Connect option above is the one that will keep working.
You also need:
- The Modify right on Setting, so you can open the Email server page.
- A paid licence (Basic or higher). Without one, the Email server page is locked.
- A Microsoft 365 administrator for Step 1, unless you are the admin yourself.
Step 1: Enable Authenticated SMTP for the mailbox
Microsoft 365 turns SMTP sign-in off by default, so a Microsoft 365 admin has to switch it on for the mailbox you will send from. These steps come from Microsoft’s guide to SMTP AUTH:
- Open the Microsoft 365 admin center and go to Users → Active users.
- Select the user and, in the panel that opens, select Mail.
- Under Email apps, select Manage email apps.
- Tick Authenticated SMTP and select Save changes.
Two organisation-wide settings can still block this mailbox setting:
- Security defaults. If security defaults are on in Microsoft Entra ID, SMTP AUTH is off and the mailbox setting has no effect.
- Authentication policy. If an authentication policy blocks Basic authentication for SMTP, sign-in fails even with Authenticated SMTP ticked.
Both are tenant decisions for your IT admin, so check with them before you change either one.
Step 2: Enter the Microsoft 365 SMTP settings in Invoice Office
- Go to Settings → Email server (in the Email group). In the menu on the left of the email settings pages, it sits directly below E-mail sender.
- Set Mail server provider to Custom. If another provider was selected, the page saves the change straight away and reloads to show the SMTP fields, so choose the provider first.
- Switch Enabled on.
- Fill in the SMTP fields:
| Field | Enter |
|---|---|
| Username | The full email address of the mailbox, e.g. accounts@yourcompany.com |
| Password | The mailbox password, or the app password from Step 3 if MFA is on |
| Transport | SMTP (filled in for you) |
| Host | smtp.office365.com |
| Port | 587 |
| Encryption | no encryption: Invoice Office then switches the connection to STARTTLS |
| Auth mode | login. Invoice Office uses the sign-in method Microsoft offers anyway |
- Click Save.
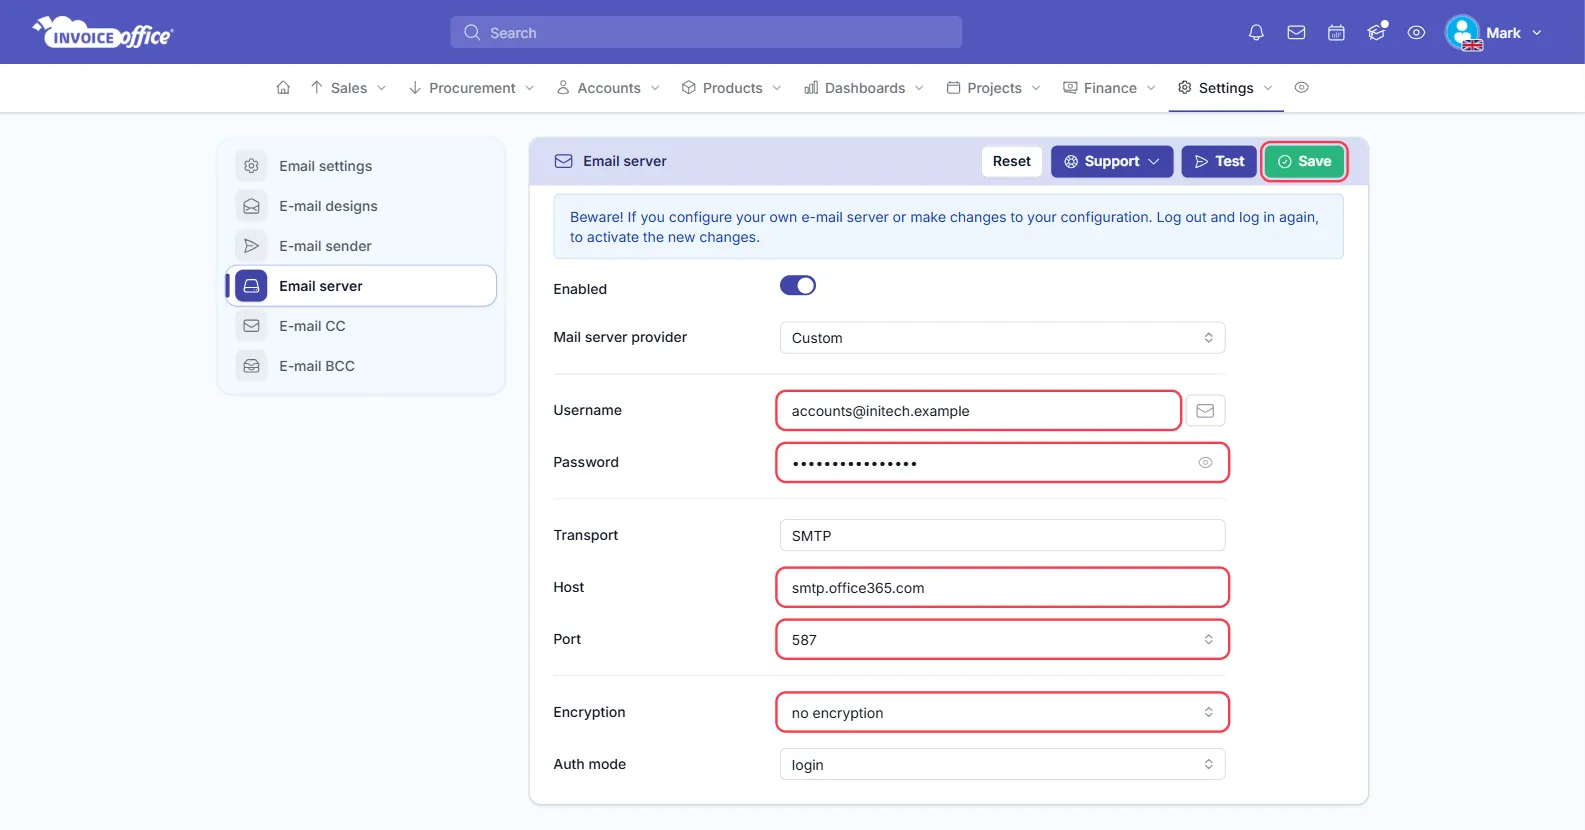
Why “no encryption” and not “tls”? Microsoft 365 expects STARTTLS on port 587: the connection
starts unencrypted and is upgraded to TLS before anything is sent. In Invoice Office, tls and
ssl both open an encrypted connection straight away, which smtp.office365.com does not accept on
port 587. With no encryption selected, Invoice Office connects and then switches to STARTTLS
because Microsoft offers it, so your login and your email still travel encrypted.
Step 3: Create an app password (only if MFA is on)
With multi-factor authentication on, Microsoft won’t accept the account’s normal password from an app such as Invoice Office. Instead, you create an app password and put it in the Password field.
- Sign in at mysignins.microsoft.com/security-info with the account you are sending from. This is the Security info page of your Microsoft account.
- Select Add sign-in method (on newer layouts, Add method) and choose App password.
- Give it a name you will recognise, such as
Invoice Office, and select Next. - Copy the password Microsoft shows. You only see it once.
- Back in Invoice Office, paste it into Password on the Email server page and click Save.
No App password option? App passwords only exist for accounts with MFA on, and a Microsoft 365 admin has to allow them for the whole tenant first. Microsoft’s article on app passwords for Microsoft Entra multifactor authentication explains where your IT admin switches them on. Microsoft also notes that app passwords don’t work for accounts that are required to use modern authentication. For those accounts, use the Outlook / Office 365 Connect option instead.
Step 4: Match your sender address
Microsoft 365 only sends from addresses the mailbox is allowed to use, and Invoice Office sends every email, the test email included, from your default sender. So set that up before you test. Under Settings → E-mail sender, the page itself warns that the address you add must be the same address as your own email server, or one that server supports:
- Switch on Use own e-mail address.
- Set From Email to the same address you entered as Username, and fill in Sender Name and Reply email.
- Mark it as Default and click Save.
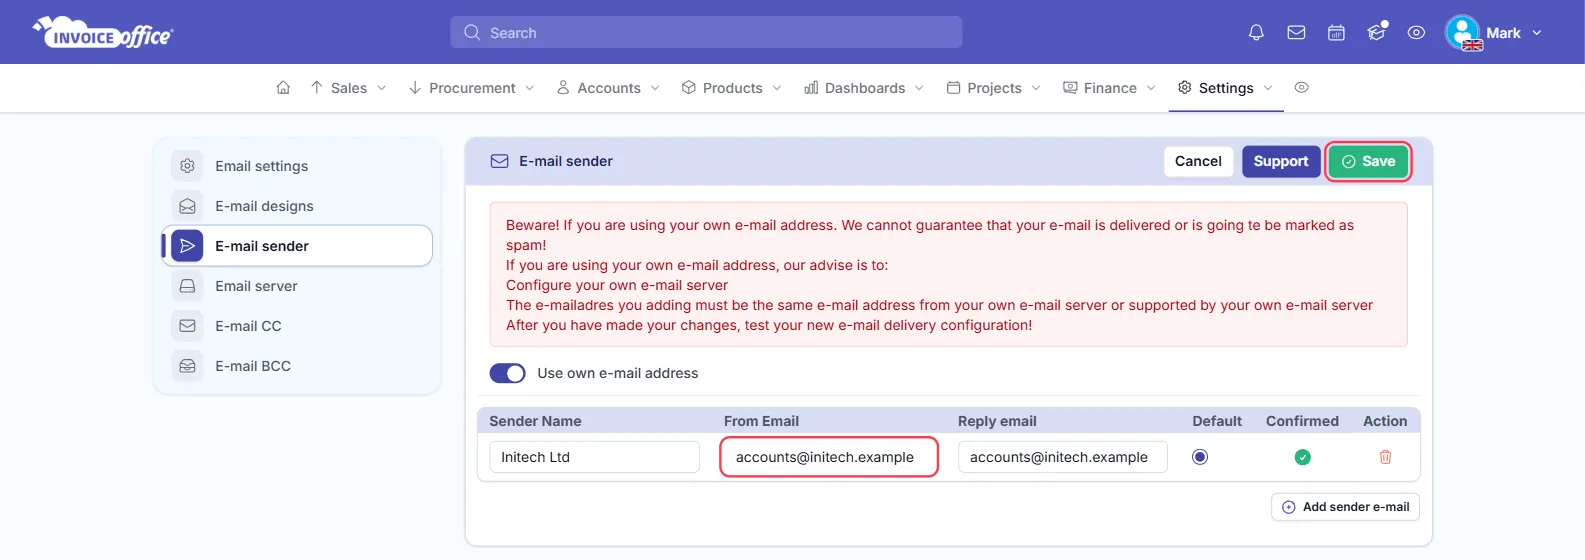
If you add a new sender with Add sender e-mail instead, Invoice Office emails that address a confirmation link. Confirm it before you rely on it, because only confirmed senders are used.
Step 5: Test the connection, then log in again
- Back on Settings → Email server, with your settings saved, click Test at the top of the page.
- The Test window opens. Send email to is filled in with your own address, and there is a Subject and a Message. Change the address if you like.
- Click Send.
- When the test works, log out and log back in, as the Email server page tells you to. Anyone else in your company who is already logged in should do the same, so their sessions pick up the new mail server settings.
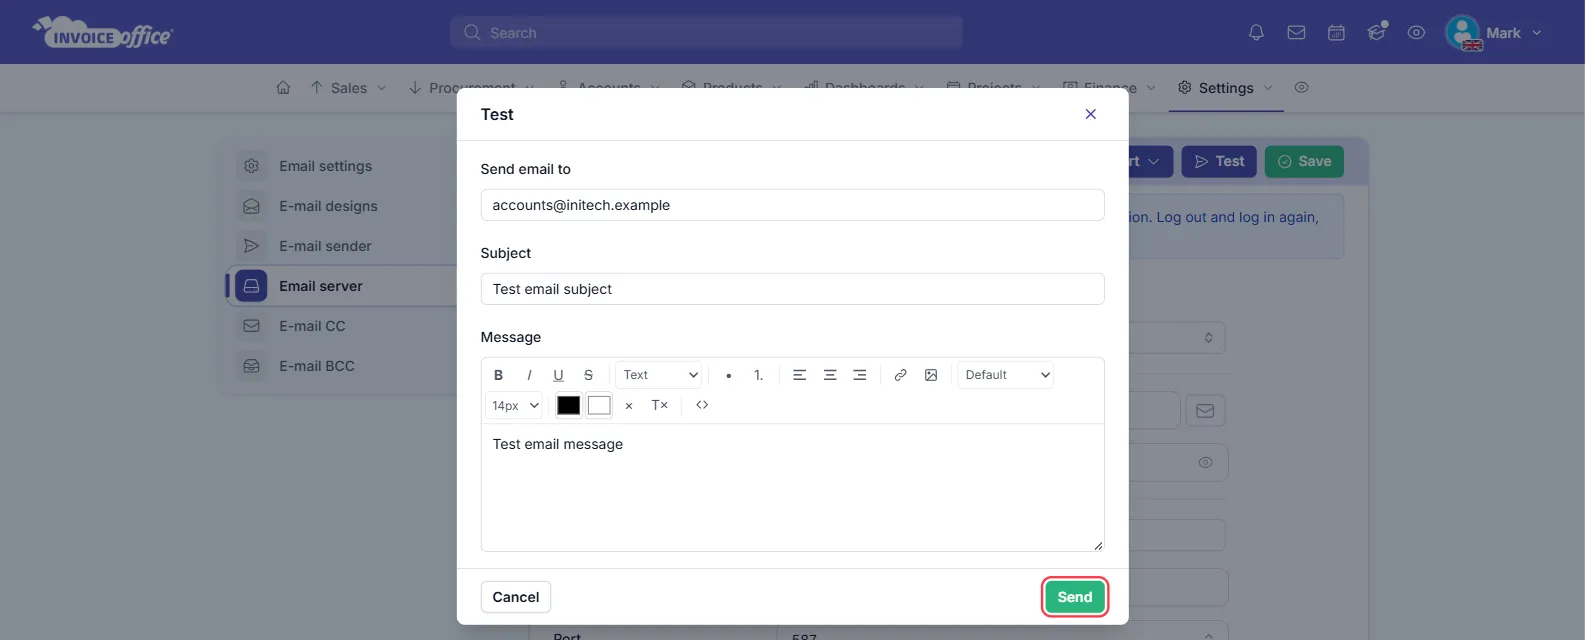
When the test works, the email arrives in that inbox. When it fails, the window closes and the error from Microsoft’s server appears at the top of the Email server page:
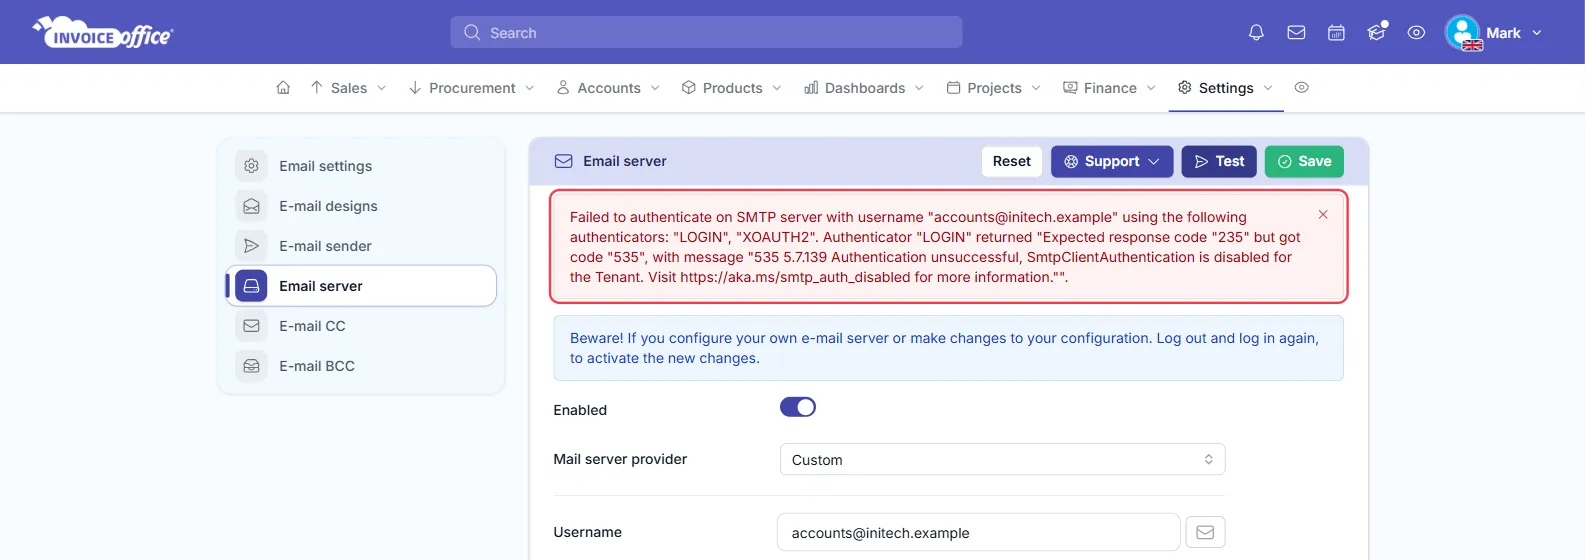
The test uses your saved password, but the host, port, username and encryption that are currently on screen. If you have just pasted a new app password, click Save before you click Test. Your own account email has to be confirmed before you can send a test.
Troubleshooting Microsoft 365 SMTP errors
- “535 5.7.139 Authentication unsuccessful, SmtpClientAuthentication is disabled…”: SMTP AUTH is off for the tenant or the mailbox. Go back to Step 1, and ask your admin about security defaults and the tenant-wide SMTP AUTH setting.
- “535 5.7.3 Authentication unsuccessful”: Microsoft rejected the username or password. Check that Username is the full email address. If MFA is on, use an app password (Step 3), then Save and test again.
- “Connection could not be established with host “ssl://smtp.office365.com:587"": Encryption
is set to tls or ssl. Neither works with
smtp.office365.comon port 587; use no encryption, as in Step 2. - Login works but Microsoft refuses to send: the From Email of your default sender isn’t an address this mailbox may send from. Set it to the Username address (Step 4).
- Test works but documents don’t go out from the new server: log out and log back in.
Not on Microsoft 365?
The same Mail server provider list covers other mailboxes:
- Gmail / Google Workspace: see Configure Gmail / Google Workspace for email.
- Any other SMTP server: see Configure a custom SMTP email server.