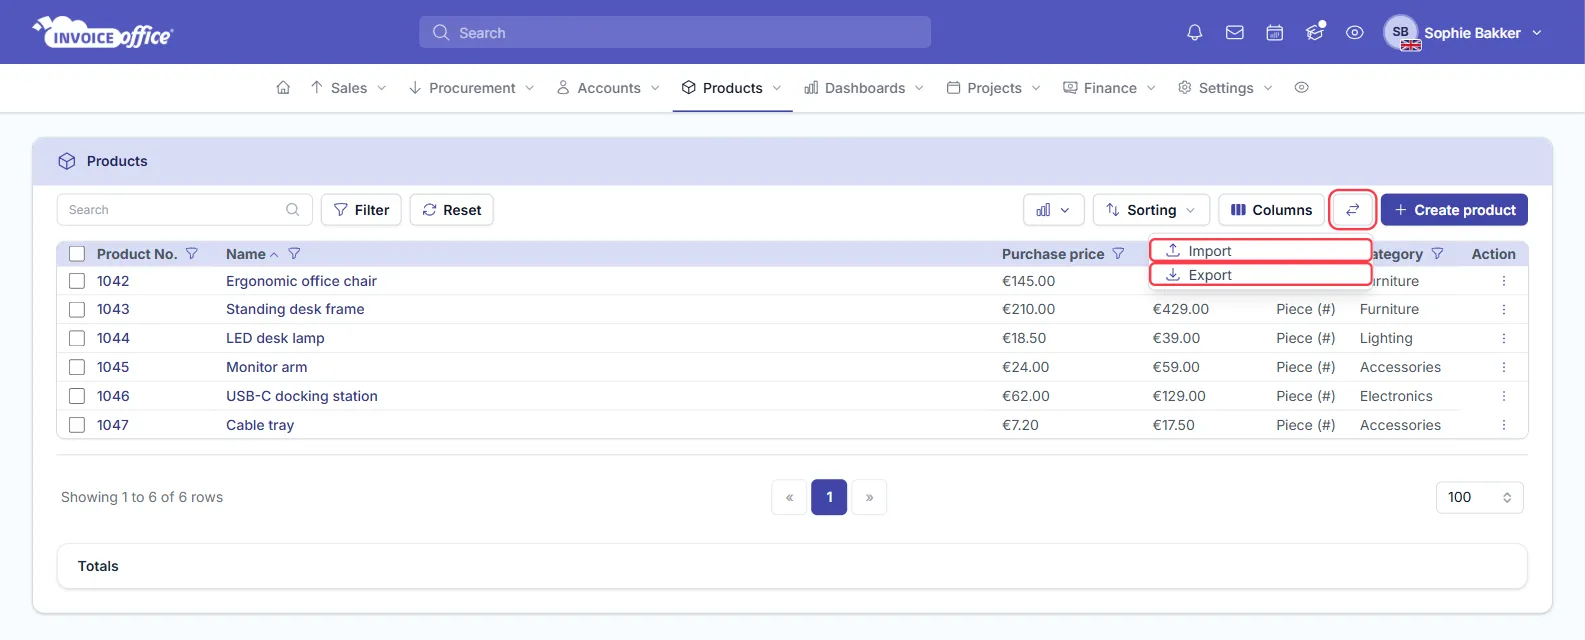
To import and export your product catalog in Invoice Office, open Products → Products and use the Import / Export button. A bulk import adds products from a CSV or Excel file, so you don’t have to create them one by one. An export gives you your product list as an Excel, CSV or PDF file.
This guide covers preparing the file, running the import, fixing validation errors and exporting the list. To add a single product, see creating and managing products. Importing customers and suppliers too? See import customers, suppliers and products.
Before you import: what happens to existing products
Read this first if your catalog already has products. Invoice Office looks for a product with the same Product No., or with that value as its Article code.
- No match, or an empty Product No.: a new product is created. An empty number gets the next number automatically.
- A match: that product is updated, and every field the import can set is replaced by what the file holds. A field that isn’t in your file doesn’t stay as it was: prices and stock become 0, and fields such as the VAT code, unit and category become empty.
So to change existing products, include every column you want to keep. An export doesn’t help here, because it has no VAT code, description or supplier. Try it on one product first and check the result.
Step 1 — Prepare your import file
- On Products → Products, click ⇄ (Import / Export) and choose Import.
- Choose CSV or Excel under Where is your data coming from?
- Not sure about the format? Click Download template and choose Excel or CSV.
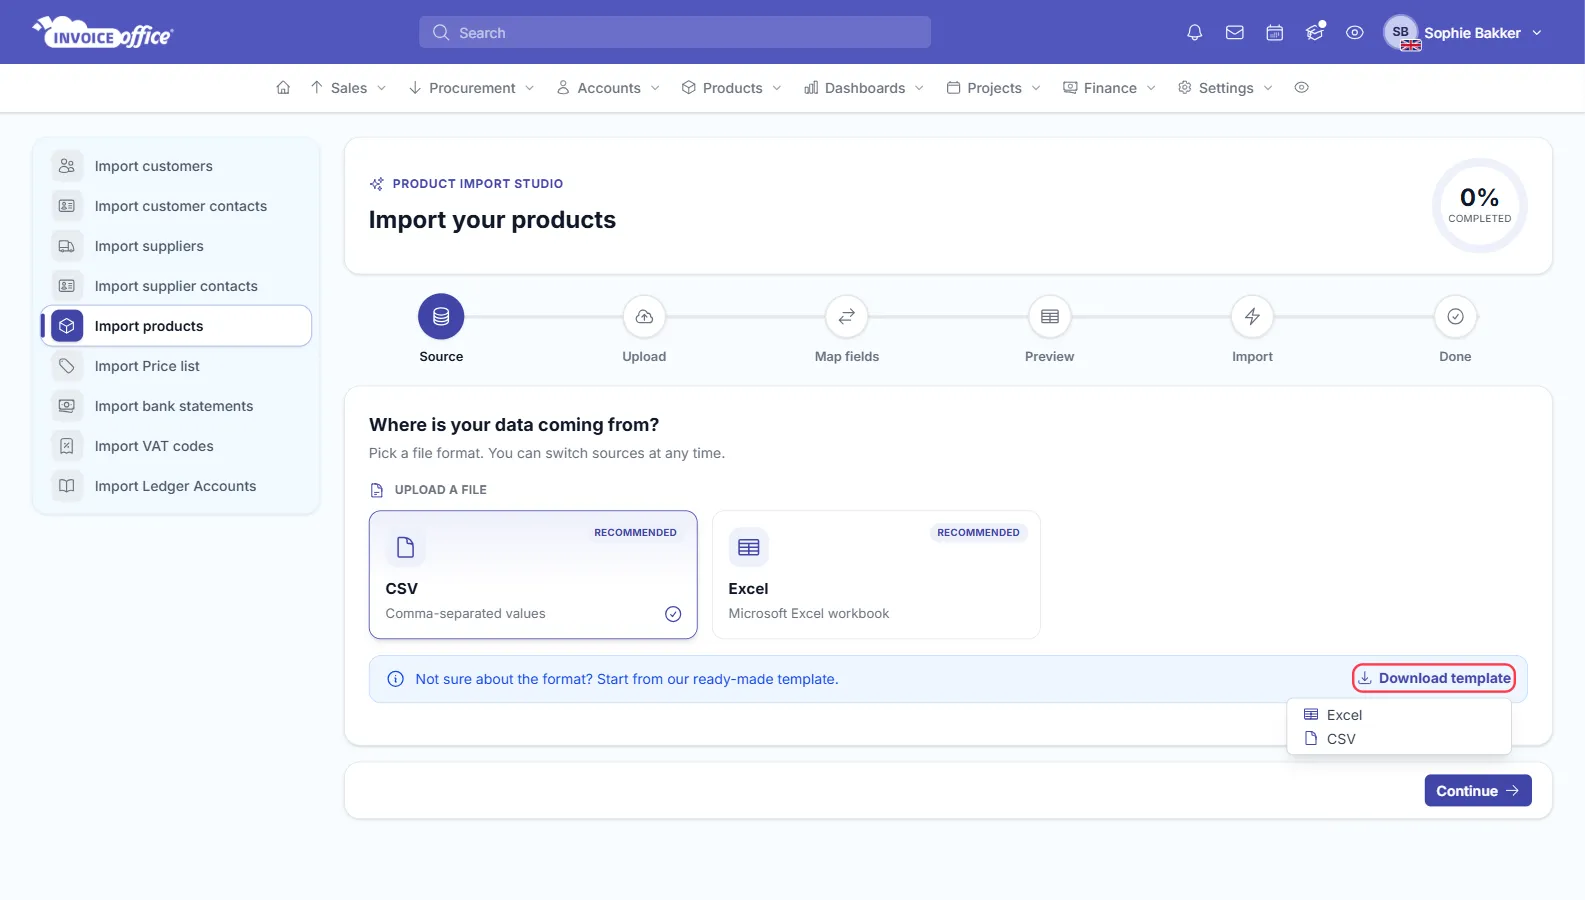
The template has all the columns the import understands. The Excel template also has dropdown lists for your VAT rates, units, categories and suppliers.
Delete the two example rows from the template, SAMPLE PRODUCT 1 and SAMPLE PRODUCT 2. If you leave them in, they are imported like any other row.
Required columns
Only two columns are required. All the others are optional.
| Column | Required | What to enter |
|---|---|---|
| Product name | Yes, in every row | The name of the product. |
| Product No. | Yes, as a column | Your product number. Leave a cell empty to number it automatically. |
The optional columns are Description, Quantity, Sales price, incl. VAT, Sale vat code, Profit account, Purchase price, Purchase price incl. VAT, Purchase vat code, Cost account, Unit, Category, Enable stock management, Stock quantity, Stock location, Minimum stock, Stock reduction, Product no. supplier, Article code and Supplier.
Format your data
- Prices must be plain numbers without a thousands separator:
1299.00or1299,00.1,299.00and€1299give an error. Be careful with1,299and1.299: they don’t give an error, but they are read as 1.30. - Quantities use a point for decimals:
1.5, not1,5. - VAT codes are the percentage, such as
20. That VAT rate must already exist in your account. - Unit and Category must match an existing name exactly, including capitals. A name that doesn’t match is left empty, without an error.
- Supplier: a name that doesn’t exist yet creates a new supplier, so check the spelling.
- Enable stock management and the incl. VAT columns take Yes or No, spelled exactly like that. Anything else counts as No.
Have an export from other software? You can use it as it is. Columns such as SKU, EAN or Cost are recognised, and you check the matches in Step 3.
Step 2 — Upload your product CSV or Excel file
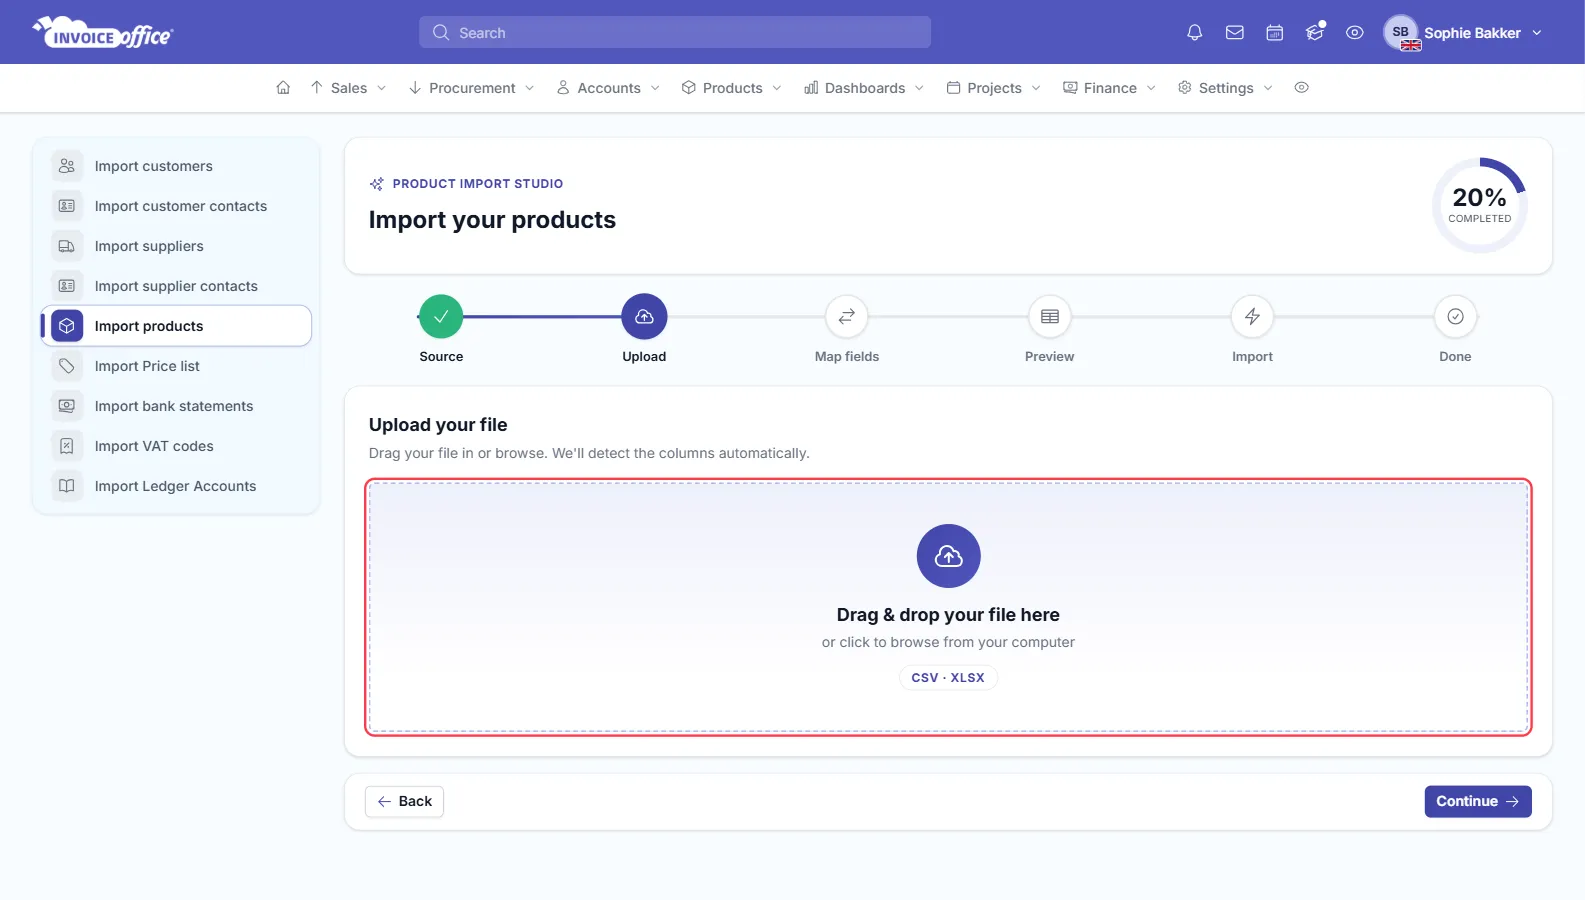
Click Continue, then drag your file onto the upload area or click it to choose a file. You can also pick a file from Google Drive, Dropbox or OneDrive.
Step 3 — Map the columns
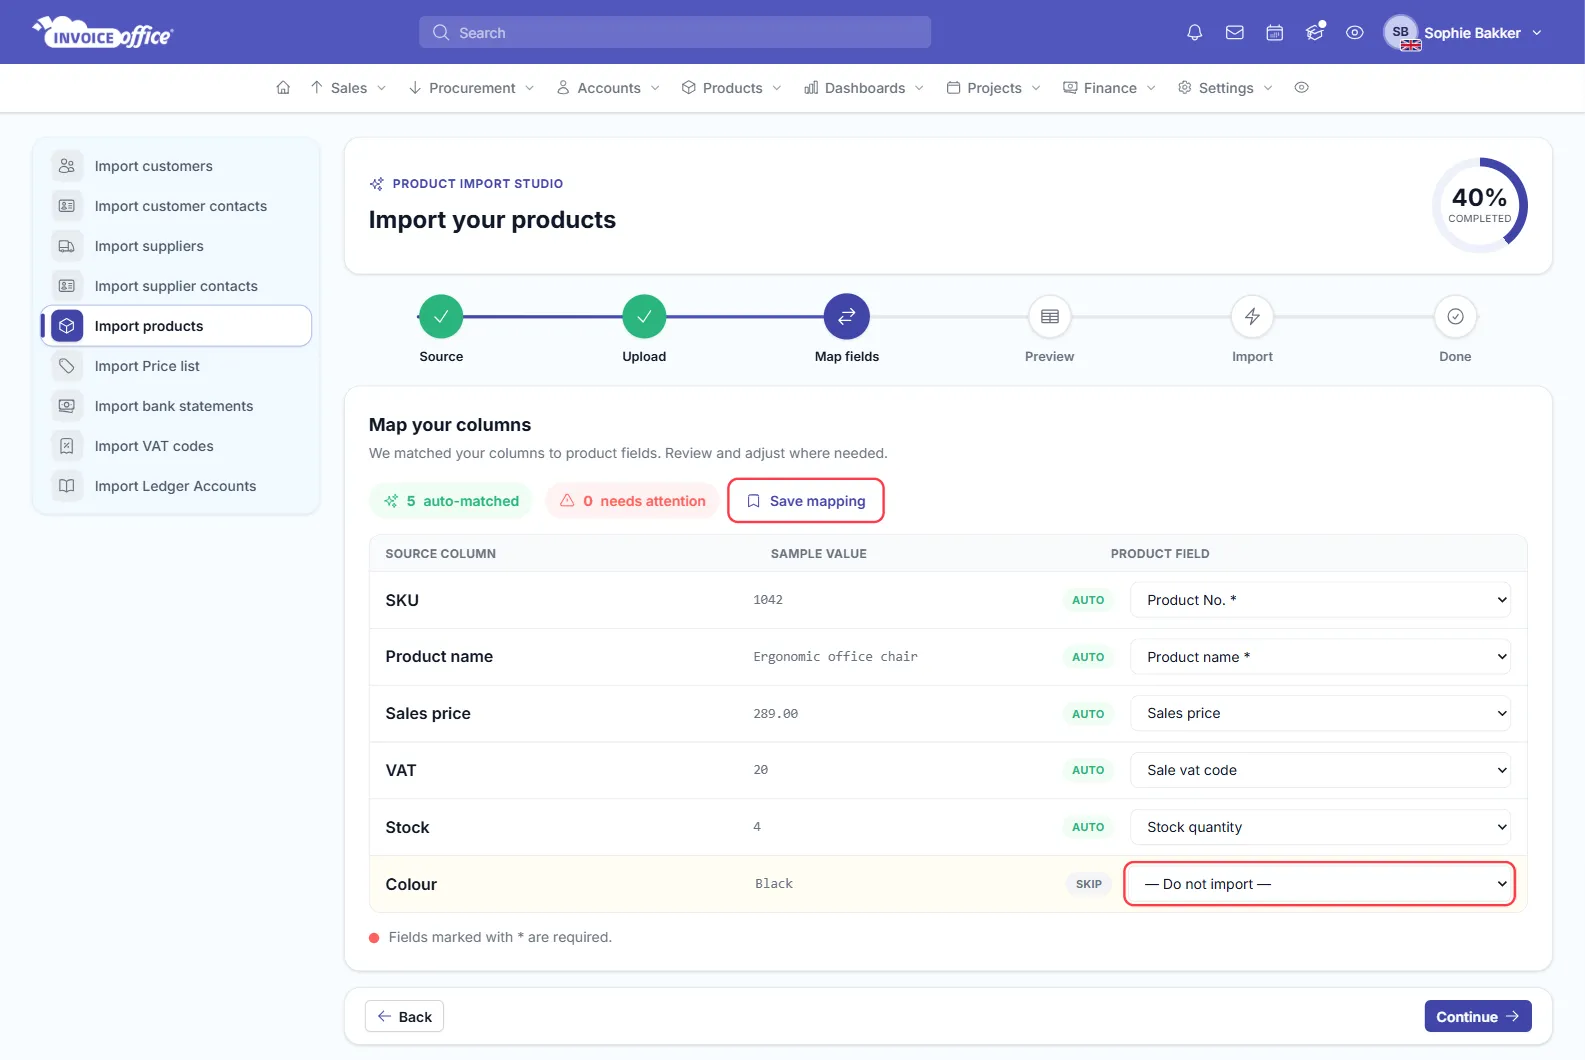
Invoice Office matches your columns to product fields and shows the result. Check each row: the Source column from your file, a Sample value, and the Product field it goes to.
- Choose another Product field to correct a match.
- Choose — Do not import — for a column you don’t need.
- Fields with a
*must be matched to a column. If one isn’t, you see Required field not mapped to any column. - Click Save mapping to use these matches for your next import.
Click Continue.
Step 4 — Fix validation errors
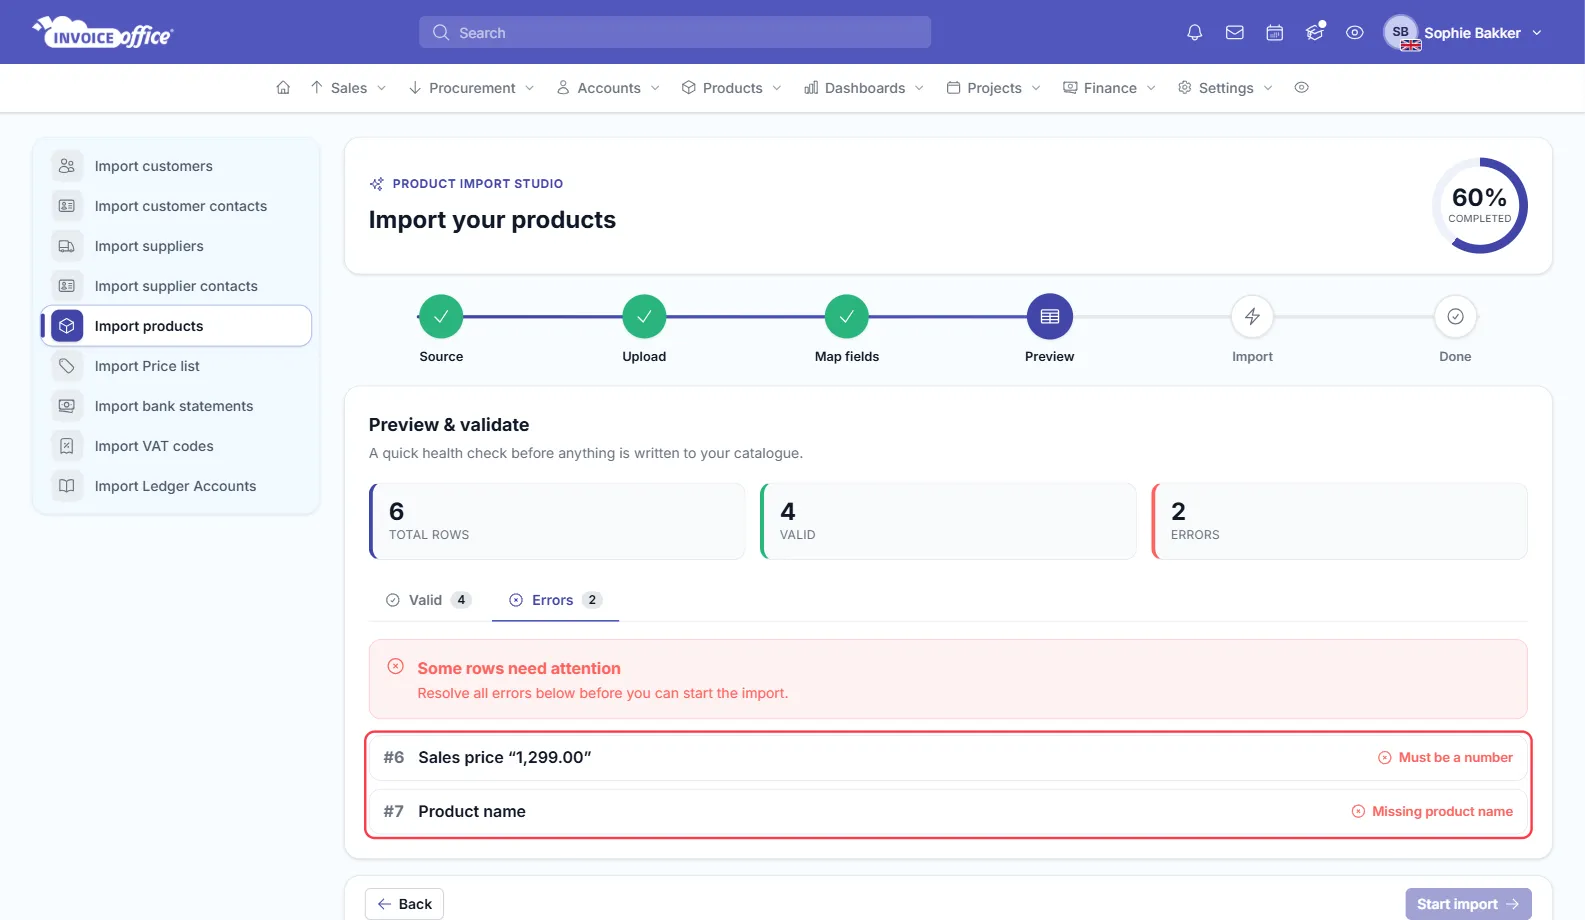
Preview & validate checks every row before anything is saved. It shows Total rows, Valid and Errors. As long as there are errors, Start import is blocked: rows with errors are not skipped, so the whole file waits until they are fixed.
Open the Errors tab. Each line shows the row number in your file, the column and the problem.
| Error | What to do |
|---|---|
| Missing product name | Enter a name in that row, or delete the row. |
| Must be a number | Remove the thousands separator, currency sign or text from the value. |
To fix them, change your file and save it. Click Back to the Upload step, remove the file and upload the new version.
Step 5 — Start the import
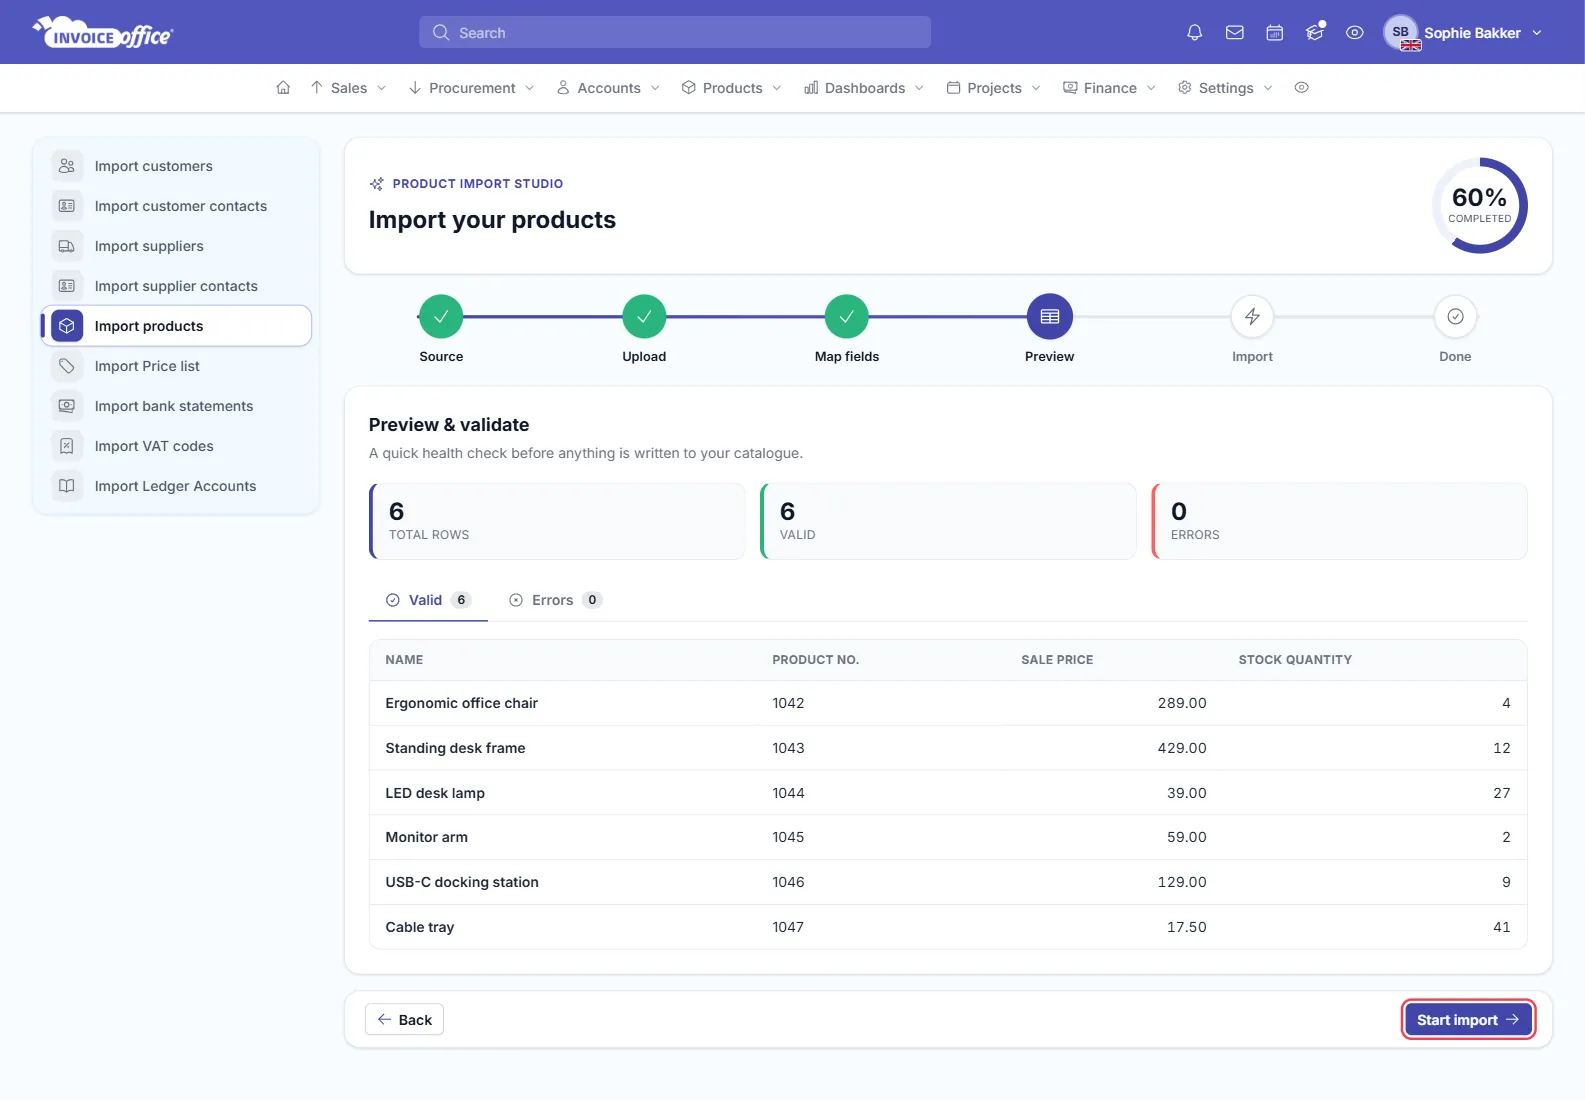
When Errors shows 0, check the rows on the Valid tab and click Start import. The tab shows a sample of your rows, not all of them.
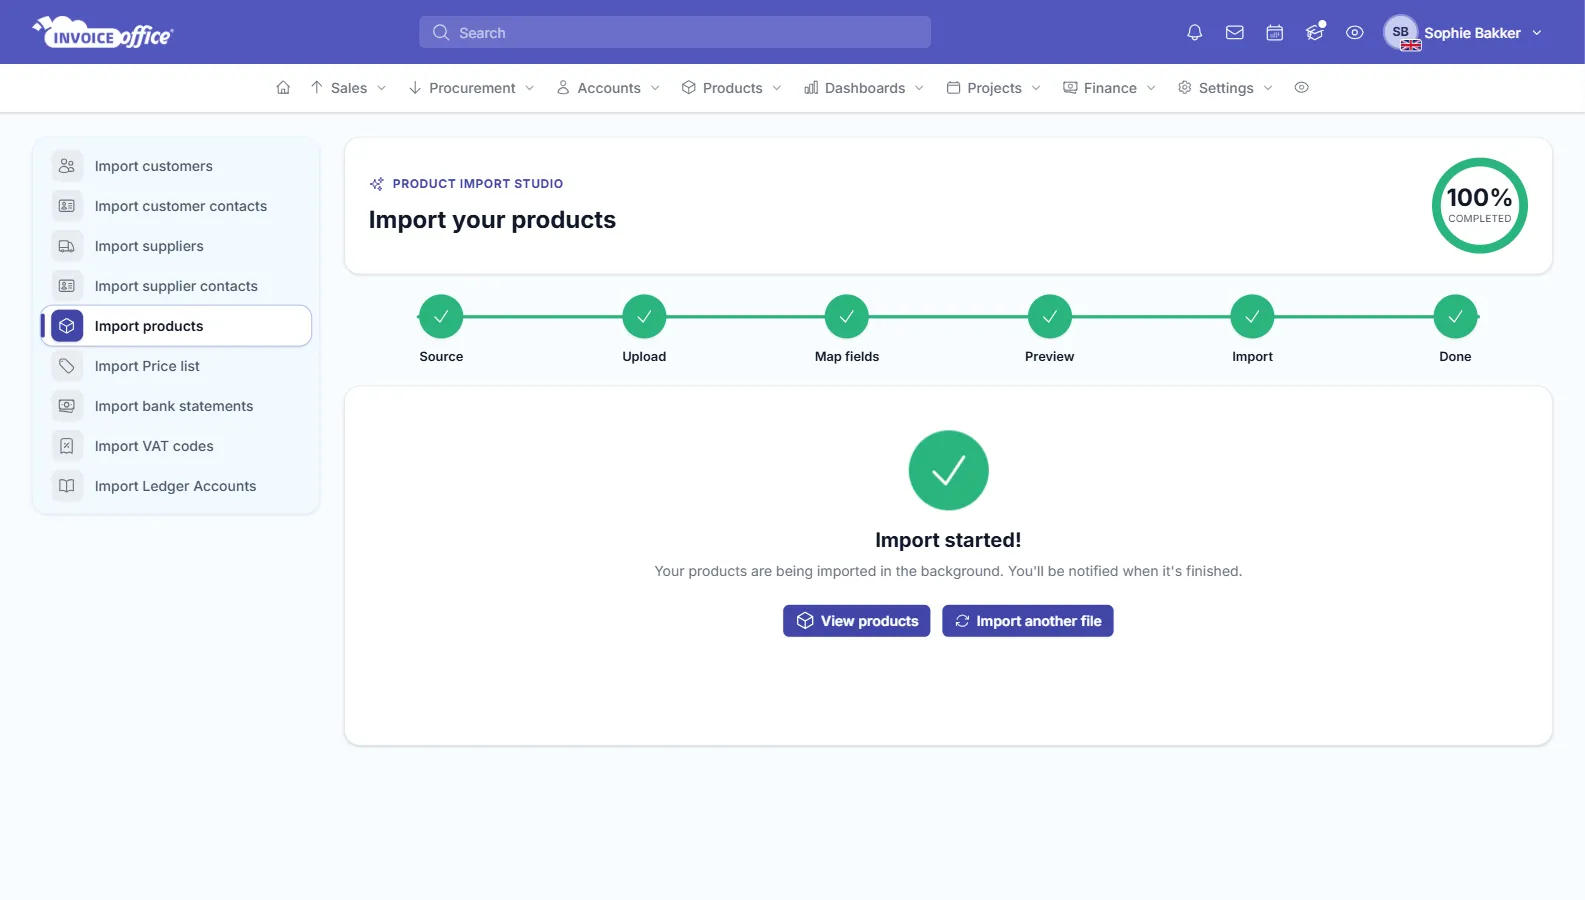
The import runs in the background, so you can keep working. You see Import started!, and the notification Product import completed appears under the bell icon when it is ready. Click View products to check the result, or Import another file.
Stock quantities from an import aren’t logged as stock mutations, so that history doesn’t show them.
Export your product list
- On Products → Products, narrow the list down first if you only want some products: use Search or Filter, or tick the rows.
- Click ⇄ (Import / Export) and choose Export.
- Choose the columns. On the left are the groups Product and Stock. Click a field to add it, and click × to remove one. Product No. always comes first.
- Choose Excel, CSV or PDF and click Export. Save and export keeps your column choice for next time.
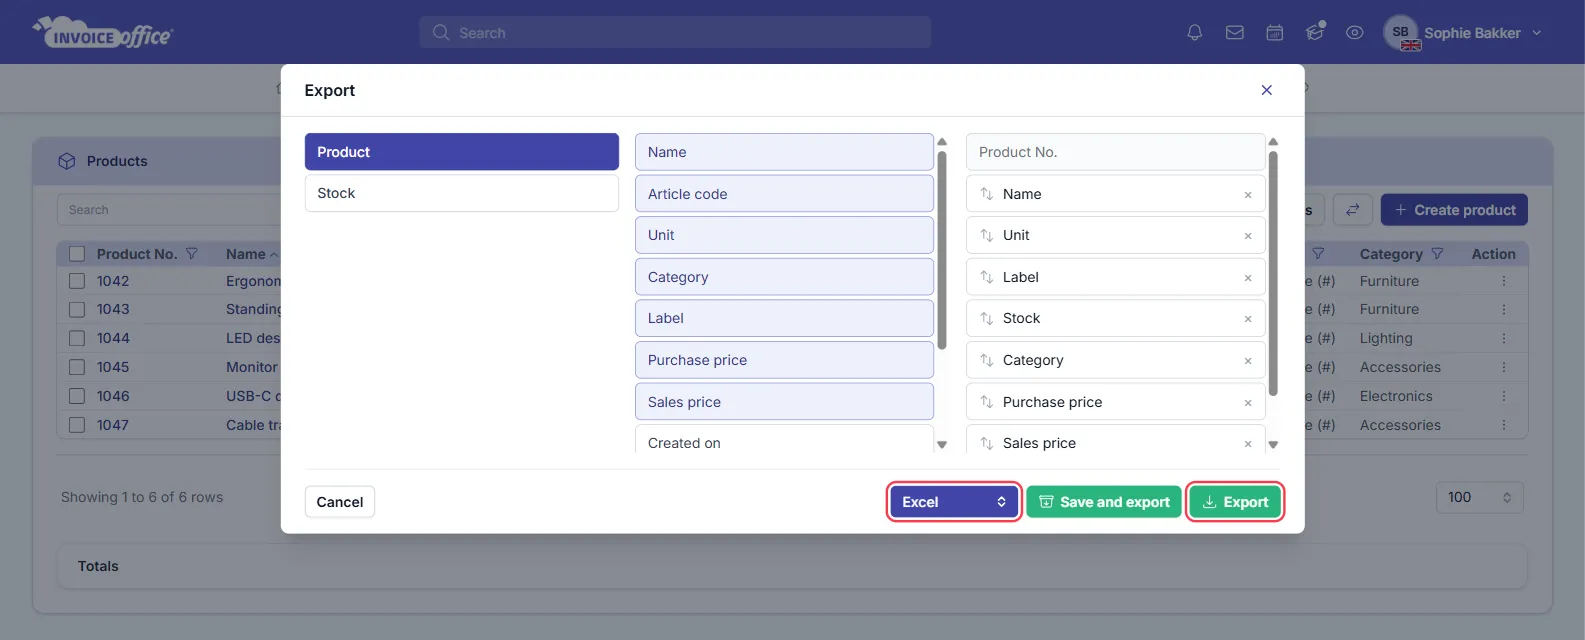
Large catalogs: if the export has more products than your Number of rows per table setting, an Excel or CSV export runs in the background. You get a notification with a download link when the file is ready. A PDF only holds the first rows, up to that same number.
Using an export as a backup or for editing: an export isn’t a full copy of your catalog.
- It has no description, VAT code, ledger account or supplier.
- Stock location and Stock reduction stay empty in the file, even if you choose them.
- Enable stock management doesn’t come out as Yes or No, so importing the file as it is switches stock management off.
- Prices over 1,000 can come out with a thousands separator, which gives an error when you import them.
So don’t import an edited export as it is. Read what happens to existing products first, and fill in every column you want to keep.
For filters and exporting customers or documents, see export your data.
Any doubts? Contact us and we will help.