To invoice a customer for hours worked on a project in Invoice Office, you let the project turn its logged time into an invoice: you choose which billable hours to include, Invoice Office prices them at the project’s hourly rate, and you get a ready invoice to check and send. This guide covers setting the rate, selecting the hours, and generating and sending the time-based invoice.
Your team logs the hours on the project’s timesheets — see how the Invoice Office timesheet works.
Step 1 — Set the hourly rate on the project
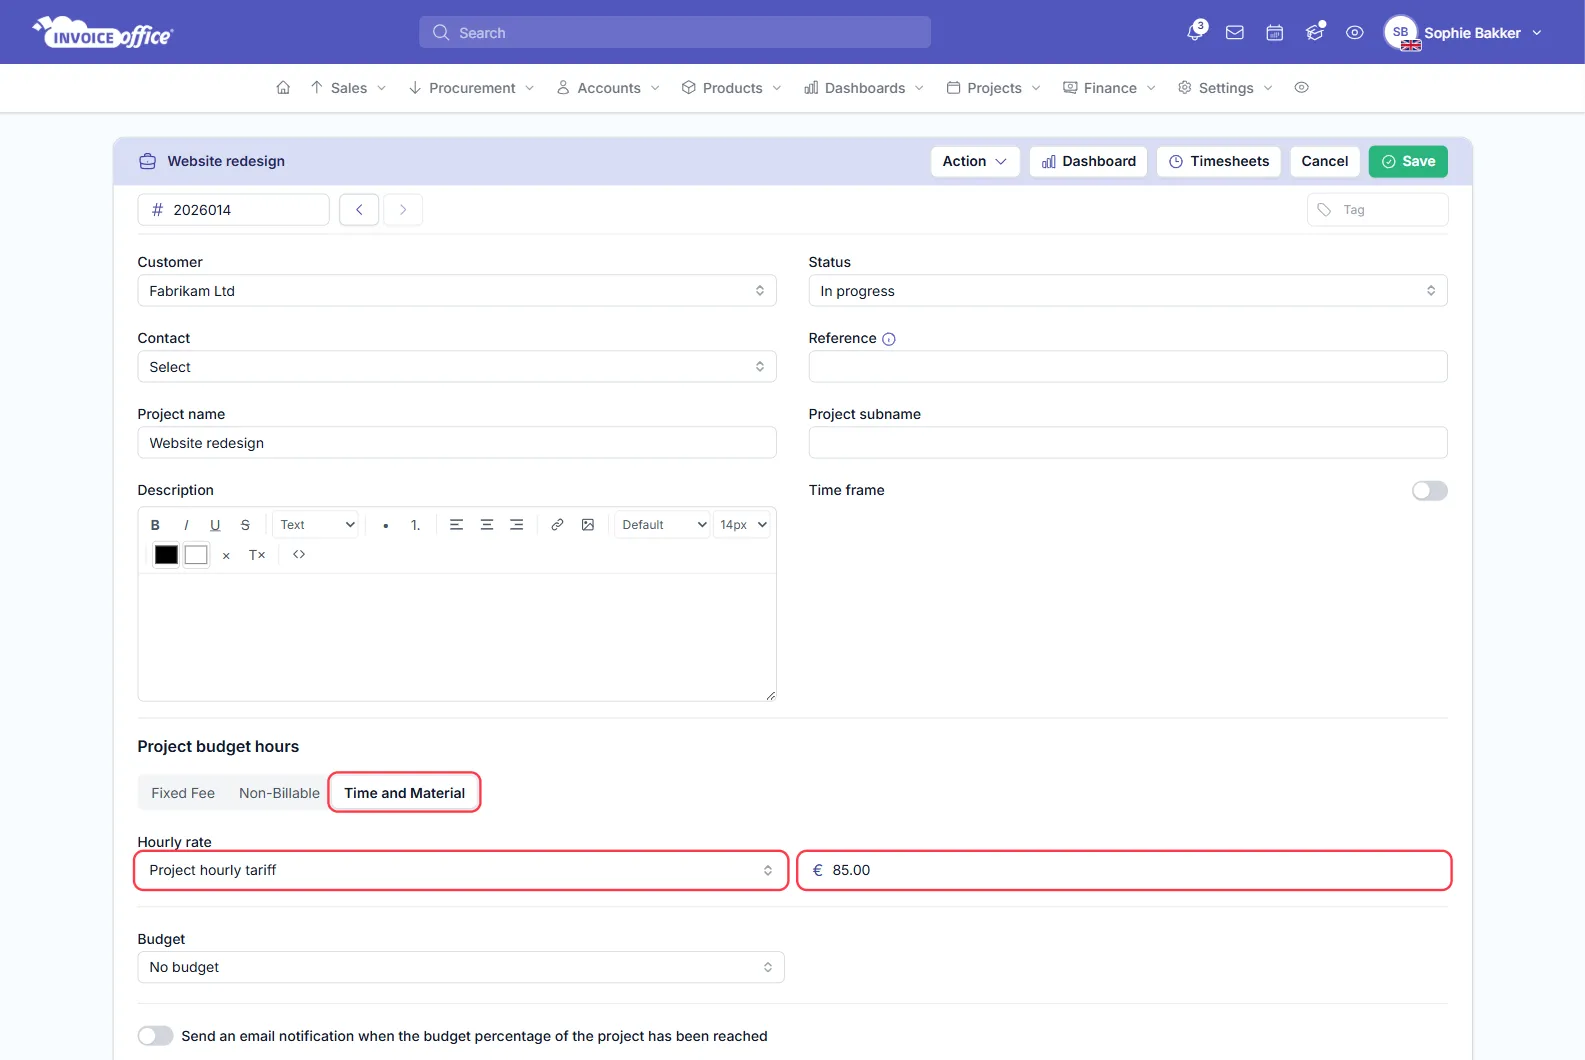
The rate comes from the project. Go to Projects → Projects, open the project’s Action menu and choose Edit project. Under Project budget hours, choose Time and Material, then pick how time is priced under Hourly rate:
- Project hourly tariff — one rate for the whole project. Enter it in the field next to Hourly rate.
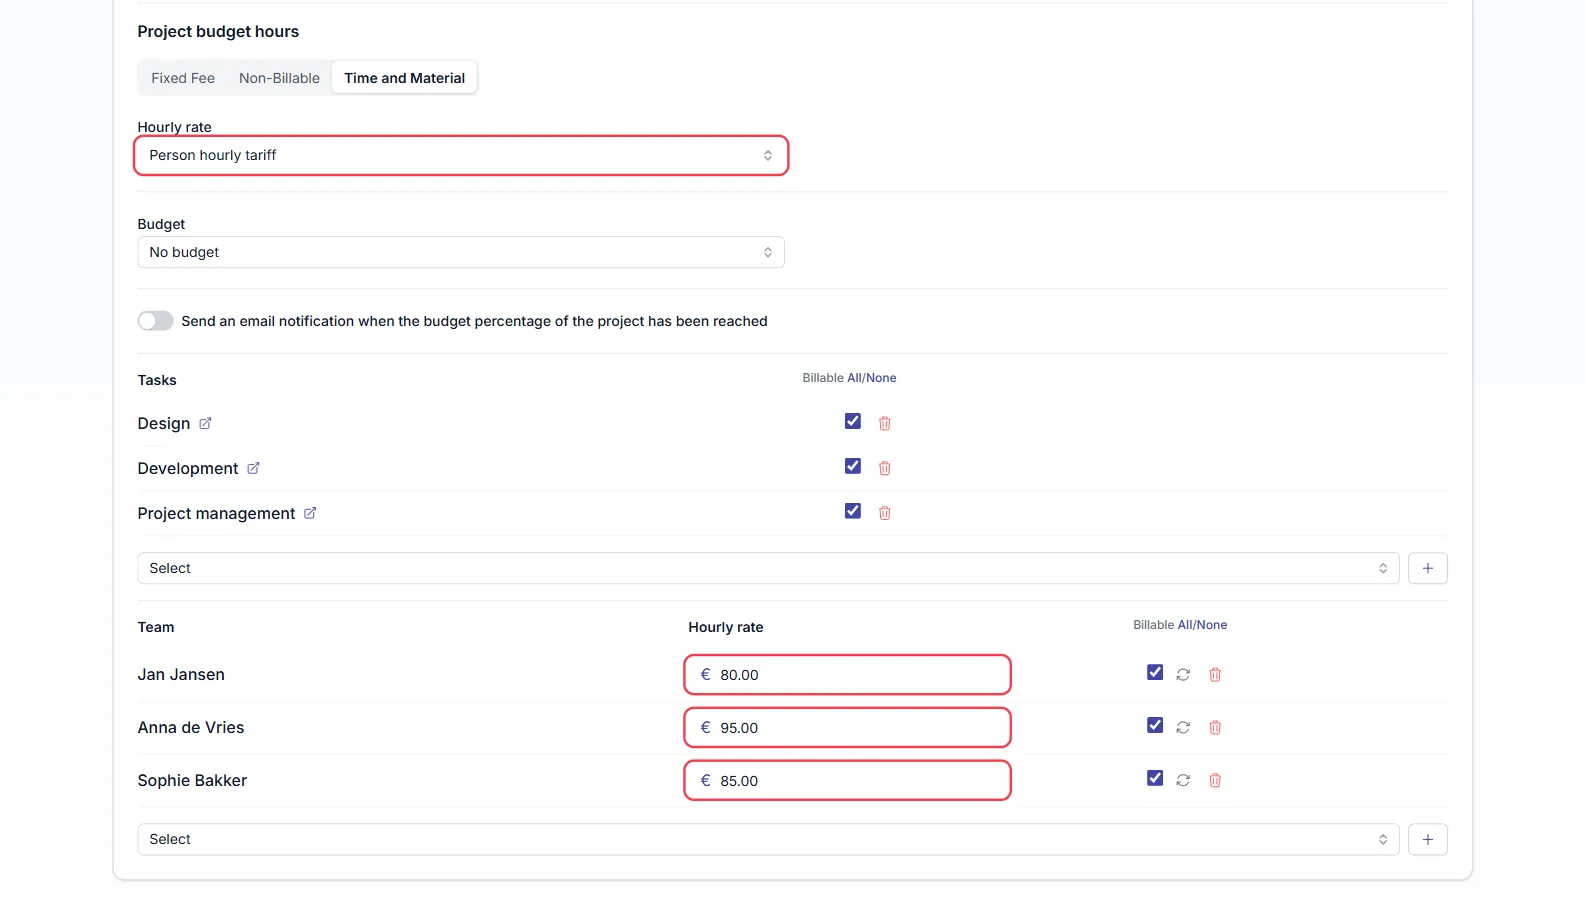
- Person hourly tariff — a rate per team member. Enter each person’s rate in the Hourly rate column under Team.
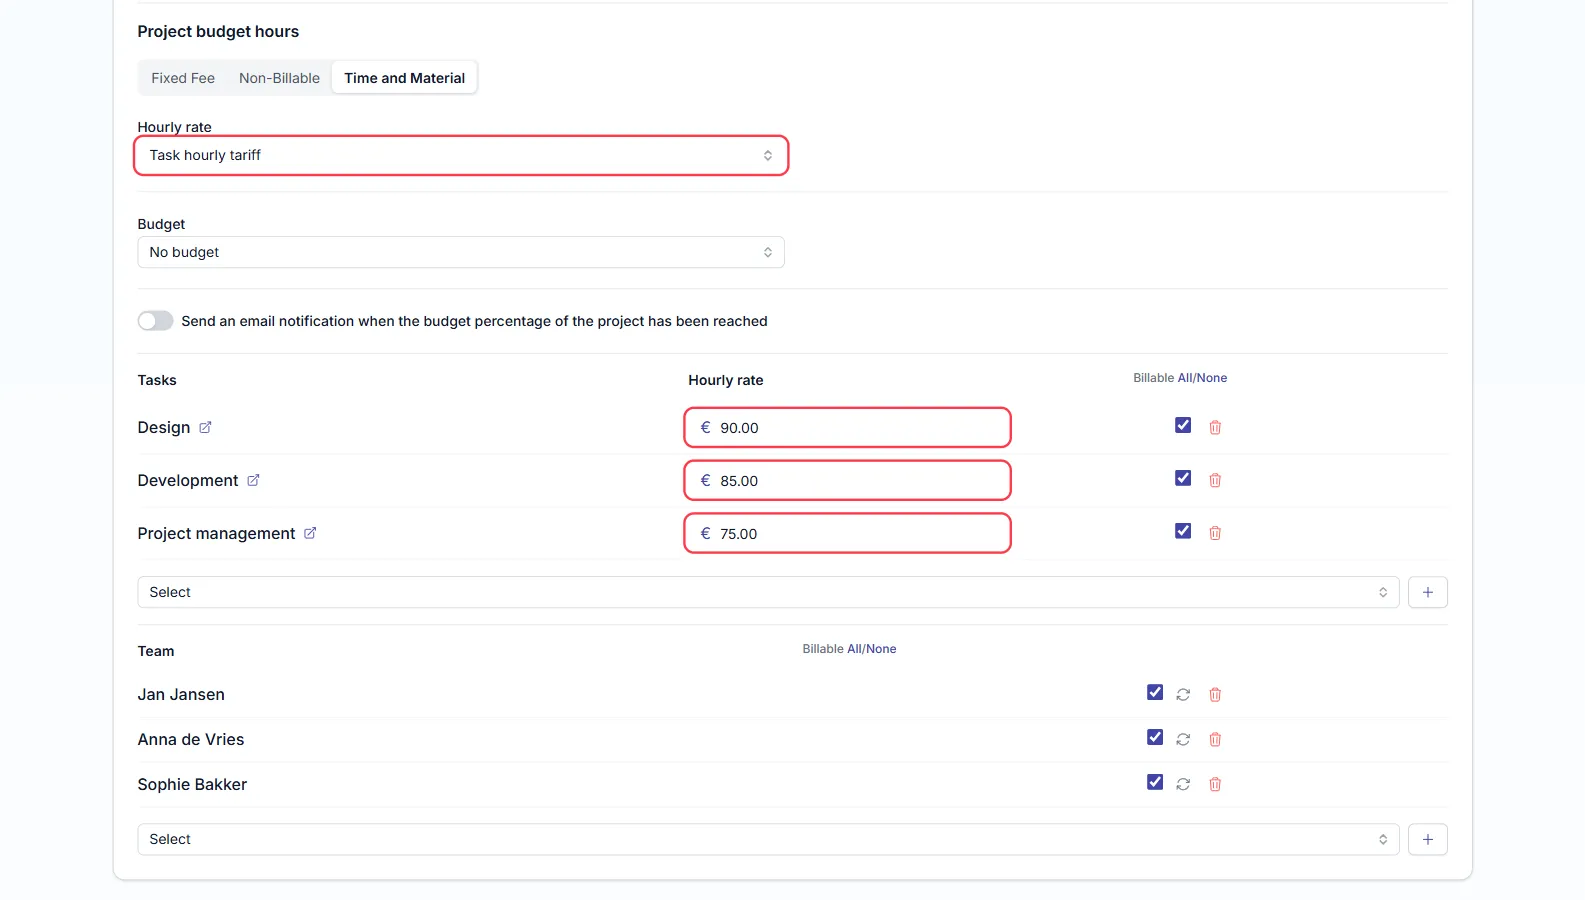
- Task hourly tariff — a rate per task. Enter each task’s rate in the Hourly rate column under Tasks.
With No billable rate, or with Person daily tariff, the invoice lines are created without a price and you enter the prices on the invoice yourself. Click Save. For the other project settings, see how to create and manage projects.
Step 2 — Select the billable hours
-
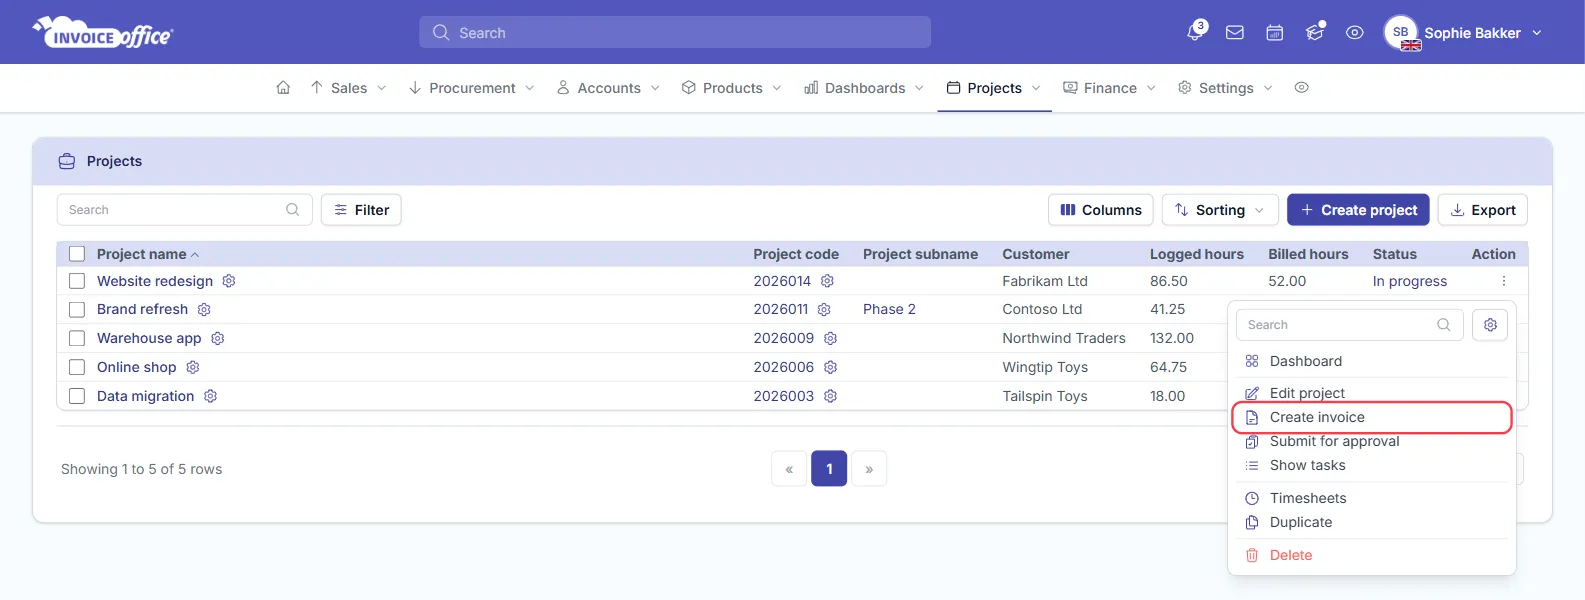
Go to Projects → Projects, open the project’s Action menu and choose Create invoice.
-
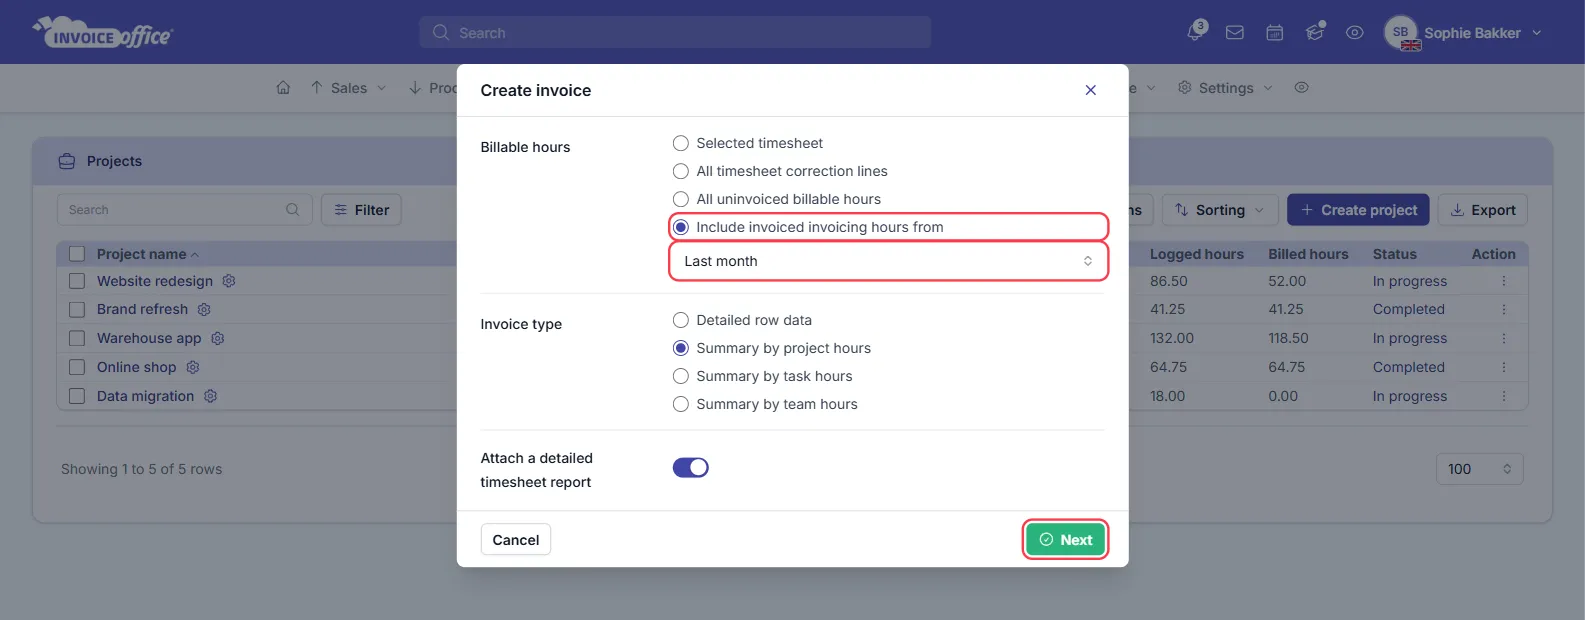
In the Create invoice window, choose under Billable hours which hours to invoice:
- All timesheet correction lines — selected by default. Despite its name, this takes every hour that hasn’t been invoiced yet for the project’s customer — on all of that customer’s projects, not only this one.
- All uninvoiced billable hours — every hour on this project that hasn’t been invoiced yet. It only finds hours when the project’s Status is In progress.
- Include invoiced invoicing hours from — the hours on this project in a period. Choose Last month, This month, Last quarter, This quarter, Last year or This year, or Custom with a From date and To date. Despite its name, hours that are already invoiced are still left out.
- Selected timesheet — used when you start from timesheet lines you selected. From the project, choose one of the other options.
-
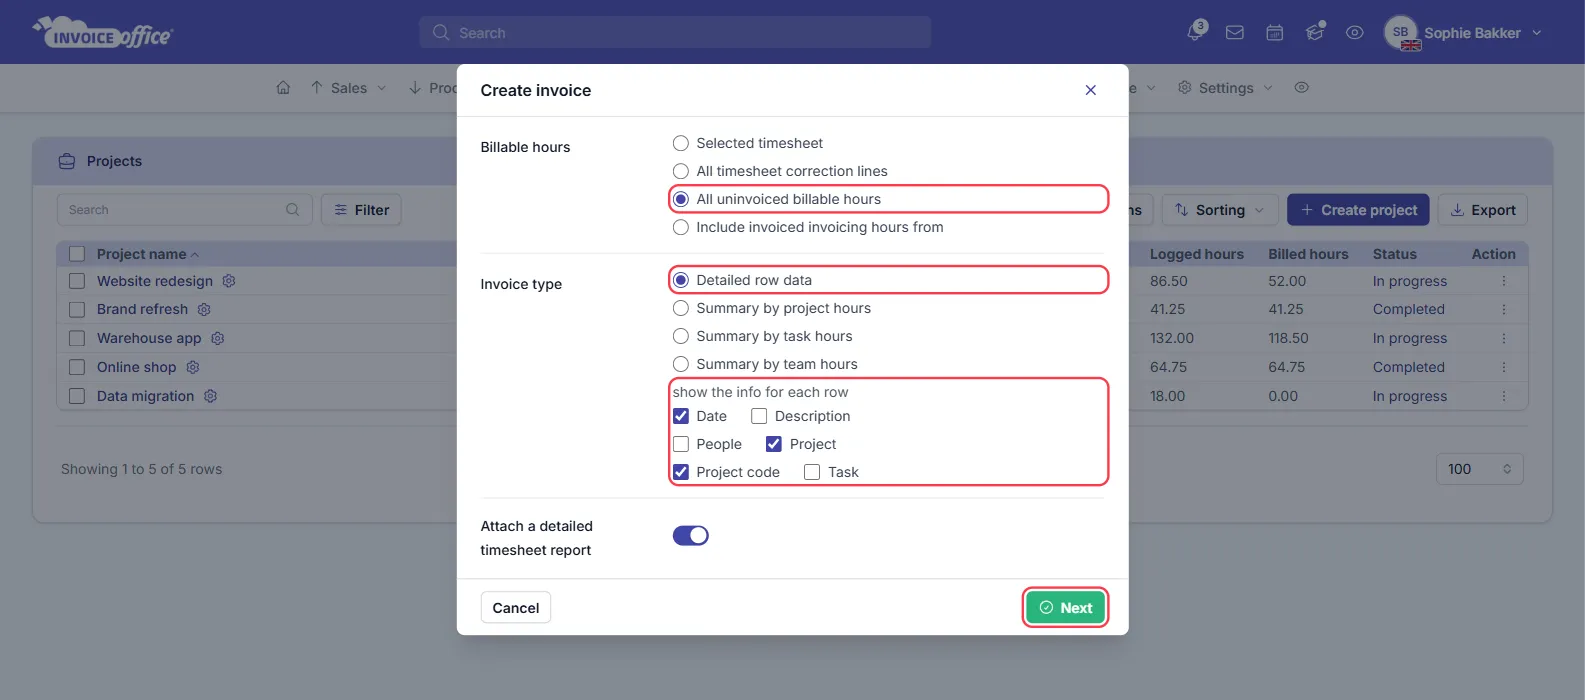
Under Invoice type, choose how the hours appear on the invoice. If the project’s Hourly rate is Project hourly tariff, Task hourly tariff or Person hourly tariff, the matching summary is selected for you; otherwise choose one:
- Summary by project hours, Summary by task hours or Summary by team hours — one line per project, task or team member, with the billable hours added up.
- Detailed row data — one line per timesheet entry, with the time logged on that entry. The window offers Date, Description, People, Project, Project code and Task to show for each row, but in the current version every line is named after the project, with no further description, whichever you tick — check the line texts on the invoice.
-
Leave Attach a detailed timesheet report on to attach the timesheet lines behind the invoice as a spreadsheet.
-
Click Next.
Hours that are already invoiced, a timer that is still running and entries without time are left out. If the option you chose finds no hours at all, Invoice Office tells you No timesheet found; if it only finds hours that are already invoiced, the invoice opens without hour lines.
Step 3 — Check the invoice
Next opens a new invoice for the project’s customer, linked to the project you started from and filled with the hours:
- The Quantity of each line is the time in hours — the billable time for a summary, the logged time for a detailed row.
- The Price is the hourly rate from step 1.
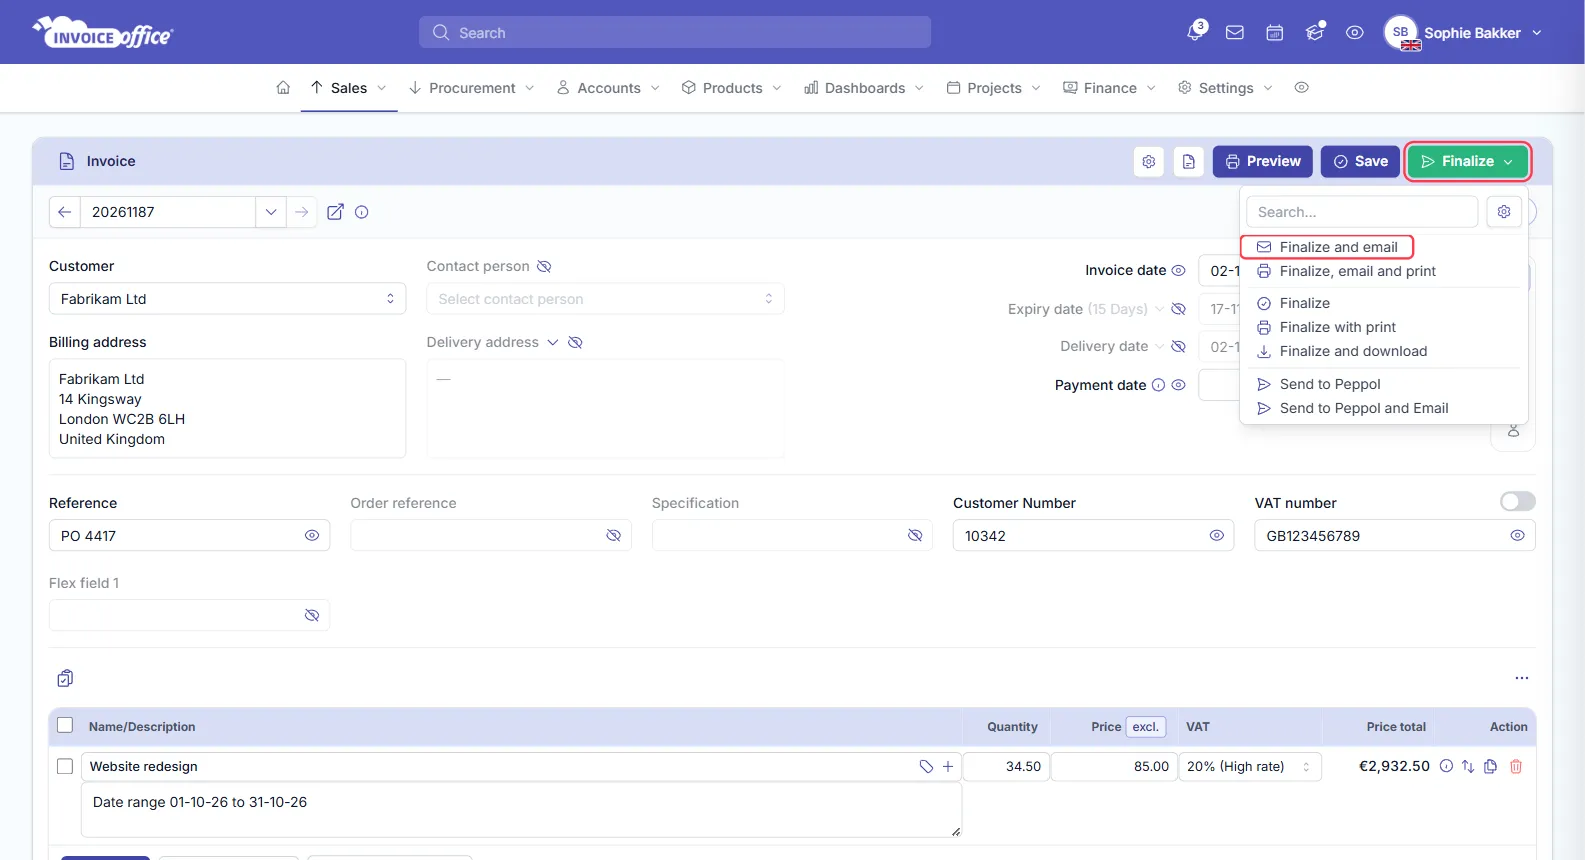
- The line carries the project name and, for the summaries, the period — for example Date range 01-10-26 to 31-10-26 — followed by the task or team member for a summary by task or team hours.
- The project’s Reference is copied to the invoice.
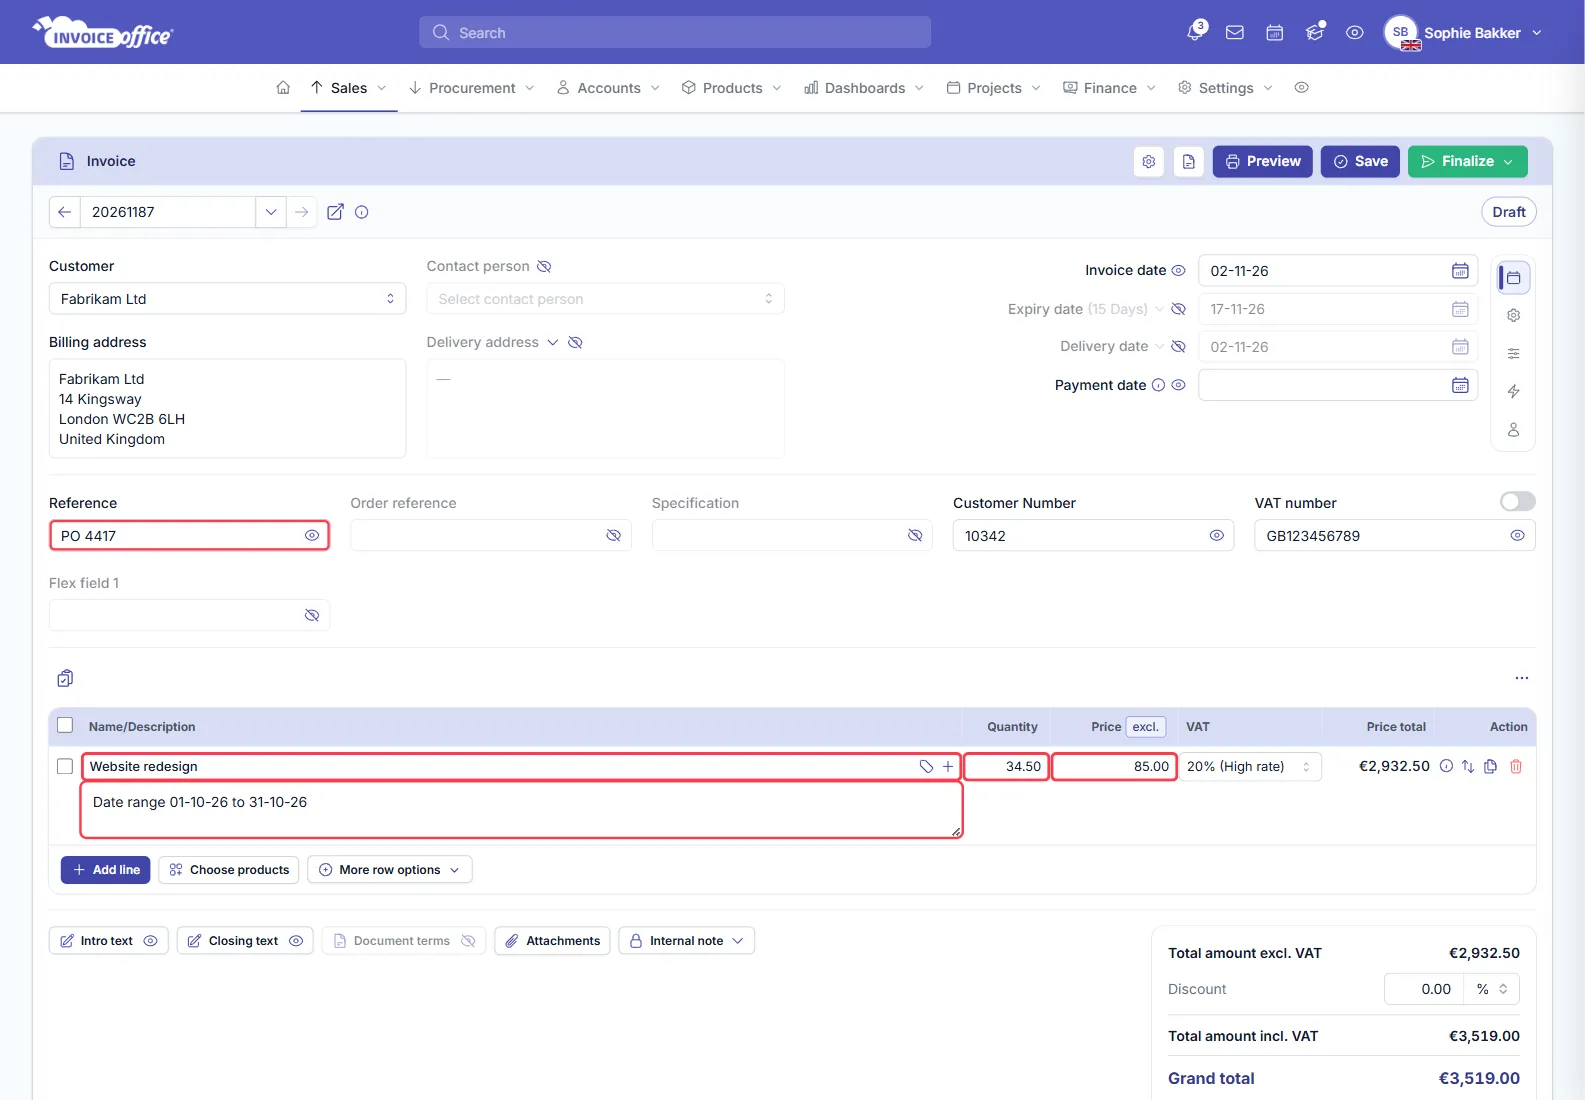
Check the lines before you go on. With Person hourly tariff, compare each line’s price with that person’s rate on the project: the invoice can show one member’s rate on every line of the project, so correct any line that differs.
When you save the invoice, the hours on it count as invoiced and are left out of the next time-based invoice. Removing a line from the invoice, or deleting the invoice while it is still a draft, makes those hours available again.
Step 4 — Send the invoice
Click Finalize and choose Finalize and email to finalize the invoice and email it to the customer — or another option, such as Finalize with print or Finalize and download. See how to create an invoice for every option.