Invoice Office timesheets track the working hours you spend on ongoing projects and tasks, and that time can be sent to your customer as an invoice. Timesheets are built on projects, so you set up the project, team and tasks first.
Everything lives under the Projects menu: Projects · Tasks · Teams · Timesheets · Timesheet Corrections · Approvals.
Step 1 — Create a project, team and tasks
Go to Projects → Projects and click the + beside it, then fill in the project details:
- Customer and Contact — who the project is for.
- Project name and Project subname — the name of your ongoing project, and an optional sub-heading for a phase.
- Description — any extra information, if you need it.
- Status — Draft, In progress, Completed, Inactive or On hold.
- Reference — copied through to the invoice.
- Time frame — turn this on to give the project a From and To date.
- Project budget hours — pick the project type: Fixed Fee, Non-Billable or Time and Material.
- Hourly rate — how the time is priced: No billable rate, Project hourly tariff, Person hourly tariff, Person daily tariff or Task hourly tariff, with the rate beside it.
- Budget — how the budget is calculated, plus an optional email notification when a percentage of it is reached.
- Tasks — add the tasks people will book time against, straight from this form.
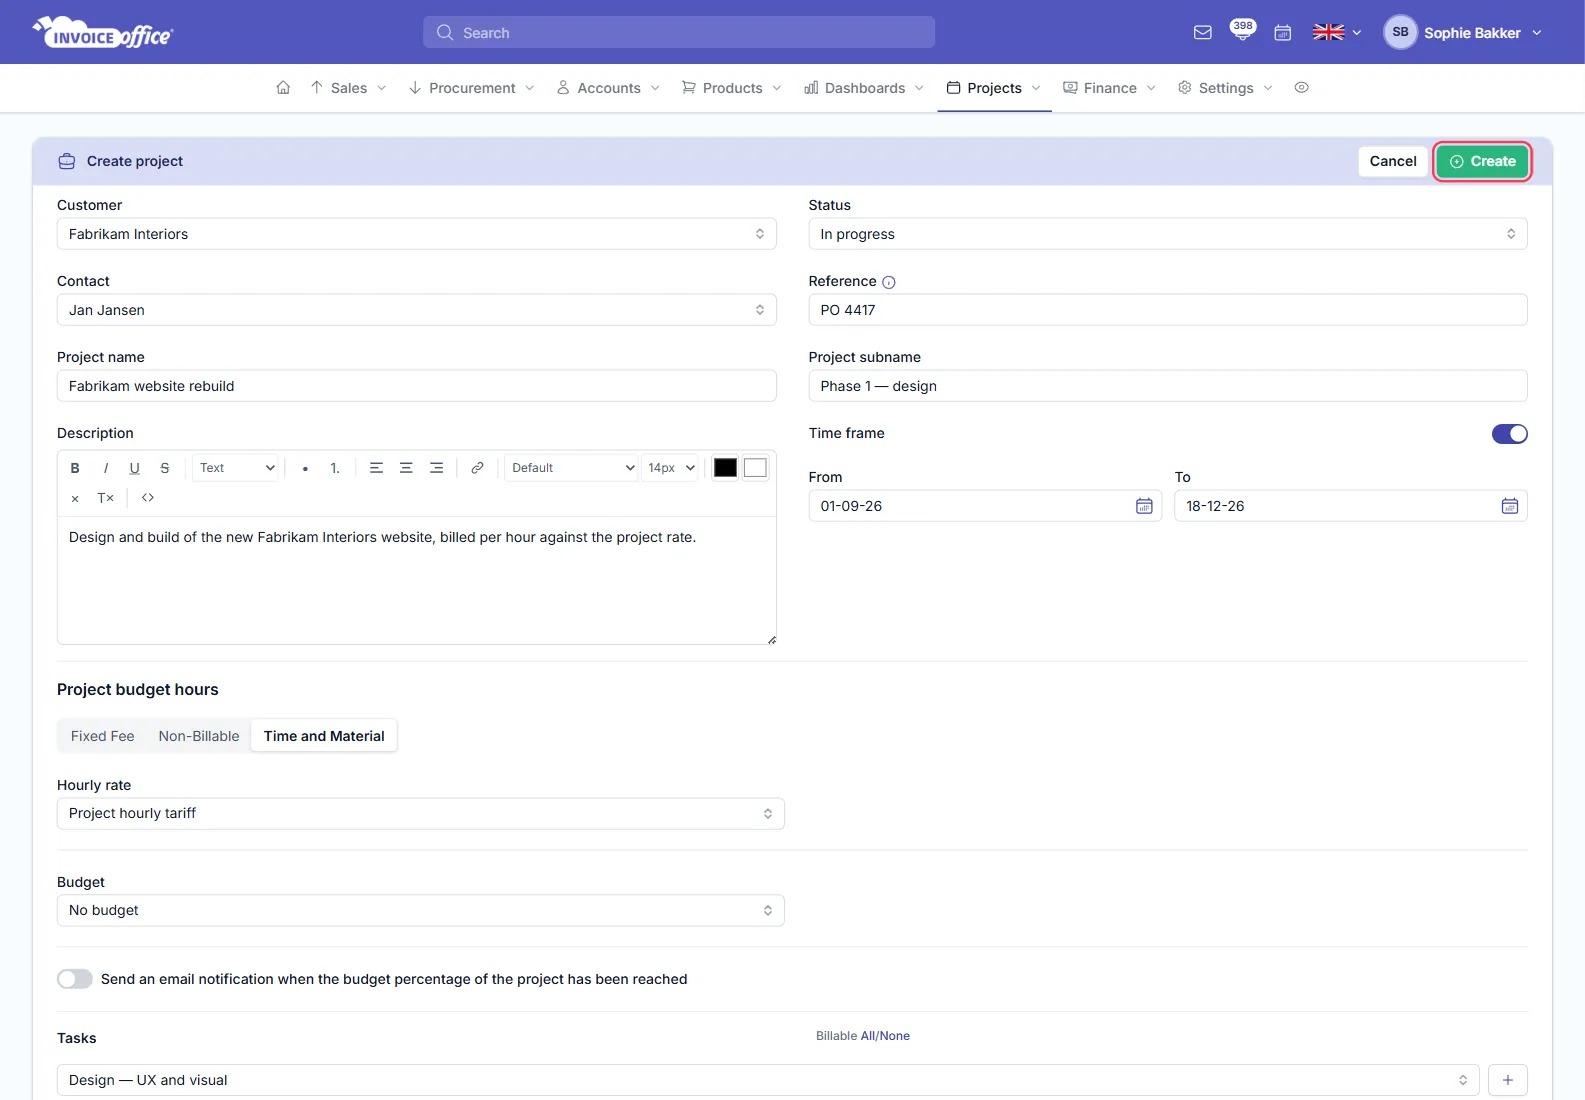
Click Create, then build out your Teams and Tasks under Projects → Teams and Projects → Tasks. Once the project, team and tasks exist, you can start filling in timesheets.
The projects list then shows each project with its Project code, customer, Logged hours, Billed hours and status.
Step 2 — Add a timesheet
Go to Projects → Timesheets and click Add timesheet, then pick the Project, Task and Team / Employee you want to track.
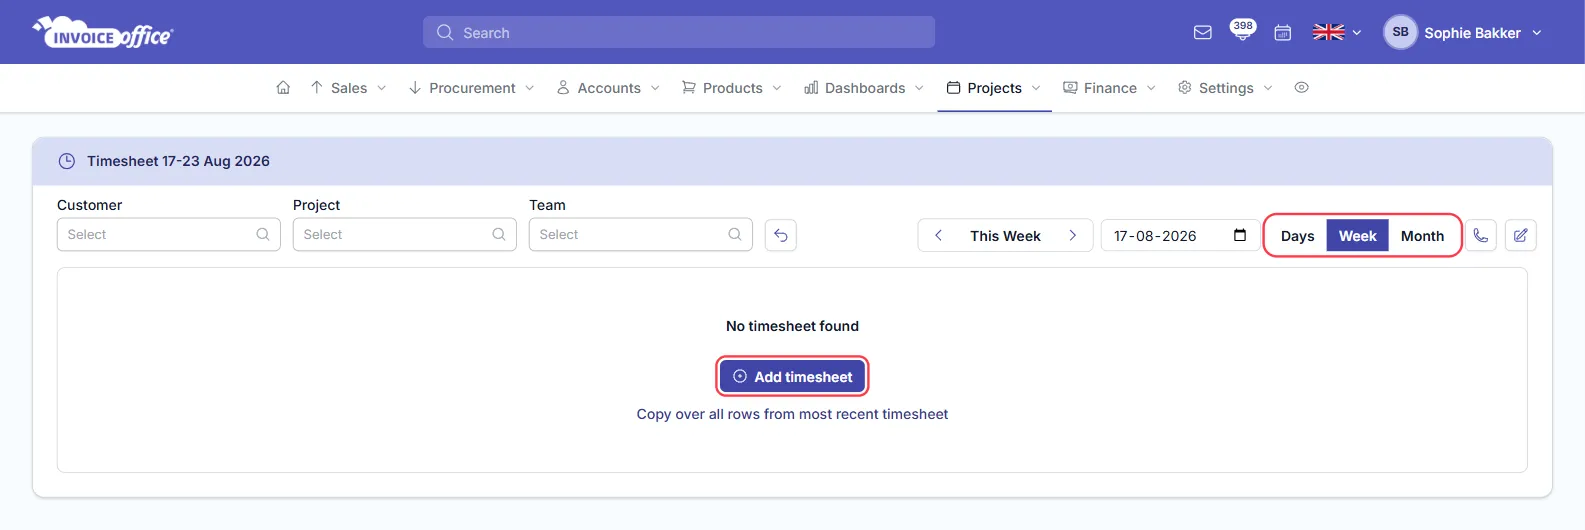
Time can be recorded in three views:
- Days — start the timer and track the time you spend on a project or task as you work.
- Week — fill in by hand the time per day you expect to spend on each project and task.
- Month — the same grid across a whole month.
Click through the days of the week to record time against different projects and tasks, and use the week or month overview to see how long you have worked on a project. Copy over all rows from most recent timesheet rebuilds last week’s rows in one click, and Projects → Timesheet Corrections is where adjustments to already-logged time are handled.
Because it runs in the browser, the timer works just as well on a phone on site as on a laptop — see mobile.
Send a timesheet for approval
Before you invoice, you can have the customer sign off on the hours. Open the project from Projects → Projects → Action → Dashboard, then choose Action → Submit for approval and the timesheet goes to your client.
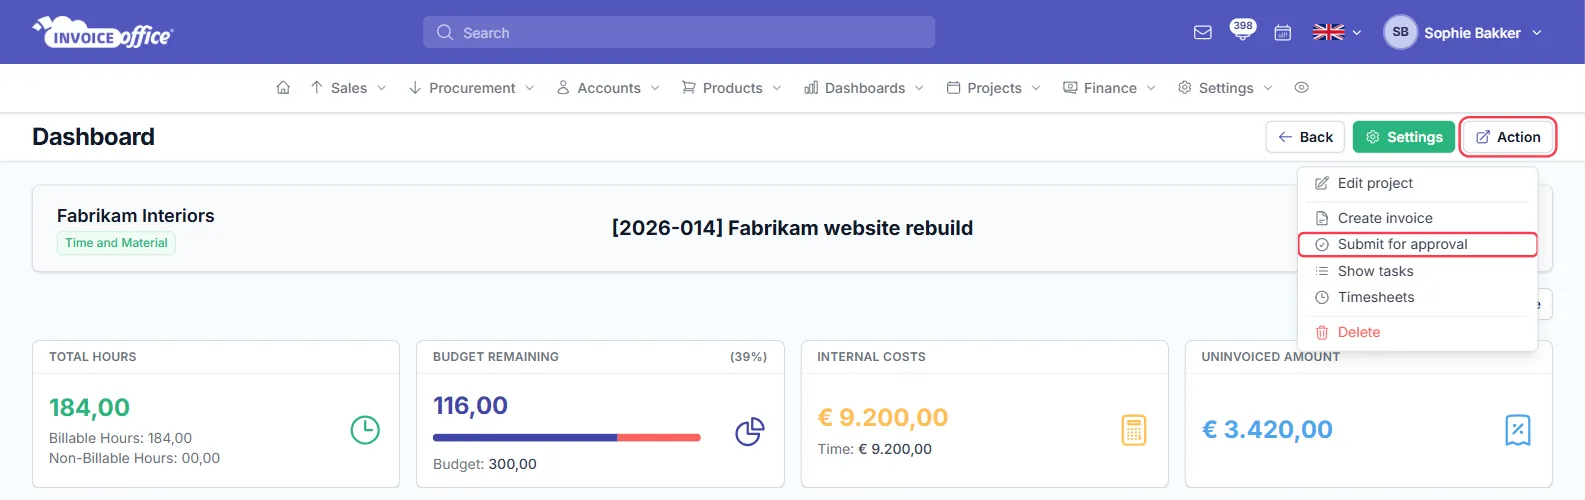
Under Projects → Approvals you get an overview of your approved timesheets, and a Create approval button for starting one from there.
Turn a timesheet into an invoice
From the same Action menu on the project dashboard, choose Create invoice.
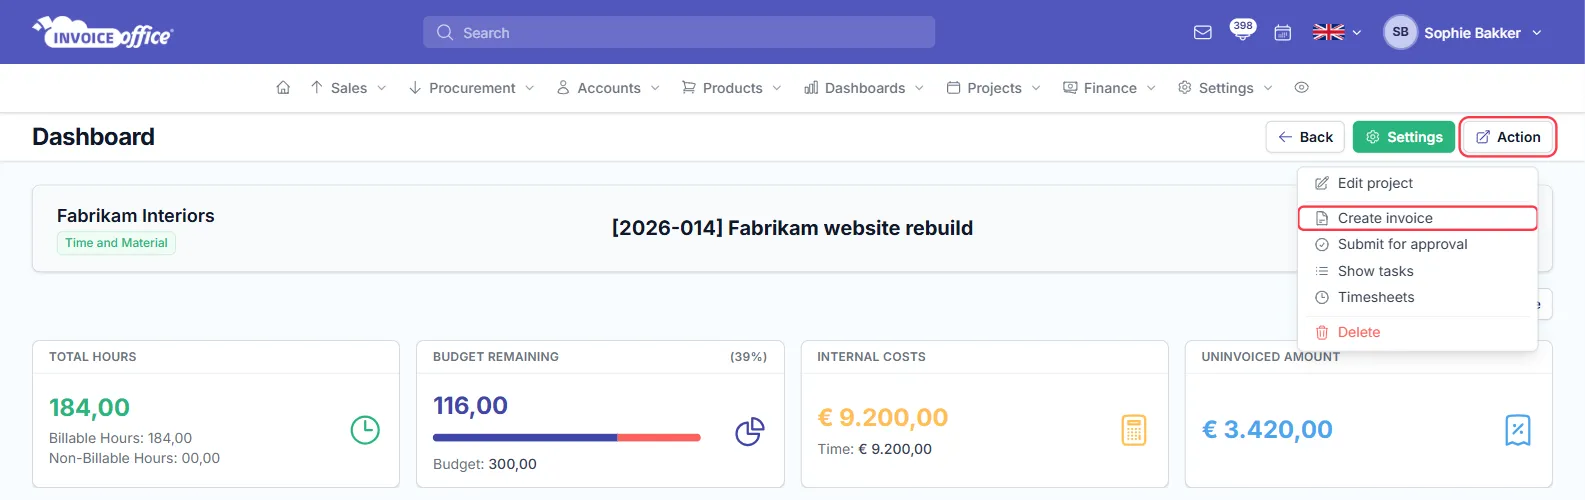
Invoice Office then asks which hours to bill and how much detail to print:
- Billable hours — the selected timesheet, all uninvoiced billable hours, uninvoiced timesheet corrections, or the hours in a period you choose.
- What to show per line — any of Date, Description, People, Project, Project code and Task.
- Invoice type — Detailed row data, or a summary by project, task or team hours.
Create it, then send it to your customer the same way as any other invoice.
Getting accurate time
- Log as you go. Timers beat reconstruction; hours written up on Friday are always rounder and usually wrong.
- Log against the right project. Time on the wrong project is invisible on the invoice it belonged to.
- Get approval done promptly. Approval close to the work is when someone still remembers whether it was reasonable.