The product table is the middle of your invoice — description, quantity, unit price, VAT, total. Sometimes a customer wants those columns in a different order, and you can drag them into whatever order you need.
Where the column order lives
It is set from the document itself, not from the document design. Open an invoice (or any other document), then on the product table click the ⋯ button and choose Display Columns.
The panel that opens is Fields, with three sub-tabs: Header, Rows and Totals. The product table columns are on Rows.
Reorder the columns
Each row in the list has a ⇅ handle on the left. Drag a column by that handle and drop it where you want it to sit — the columns reorder as soon as you drop them.
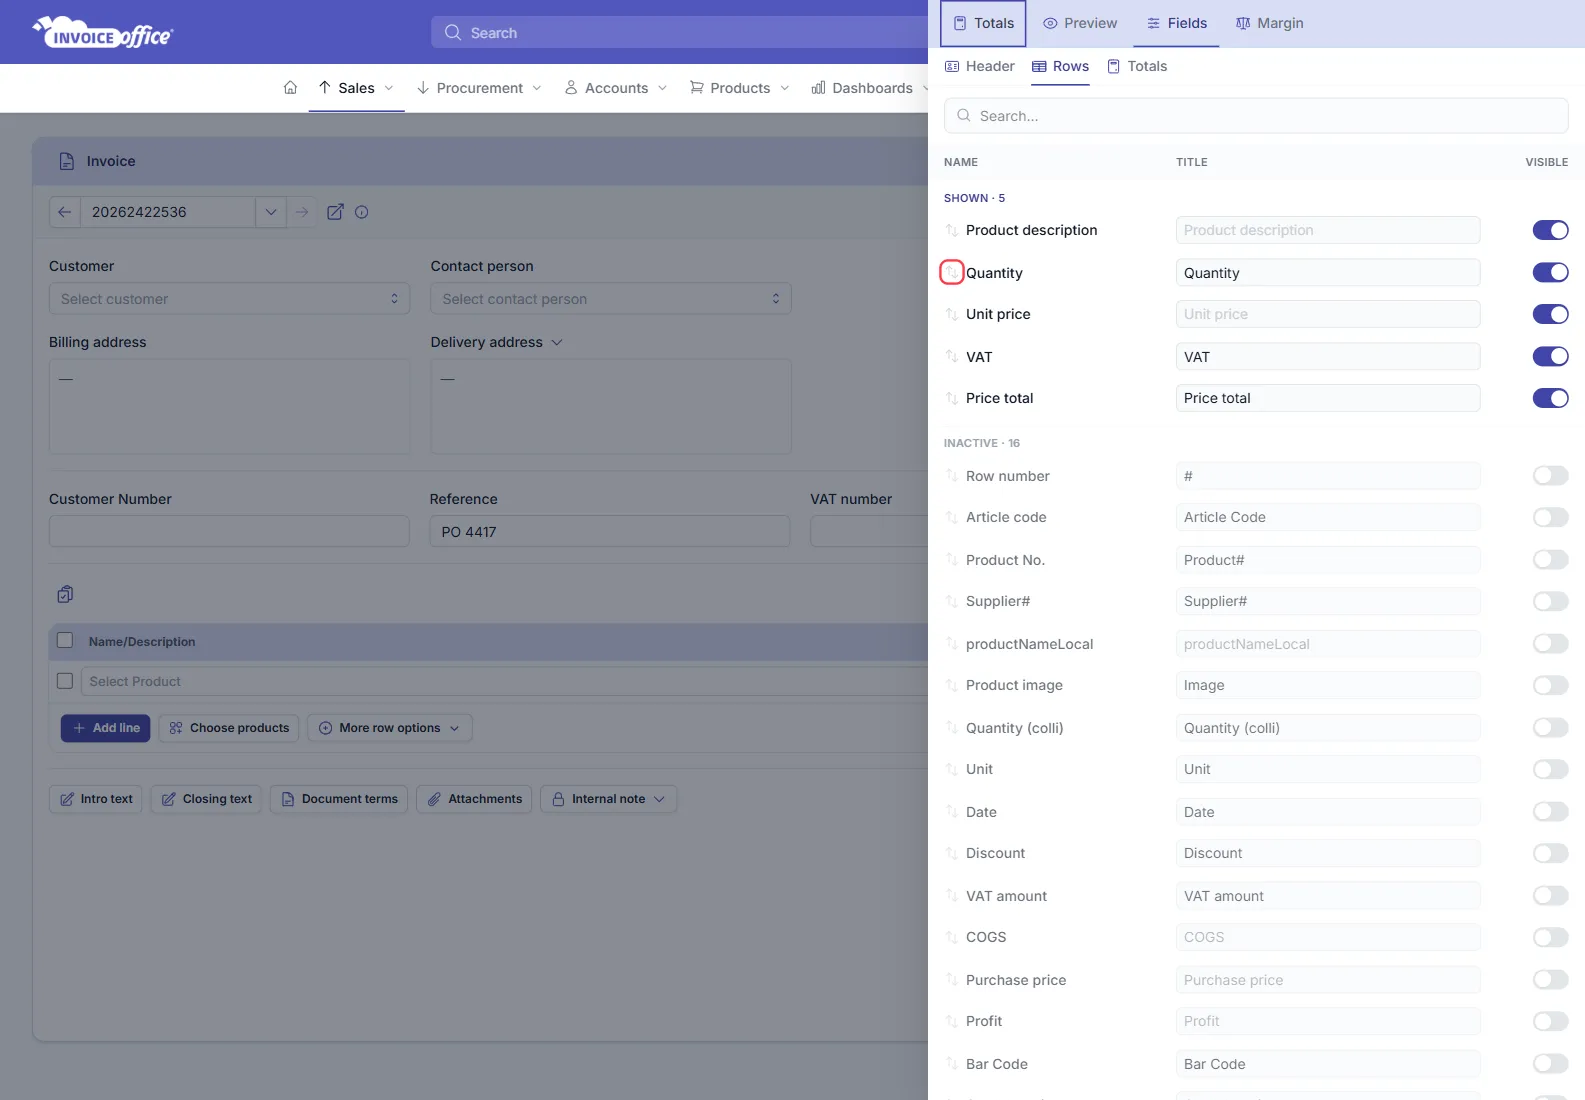
The list is split in two: SHOWN holds the columns currently printed, in their printed order, and INACTIVE holds everything available but switched off — row number, article code, product number, unit, date, discount, VAT amount, purchase price, profit, bar code, stock location and more.
Rename or hide a column while you are there
The same panel does two more jobs:
- TITLE — the middle column is an editable field holding the heading that is printed. Type over it to call Quantity something else. See How to change the label name.
- VISIBLE — the toggle on the right moves a column between SHOWN and INACTIVE. See Add or delete document data.
Column width is a different setting
Do not confuse order with width. Widths live in the document template: open the design, switch to Document template, click the document table, and its Content tab shows Specification columns with a slider per column, each defaulting to Auto.
Getting the arrangement right
- Order it the way it is read: what it is, how many, what each costs, what that totals.
- Watch the width. Long descriptions need room and every column takes some, so preview with your longest real product name.
- Preview before you send. Use Preview in the document’s top right to see the printed result.