With direct debit in Invoice Office you collect open invoices automatically from your customers’ bank accounts instead of waiting for them to pay. You record each customer’s mandate once, then select the invoices to collect and generate a SEPA direct debit file that you upload to your bank. This guide covers the whole cycle: the creditor identifier, mandates, batches, tracking a collection and handling one that comes back.
Before you start
- SEPA only. Invoice Office creates SEPA CORE (consumers) and SEPA B2B (businesses) collection files, for invoices in euros. UK Bacs Direct Debit is not supported.
- You need a creditor identifier from your bank — the SEPA creditor ID (in the Netherlands, the Incassant ID). You usually get it through your bank when you sign a direct debit agreement with them.
- Your company bank account must be in Invoice Office, with its IBAN as the Bank account number, under Settings → Bank accounts (in the settings menu on the left — see add your bank account details). The money is collected into that account. Without one, Direct debit shows no form at all — only the message that there are no open invoices to collect.
- Generating the file needs a Pro license. Without a Pro license you can set everything up, but the Generate SEPA file button stays locked.
Step 1 — Enter your creditor identifier
- Go to Finance → Direct debit and open Settings.
- Enter your SEPA creditor identifier and the Creditor name.
- Click Save.
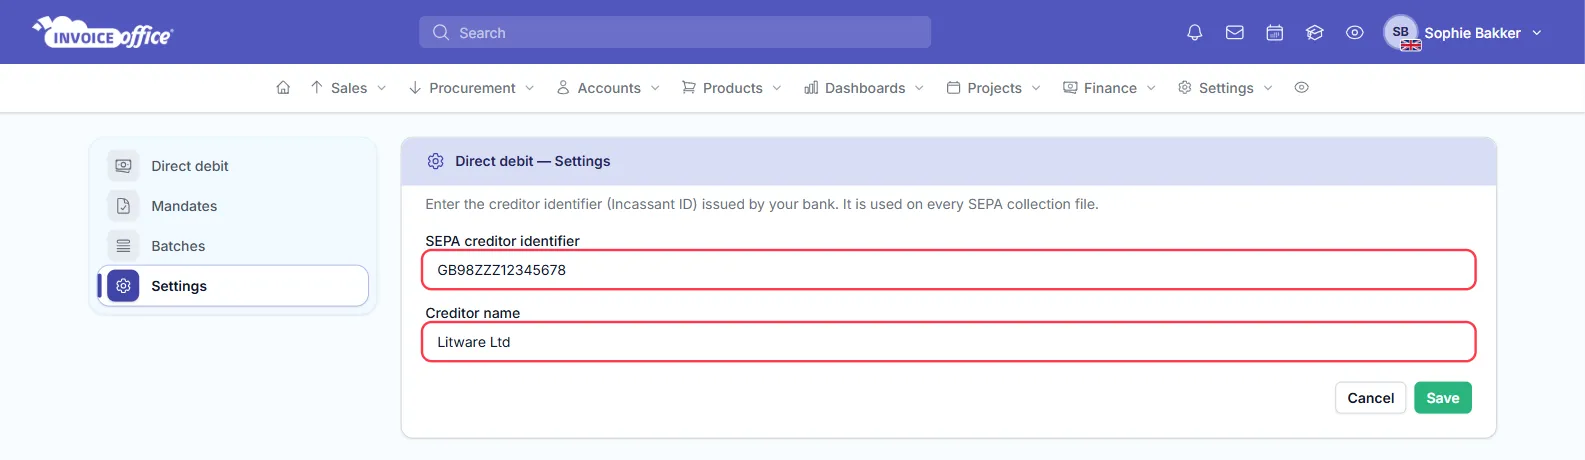
Until the creditor identifier is filled in, the Direct debit page reminds you to set it before you can generate a collection file.
Step 2 — Add a mandate for each customer
A mandate is your customer’s permission to collect from their account. You need a signed mandate before you may collect, and Invoice Office only offers invoices of customers with an Active mandate.
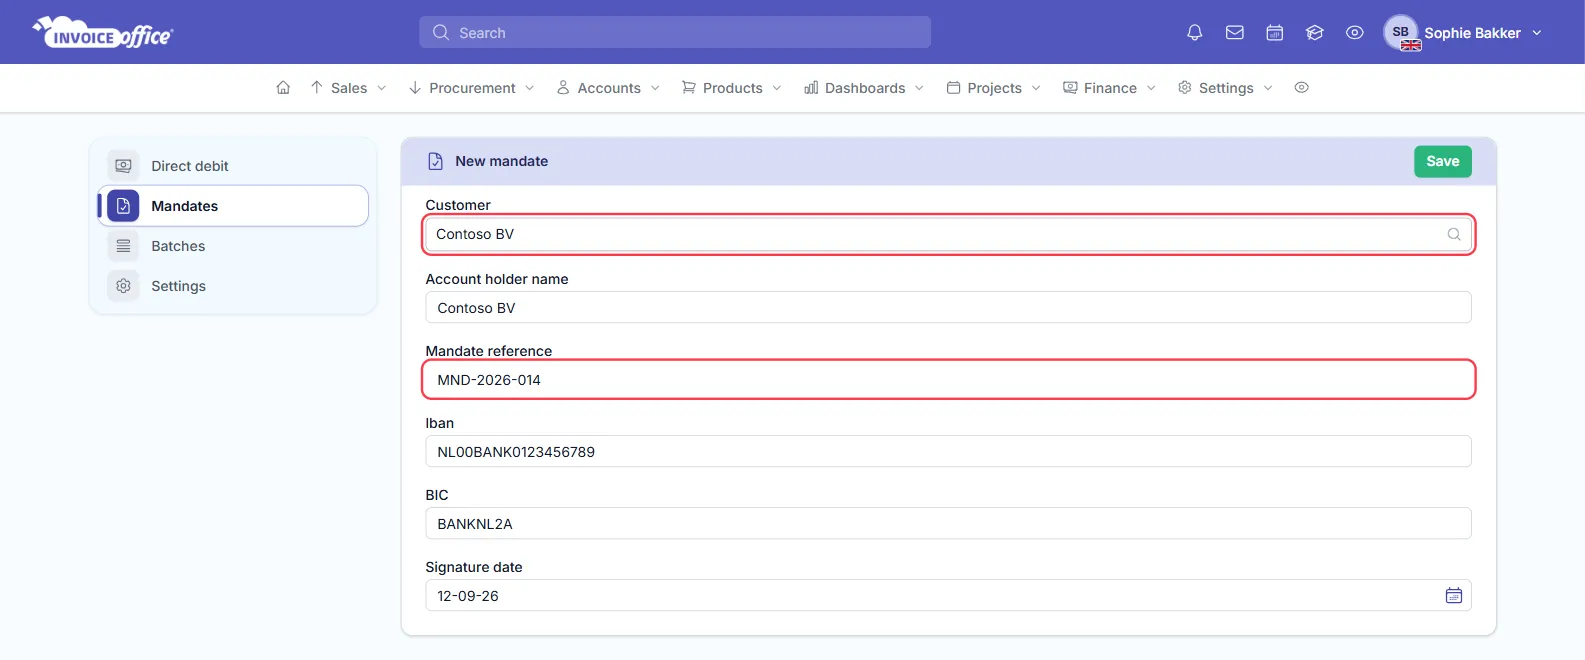
- Open Mandates and click New mandate.
- Choose the Customer. If the customer’s bank details are already in Invoice Office, the Account holder name, Iban and BIC are filled in for you — check them against the signed mandate.
- Enter the Mandate reference — the unique reference printed on the signed mandate form — and the Signature date. Fill in the BIC if the customer’s IBAN is from outside the EEA, for example the UK or Switzerland — the file cannot be generated without it.
- Click Save.
Mandates lists every mandate with its Customer, Signature date and Status — Active or Revoked. Use Edit to correct one, or Revoke when a customer withdraws their permission; their invoices are then no longer offered for collection.
Step 3 — Select the invoices and generate the SEPA file
Open Direct debit. It lists every invoice you can collect: finalized invoices in euros, open or overdue, with an amount still unpaid, for customers with an active mandate — with the Invoice number, Customer, Mandate reference, Amount due and Due date.
- Tick the invoices you want to collect, or tick the box in the header to select them all.
- Choose the Scheme: SEPA CORE for consumers, SEPA B2B for business customers who signed a B2B mandate.
- Choose the Bank account the money should go to.
- Set the Collection date. Invoice Office suggests one five business days ahead; it must be at least two business days away and not on a weekend.
- Click Generate SEPA file.
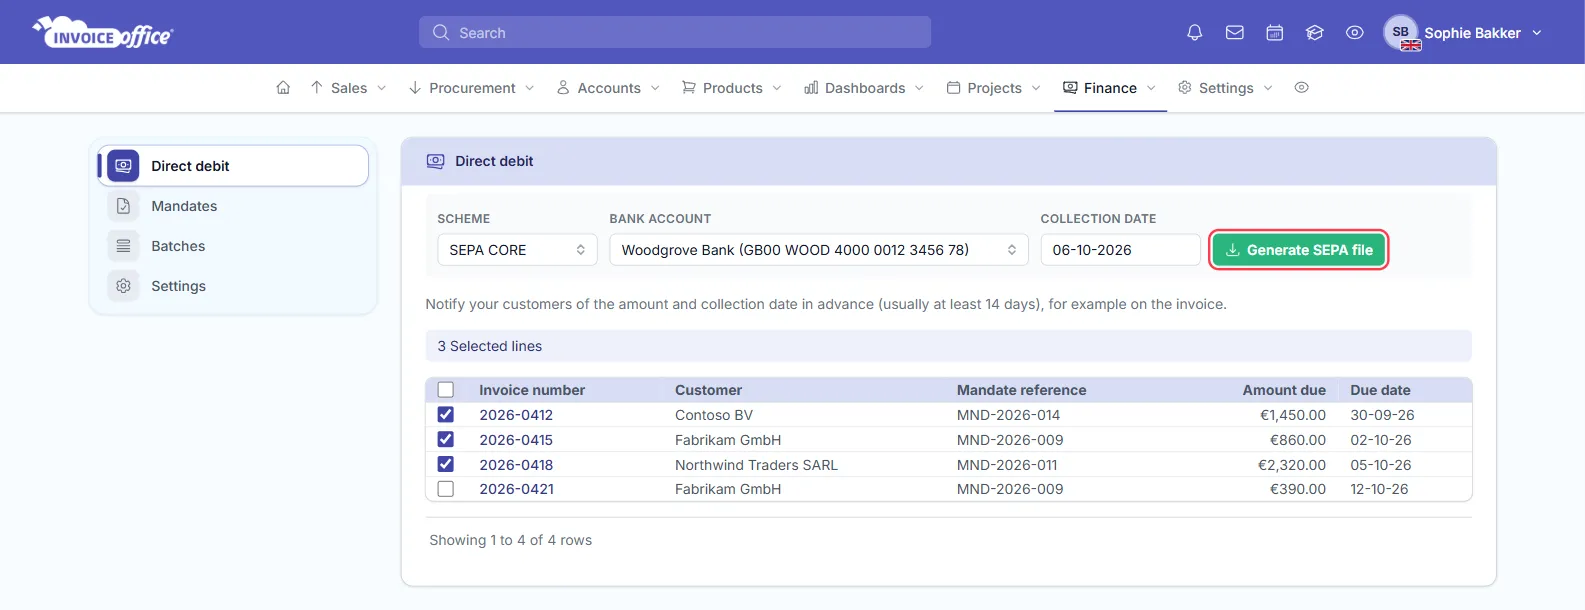
Invoice Office creates a batch and downloads the SEPA collection file. Invoices in a batch that is still open — Generated or Uploaded — are not offered again. After you mark a batch as executed, register the payments promptly: an invoice that is still unpaid in Invoice Office appears on Direct debit again.
Let your customers know the amount and collection date in advance — usually at least 14 days before, for example on the invoice itself.
Step 4 — Upload the file and track the batch
- Log in to your online banking and upload the downloaded file as a direct debit batch.
- Back in Invoice Office, open Batches. Each batch shows its Collection date, Scheme, Status and Amount — the number of collections and the batch total (3 × €4,630.00 means three collections totalling €4,630.00). Open the batch’s Action menu (⋮) and choose Mark as uploaded, so you can see it has gone to the bank.
- Once your bank has collected the money, choose Mark as executed in the same menu. Every collection in the batch that has not been returned is then marked Settled.
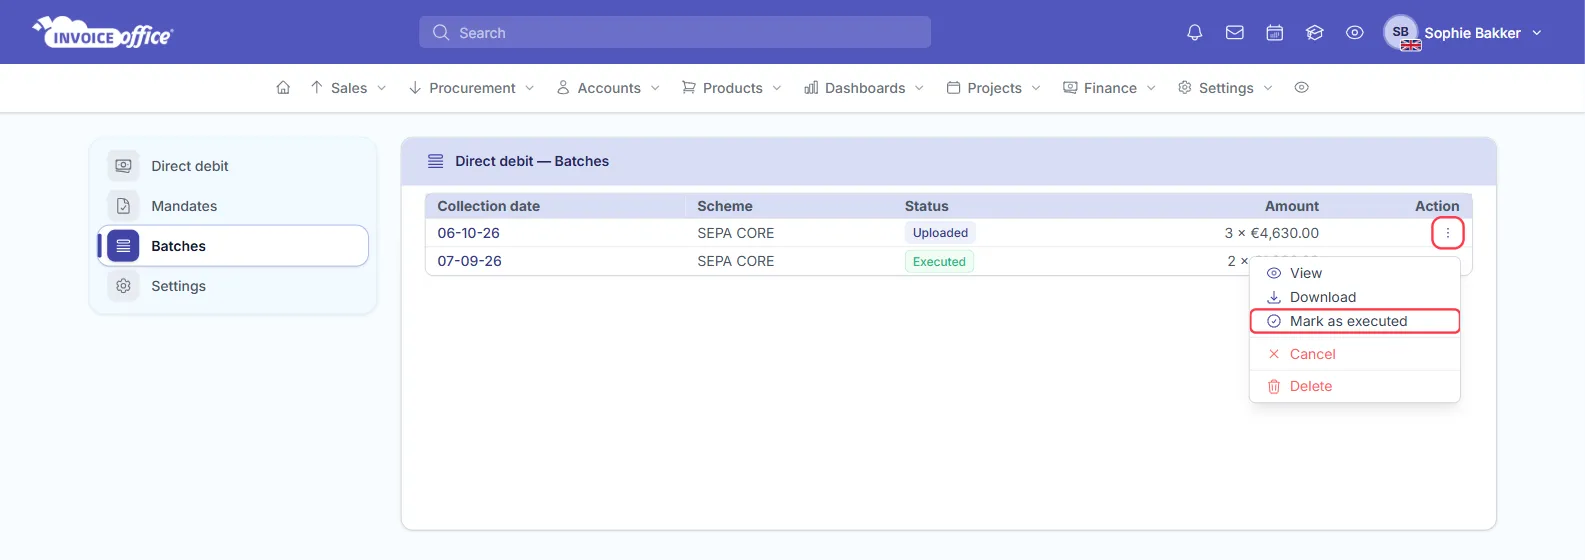
A batch goes from Generated to Uploaded to Executed, or Cancelled if you stop it. View shows the collections in a batch with their Amount, Description and Status, and Download gets the file again.
Marking a batch as executed does not register the payments on the invoices. Import your bank statement to register the collected amounts on the invoices — see import and reconcile bank statements. If your bank books the whole batch as one amount, register the payment on each invoice yourself — see how to register or modify a payment.
Step 5 — Handle a failed collection
Sometimes a collection comes back — the account had too little money, the mandate was cancelled at the bank, or the customer asked for a refund.
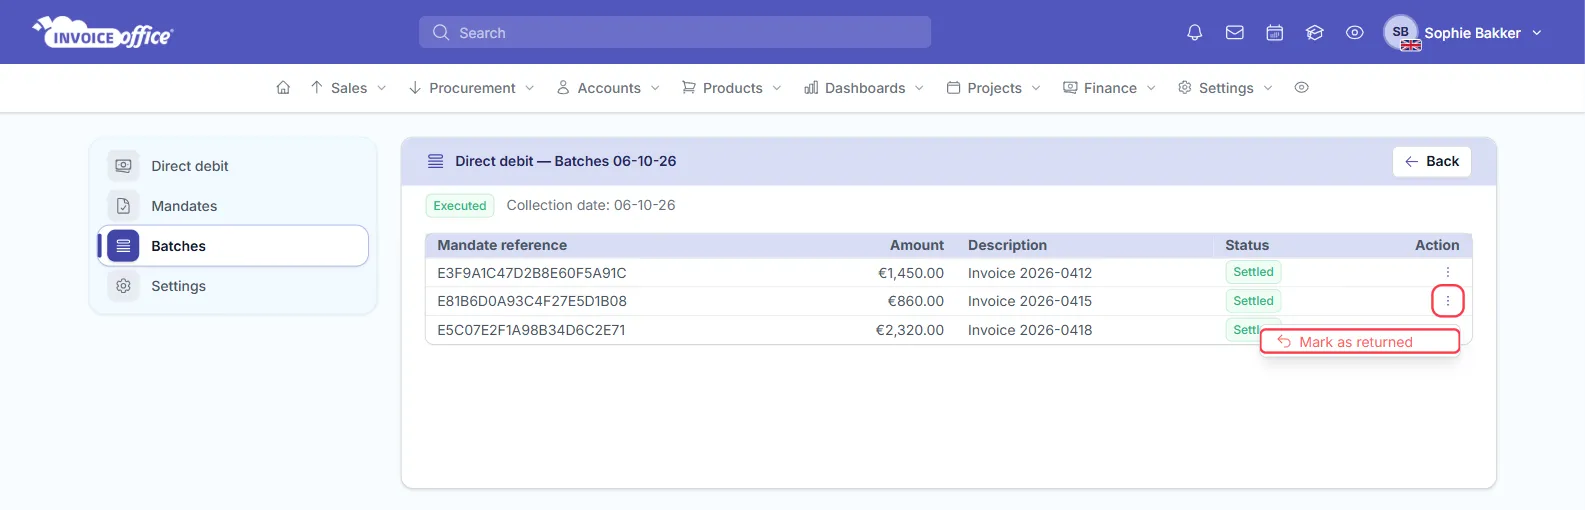
- Open Batches and choose View in the batch’s Action menu.
- Open the Action menu (⋮) of the collection that failed and choose Mark as returned. It is marked Returned.
- The invoice is offered on Direct debit again, so you can include it in the next batch — or contact the customer and ask them to pay another way.
Made a mistake in a batch that is not executed yet? Choose Cancel in its Action menu to put all its invoices back up for collection, or Delete to remove it from the list as well.