When you import a bank statement in Invoice Office, every transaction on it is compared with your open invoices and purchases. Payments that clearly belong to an invoice are matched and registered for you, and the rest are marked so you can see at a glance what still needs a person. This guide covers the whole bank reconciliation: the file formats you can import, how the automatic matching works, and how to handle the transactions it could not match.
Step 1 — Download your statement from your bank
In your online banking, export the transactions for the period you want in one of these formats:
- MT940, MT940 Structured or an MT940 .swi file
- a .csv file, or an Excel workbook through the CSV import
MT940 is the most reliable choice when your bank offers it: the format is fixed, so nothing needs to be mapped.
Step 2 — Import the file
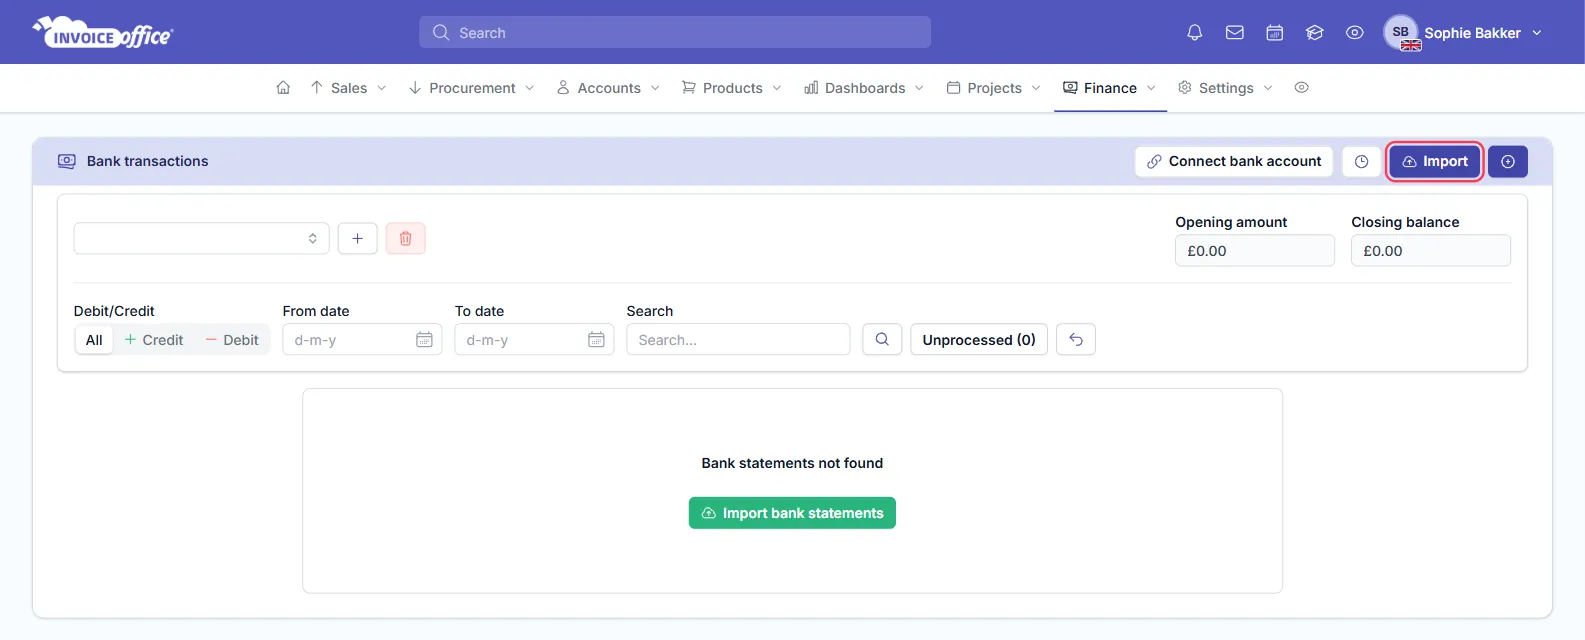
Go to Finance → Bank transactions, click Import, choose the file format, upload your file and click Start import.
- Go to Finance → Bank transactions and click Import. If nothing has been imported yet, the green Import bank statements button in the middle of the page does the same.
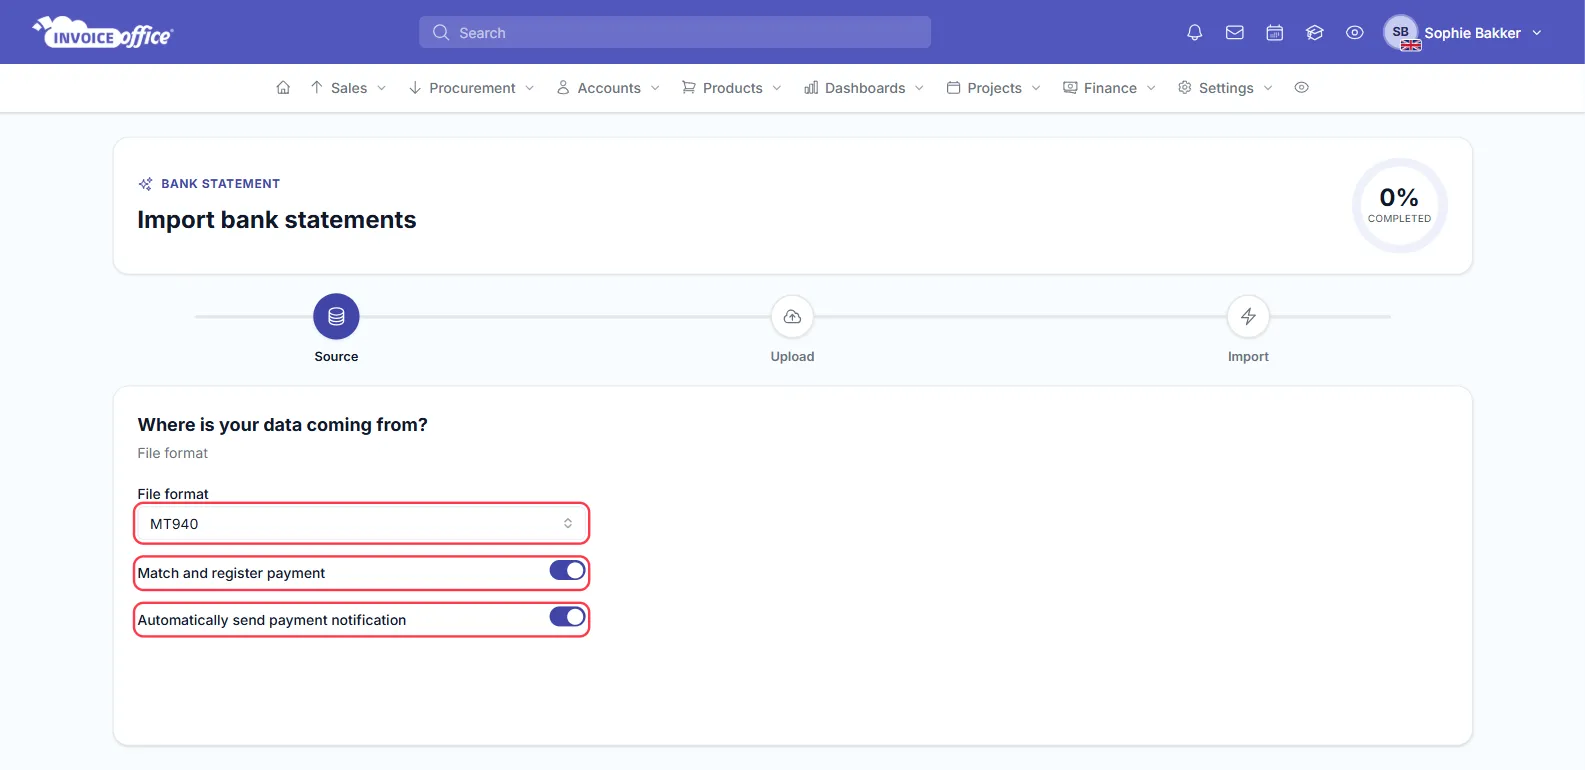
- Under Where is your data coming from?, choose the File format of your file.
- Leave the two switches on unless you have a reason not to:
- Match and register payment — registers the payment on every invoice or purchase that is matched automatically, so its status updates straight away.
- Automatically send payment notification — emails the customer a payment notification for each invoice payment the import registers (only works with Match and register payment on).
- Click Continue, drag your file into Upload your file (or click to browse), and click Start import.
Wait while the import runs. When it is done you land on Bank transactions with the new lines already matched. Lines that were imported before are skipped, so an overlapping period does not create doubles; uploading the exact same file again is refused.
Importing a CSV? Choosing .csv file opens the CSV import instead. Upload a CSV or Excel file, Map fields — map at least Account number, Date, Amount and Description; money going out must be a negative amount — check the Preview and import. Download template gives you a file in the layout it expects. The two switches don’t apply here: a CSV import always registers automatic matches and sends no payment notifications, and when it is done it takes you to the bank statement dashboard.
Step 3 — Check how payments are matched automatically
Check the match status of each line — only Automatically matched lines are registered as payments for you.
Every line on Bank transactions shows its match status:
| Status | What it means |
|---|---|
| Automatically matched | The amount equals the document’s total and the description contains its invoice or purchase number. |
| Suggested match | Only one of the two fits — the amount or the number. Invoice Office links a likely document for you to check. |
| Manually matched | You matched the line yourself. |
| Match failed | No open document fits. Lines you booked to a ledger account also keep this label. |
Incoming money (Credit) is compared with your invoices and outgoing money (Debit) with your purchases. Invoices and purchases that are already paid are left out.
With Match and register payment on, only Automatically matched lines are registered as payments. A Suggested match is linked to its document but not registered — look through the full list for them and use Register payment to confirm the ones that are right. Switched Match and register payment off? Then automatically matched lines are not registered either, and wait for you under Unprocessed.
Step 4 — Match the remaining transactions
Open Unprocessed, then use Register payment for invoice or purchase payments and Register income or Register expense for everything else.
Click Unprocessed above the list to see only the lines that are not linked to any document or booking yet.
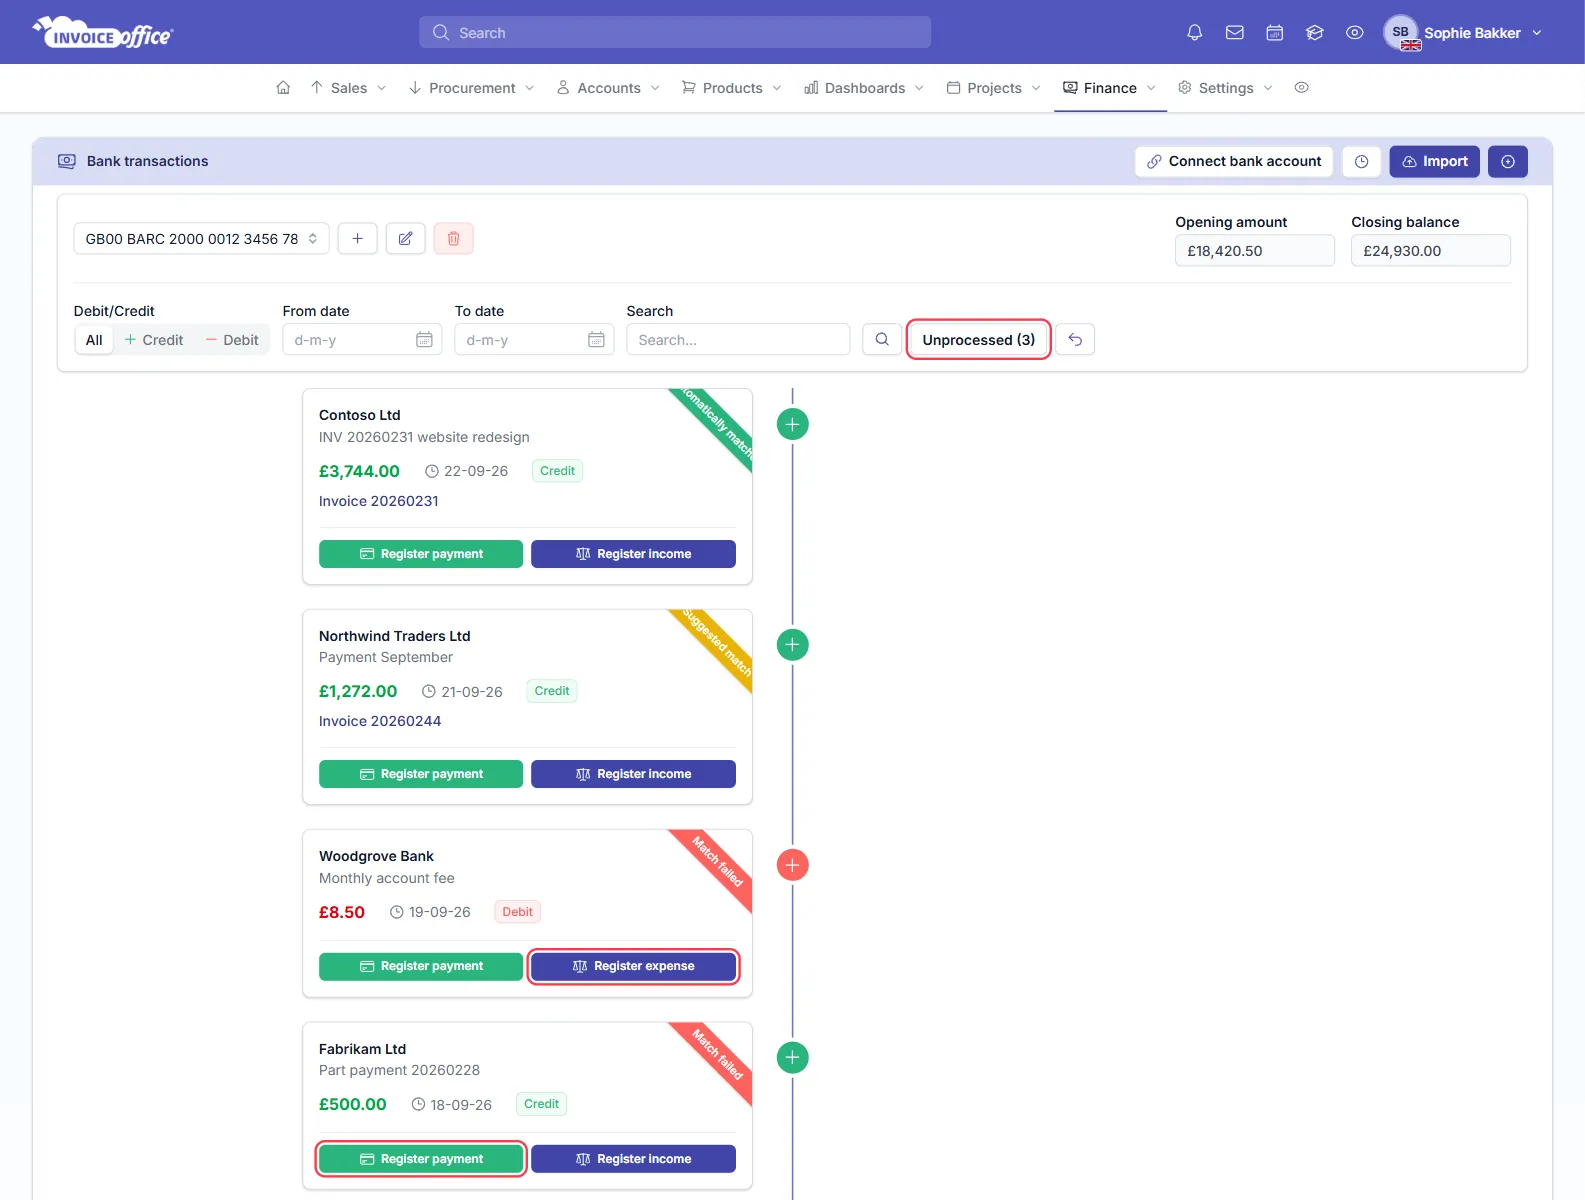
For each one, pick what it is:
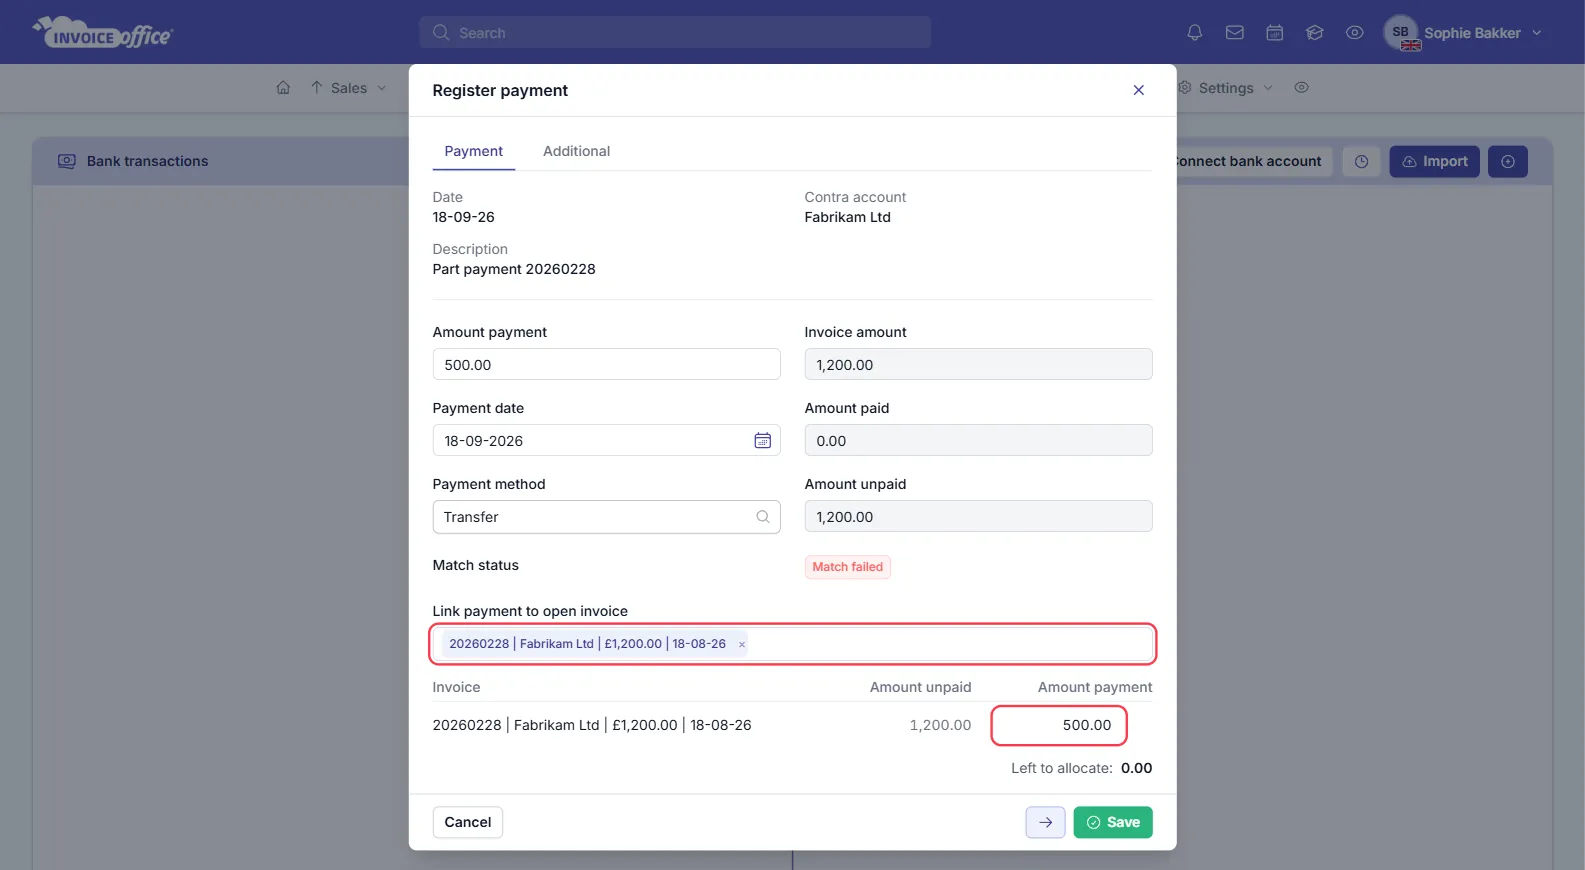
- Register payment — the line pays one or more invoices (or, for money going out, purchases). Choose the documents under Link payment to open invoice (for money going out: Document number), divide the amount over them in Amount payment, and check that Left to allocate is 0.00 before you click Save. The payment is registered on each document, just as it would be from the invoice itself.
- Register income or Register expense — the line is not an invoice or purchase, for example bank charges, a refund or a transfer to savings. Book it to one or more ledger accounts under Transactions, with the VAT if any, and click Save, or Save and next to move straight on to the next line.
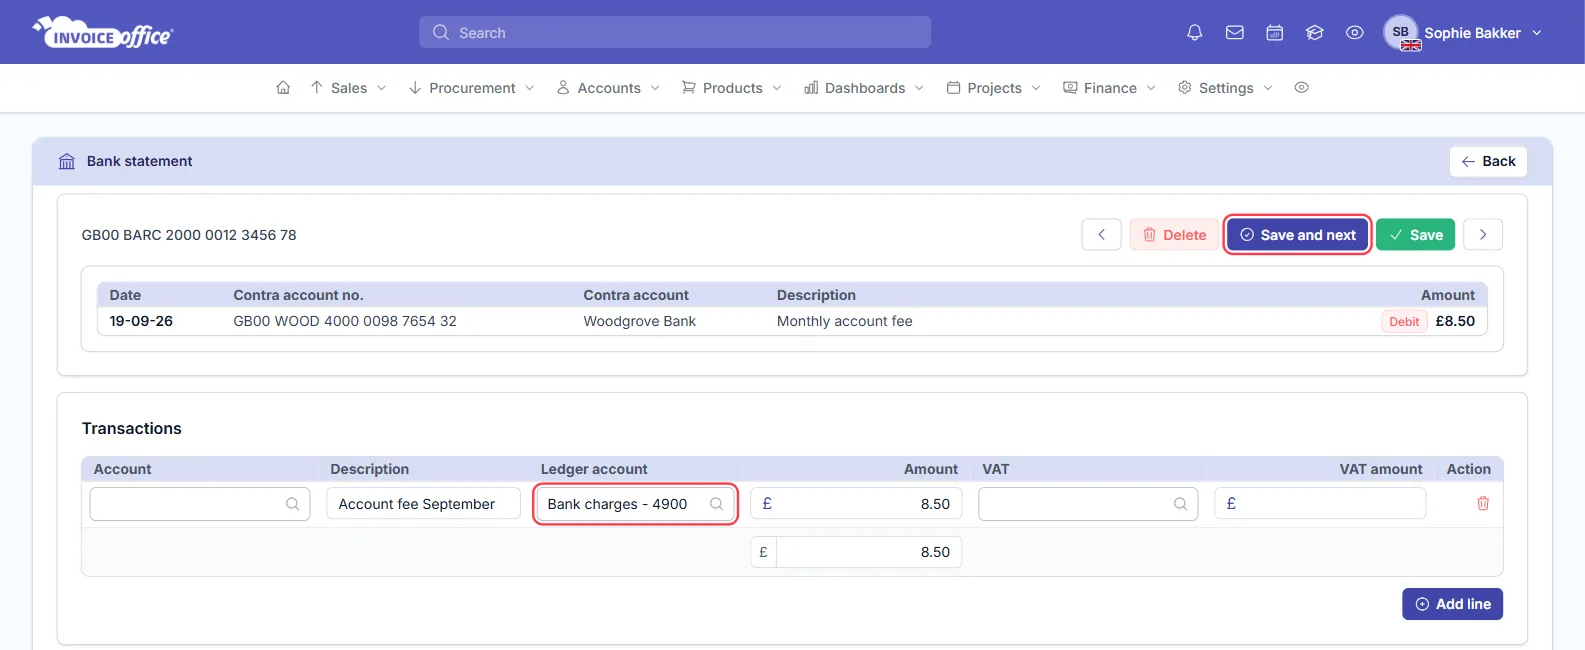
Not ready to decide on a line? Leave it — it stays in Unprocessed until you come back to it.
Step 5 — Finish the reconciliation
There is no separate “close” button: a statement is reconciled when Unprocessed is empty. Compare the Closing balance at the top of Bank transactions with your online banking to check you imported the latest statement.
- Transactions import history lists the MT940 files you imported, with how many lines were new and how many were skipped as duplicates.
- Add transaction lets you enter a single line by hand, for example one your bank left off the export.
- To see where the money went, open the bank statement dashboard or the finance dashboard.