Your bank account details are the payment information customers need to pay an invoice in Invoice Office: the account number (IBAN), the BIC and the name the account is held in. You enter them once under your company settings. Invoice Office then fills them into your invoices wherever the bank placeholders are used, sends the IBAN along with Peppol e-invoices, and offers the account when you register payments or collect by direct debit.
Step 1 — Open your bank accounts
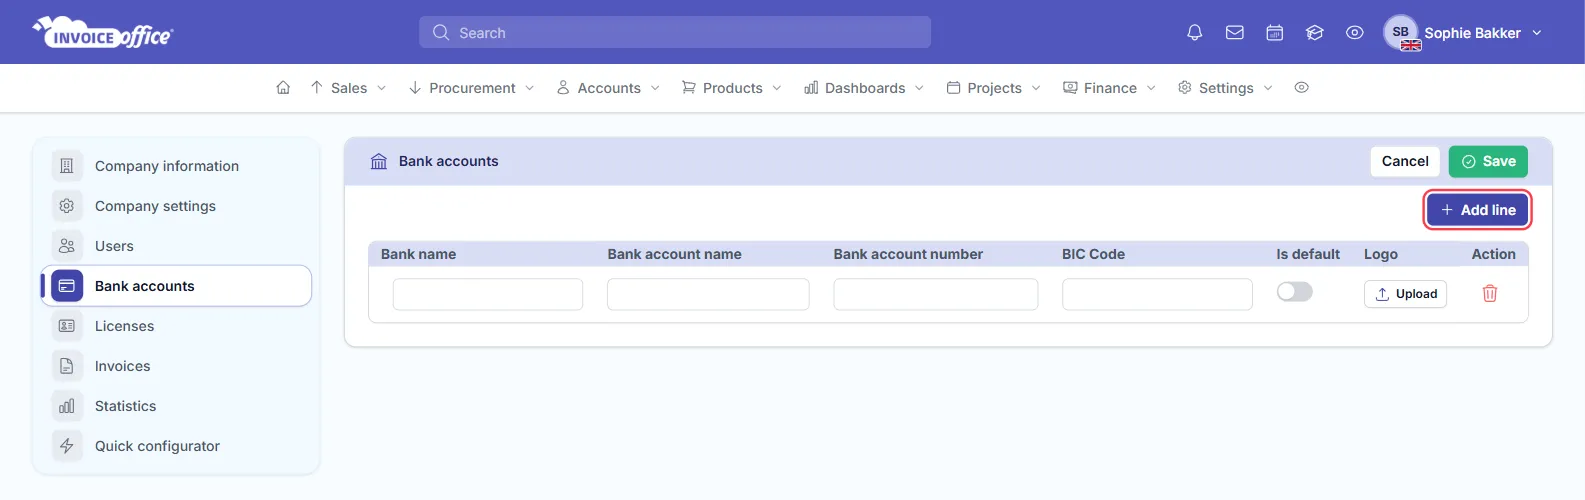
- Go to Settings → Company → Company settings.
- In the menu on the left, click Bank accounts.
The page lists your company’s bank accounts in a table you edit directly: Bank name, Bank account name, Bank account number, BIC Code, Is default and Logo.
Tip: you can also edit your default account on Settings → Company → Company information, on the Bank account tab.
Step 2 — Add your IBAN, BIC and account holder name
- Click Add line if there is no empty row.
- Fill in the row:
- Bank name — the name of your bank.
- Bank account name — the name the account is held in, usually your company name.
- Bank account number — your IBAN, or your account number if your bank does not use IBANs.
- BIC Code — your bank’s BIC (SWIFT code).
- Click Save.
Bank name and Bank account number are required on every row.
Step 3 — Set your default bank account
Switch on Is default on the account customers should pay into, and click Save. Only one account can be the default: switching it on for one row switches it off for the others.
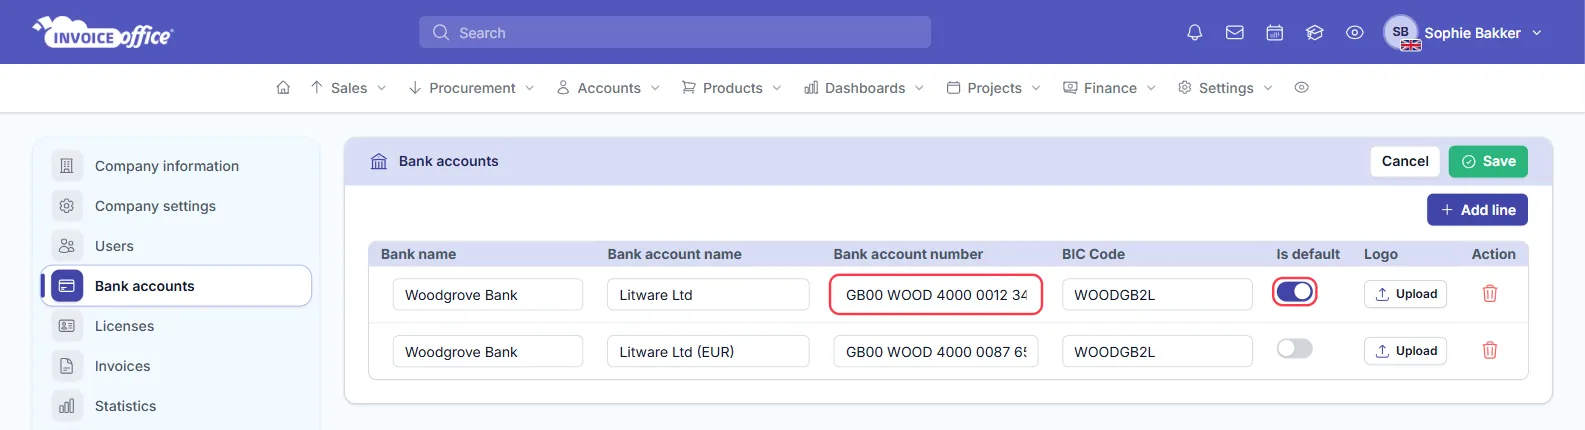
The default account is the one Invoice Office uses on your documents. If no account is marked as default, Invoice Office uses one of your other accounts — so always mark the right one as default.
Step 4 — Show your payment information on the invoice PDF
Your bank details appear on an invoice wherever its text uses the bank placeholders. They are filled in from your default bank account when the invoice PDF is generated:
| Placeholder | What it prints |
|---|---|
[accountBankNumber] | the bank account number |
[accountBankBicCode] | the BIC code |
[accountBankHolderName] | the bank account name |
[accountBankName] | the name of your bank |
A good place is the text of your invoice’s document terms, for example:
Please make the payment within [documentDateExpireDays] days to our bank account [accountBankNumber] (BIC [accountBankBicCode]) in the name of [accountBankHolderName], with a reference of the invoice number [documentNumber].
Go to Settings → Documents → Document terms, open the terms your invoices use, and type the placeholders into the Document terms & conditions text, with Show text on document switched on. See how to use document terms.
If you leave the bank name, account name or account number empty, a label-and-value pair such as
[labelBankName]: [accountBankName] is left out, so you don’t get an empty label. That doesn’t work for
the BIC or for placeholders inside your own sentences, so only use [accountBankBicCode] once you have
filled in a BIC Code.
![The Document term window in Invoice Office for the English (UK) invoice term Invoice 30 days, with the Document terms & conditions text using the placeholders [accountBankNumber], [accountBankBicCode] and [accountBankHolderName] outlined in red and Show text on document switched on](/_astro/support-bank-account-details-document-terms.BZ5UzBrK_aA8IV.webp)
Step 5 — Add more than one bank account
Click Add line for every extra account — for example a savings account, or an account in another currency — and click Save. All your accounts are then available elsewhere in Invoice Office:
- Registering payments — pick the Bank account the money came in on. Your default account is preselected; see how to register or modify a payment.
- Direct debit — choose which account a collection is paid into; see how to use direct debit.
- Bank statements — each imported statement belongs to the bank account on the file; see import and reconcile bank statements.
The bank placeholders on your invoices, and the IBAN sent with Peppol e-invoices, always use the default account. To remove an account, delete its row and click Save.