The VAT dashboard in Invoice Office shows all the VAT you collected on sales and paid on purchases for a period, and adds it up box by box for your VAT return. In the app it is called VAT declaration. Pick the period, check the figures, and export a summary to file with your tax authority or send to your accountant.
Invoice Office prepares the figures; it does not submit the return for you. You file it yourself — or your accountant does — with the numbers from the report.
What counts towards the numbers
- The report reads your ledger. Invoices, credit notes, expenses and purchases are posted to it when you finalize them, so draft documents are not counted.
- A document counts in the period its date falls in.
- Every amount reaches a box through its VAT code. Each VAT code is linked to one or more boxes of your VAT return; a VAT code that is not linked to any box does not show up in the report at all. See How can I change the VAT? for the VAT codes themselves.
Step 1 — Open the VAT dashboard
Go to Finance and, under Reports, choose VAT declaration.
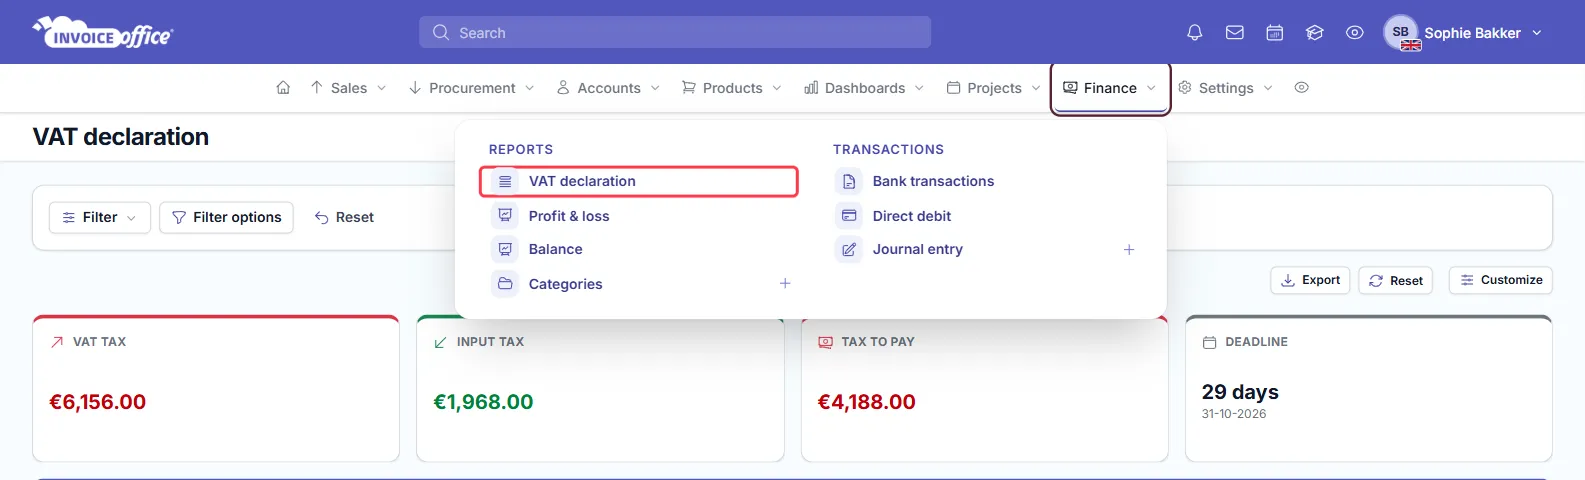
You need permission to view both reports and finance to see this page. If you get a no-access message, ask an administrator to check your role — see how to manage user roles and permissions.
Step 2 — Choose the period of your VAT return
The report opens on the current quarter. To pick another period, use the filter bar at the top:
-
Open Filter and choose a period — for a quarterly return, Last quarter or Current quarter. Current Month, Last Month, Current year, Last year, Last 12 months and Year to date are there too.
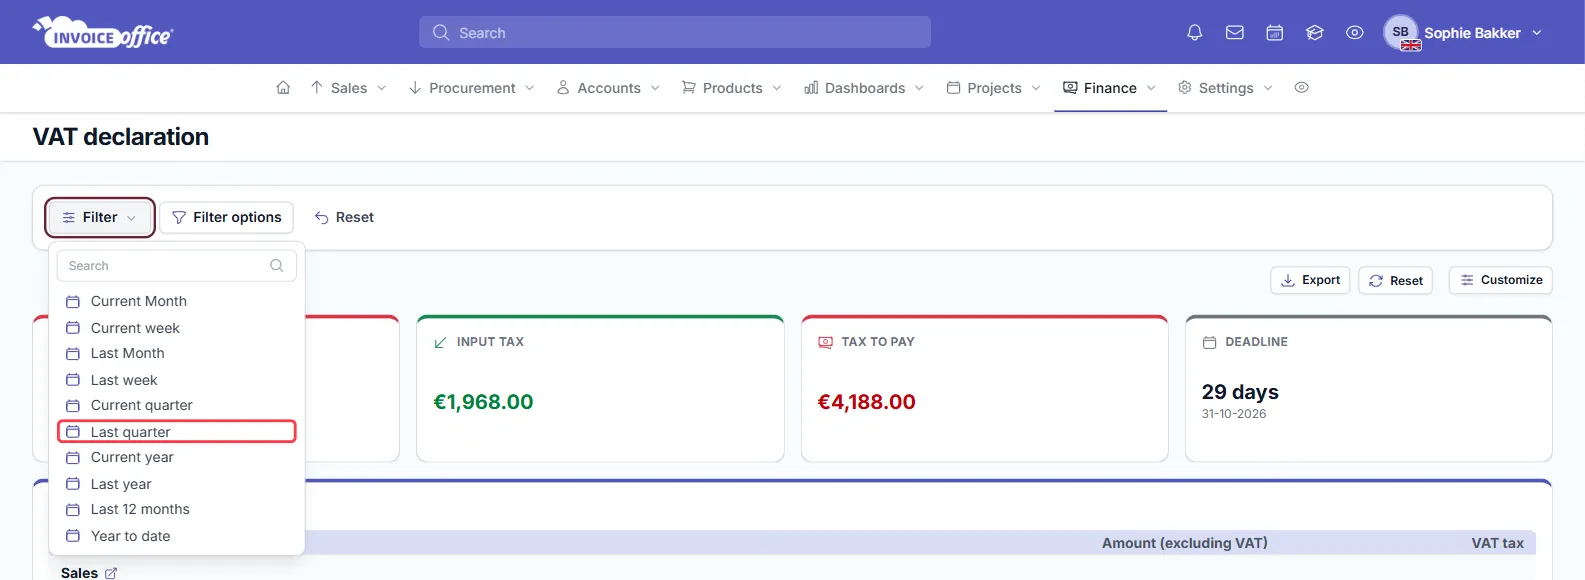
-
For a period that does not match one of these, click Filter options, fill in the start and end date under Date range and click Apply. Save and apply keeps the range in the Filter list, so you can pick it again next time.
-
Reset next to the filter returns to the current quarter.
Step 3 — Read the summary tiles
Four tiles at the top sum up the period:
- VAT tax — the VAT on your sales, which you owe.
- Input tax — the VAT on your purchases and expenses, which you can reclaim.
- Tax to pay — VAT tax minus input tax: what is left to pay for the period.
- Deadline — the number of days left and a date: the last day of the month after the period ends.
The Deadline tile is a reminder, not the official deadline. Deadlines differ by country and by how you pay — check the date with your tax authority or accountant. In the UK, for example, a quarterly VAT return is usually due one calendar month and 7 days after the end of the quarter (GOV.UK).
Step 4 — Check the boxes of your VAT return
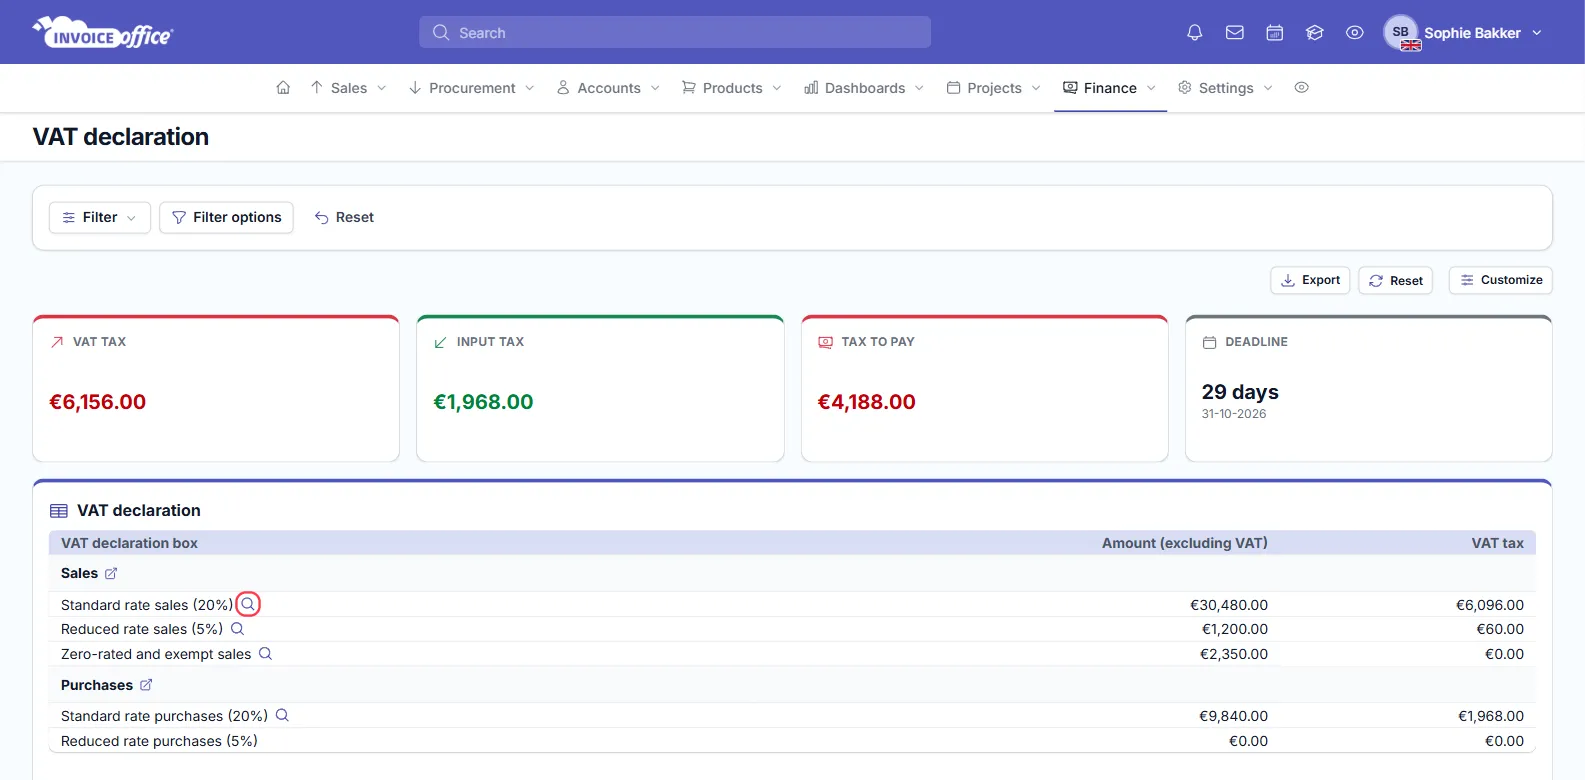
Below the tiles, the VAT declaration table lists every box of your VAT return:
- VAT declaration box — the name of the box. Grey rows are section headings.
- Amount (excluding VAT) — the total of the sales or purchases in that box, before VAT.
- VAT tax — the VAT on them.
These are the figures you copy into the boxes of your return. To see where a figure comes from, click the magnifier next to the box.
A Documents page opens with every booking behind it — date, ledger account, document, document number, account, and debit or credit — which you can filter by document type, ledger account and date, or export. Back returns to the report.
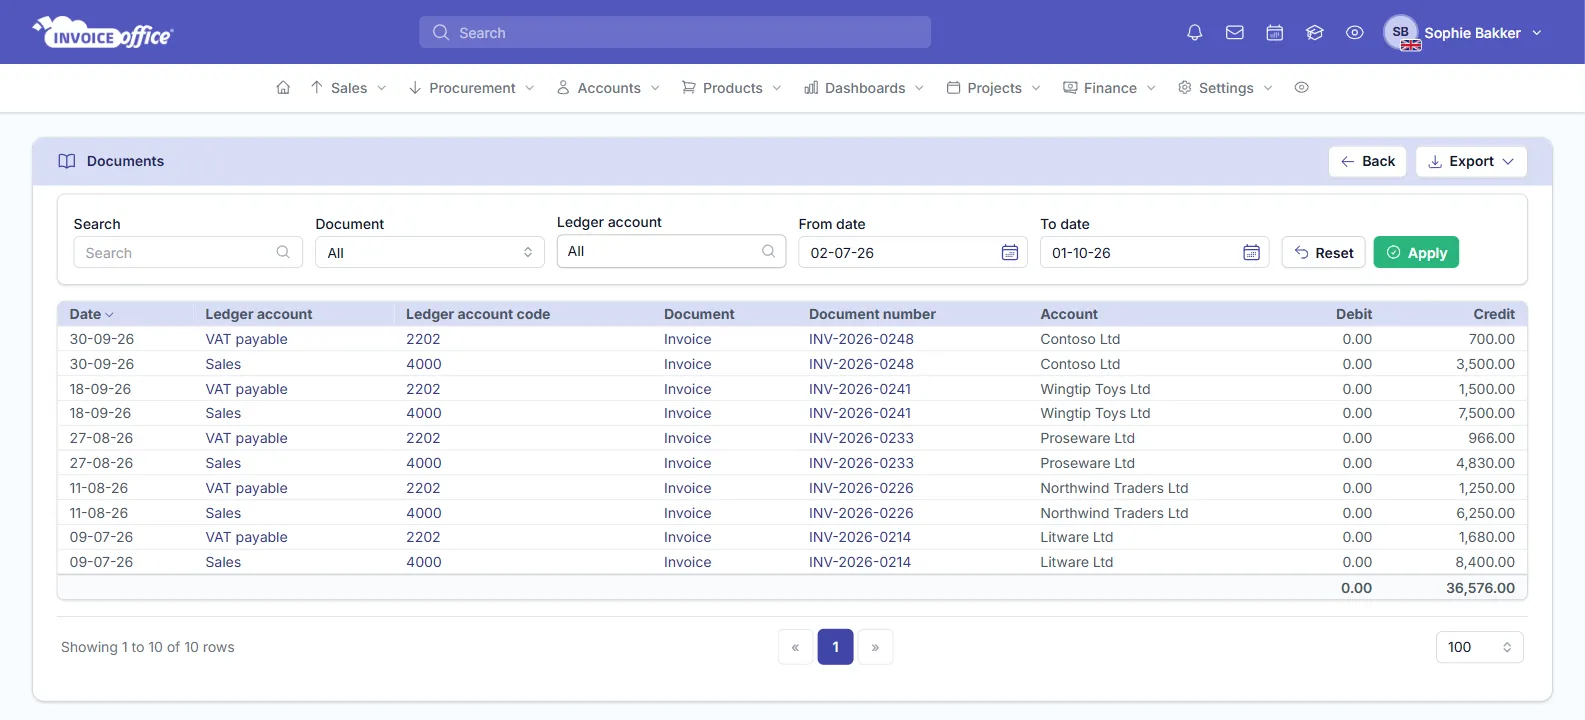
If a figure looks wrong, check it there first. The most common causes are a document that is still a draft, a document dated in another period, or a line with the wrong VAT code.
Step 5 — Export the VAT return summary
Click Export above the tiles and choose PDF, Excel or CSV. The export covers the period you selected in step 2:
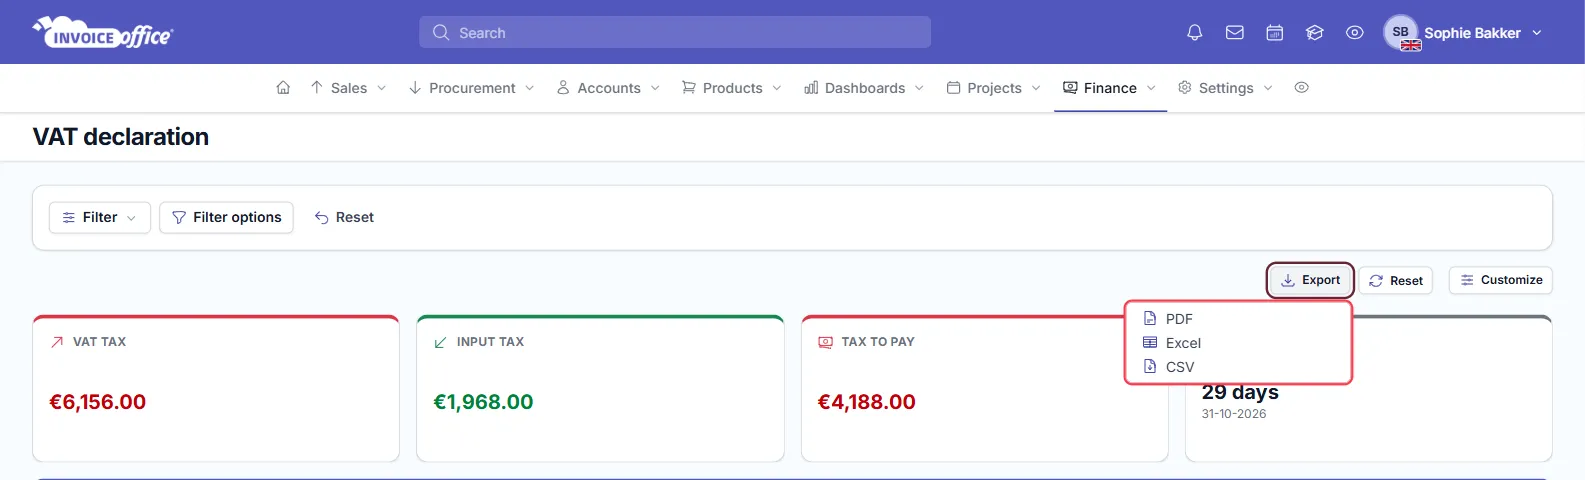
- PDF — a summary to keep with your records or attach to an email to your accountant.
- Excel or CSV — the figures per box, to work with in a spreadsheet.
Change the boxes of your VAT return
The boxes in the table come from your VAT declaration layout. To change it, go to Settings and, under Company, choose VAT declaration layout. There you can:
- Add text row for a section heading, or Add line for a new box, each with a Code and a Description.
- Save to apply the changes to the report.
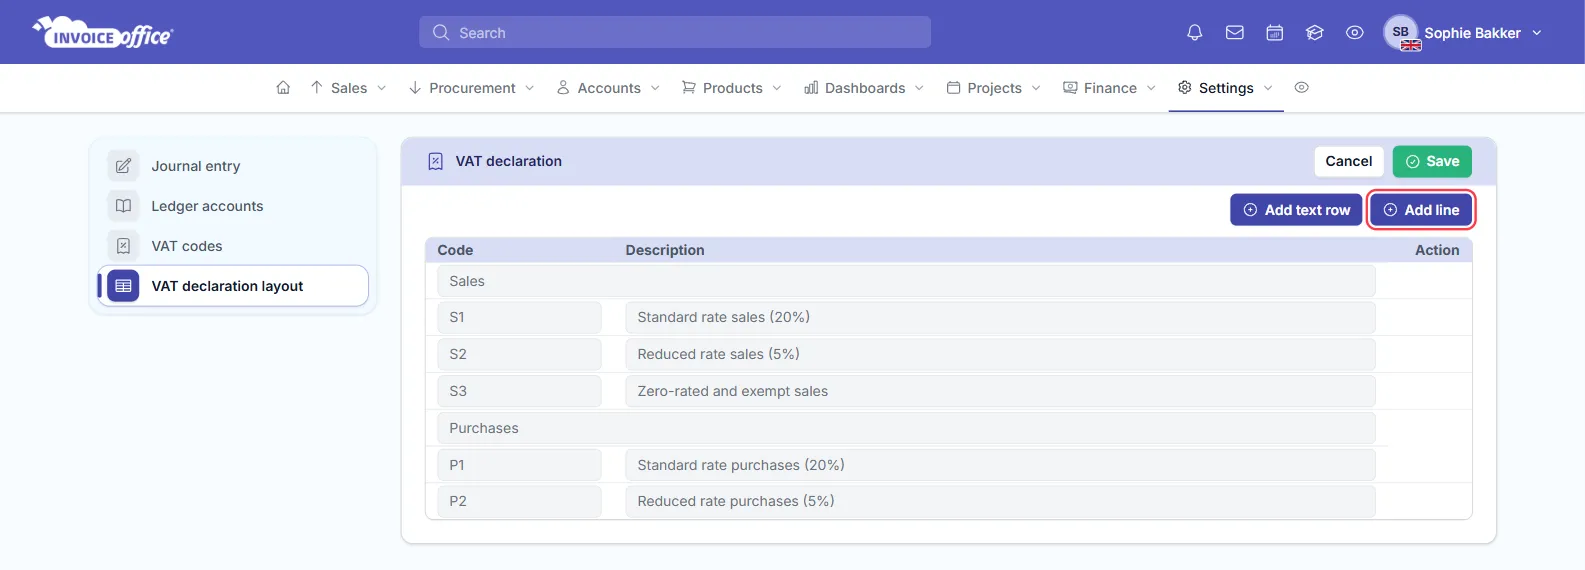
To decide which box a VAT code feeds, open the VAT code under Settings → Company → VAT codes; its VAT declaration section lists the boxes it is linked to. After adding a new VAT code, link it to a box there, or its amounts are left out of your VAT return.
Customize the dashboard
Click Customize to show or hide any of the tiles or the table. You can also drag the cards to another place and resize them. The layout is saved in your browser; Reset next to Customize puts the default layout back.