With multiple price lists in Invoice Office, each of your customers can have their own prices: a wholesale list for resellers, a discounted list for a key account, a list in another currency. You create the price lists once, link one to a customer in their settings, and from then on that customer’s prices fill themselves in whenever you choose them on an invoice, quote or other document. This article shows how to set up the price lists, set customer-specific prices per product, and assign a price list to a customer.
Before you start
- Price lists live under Products → Price lists.
- Price lists are a Pro feature. Without Pro you can still create and edit price lists (the page shows a notice that a Pro licence is required), but the prices are not applied to documents, and changes to a product’s price are not passed on to your price lists.
- Use the same currency for the price list and the customer. A price list in another currency than the document is not applied (more on that below).
Step 1: Create a price list
- Go to Products → Price lists.
- Click Create price list.
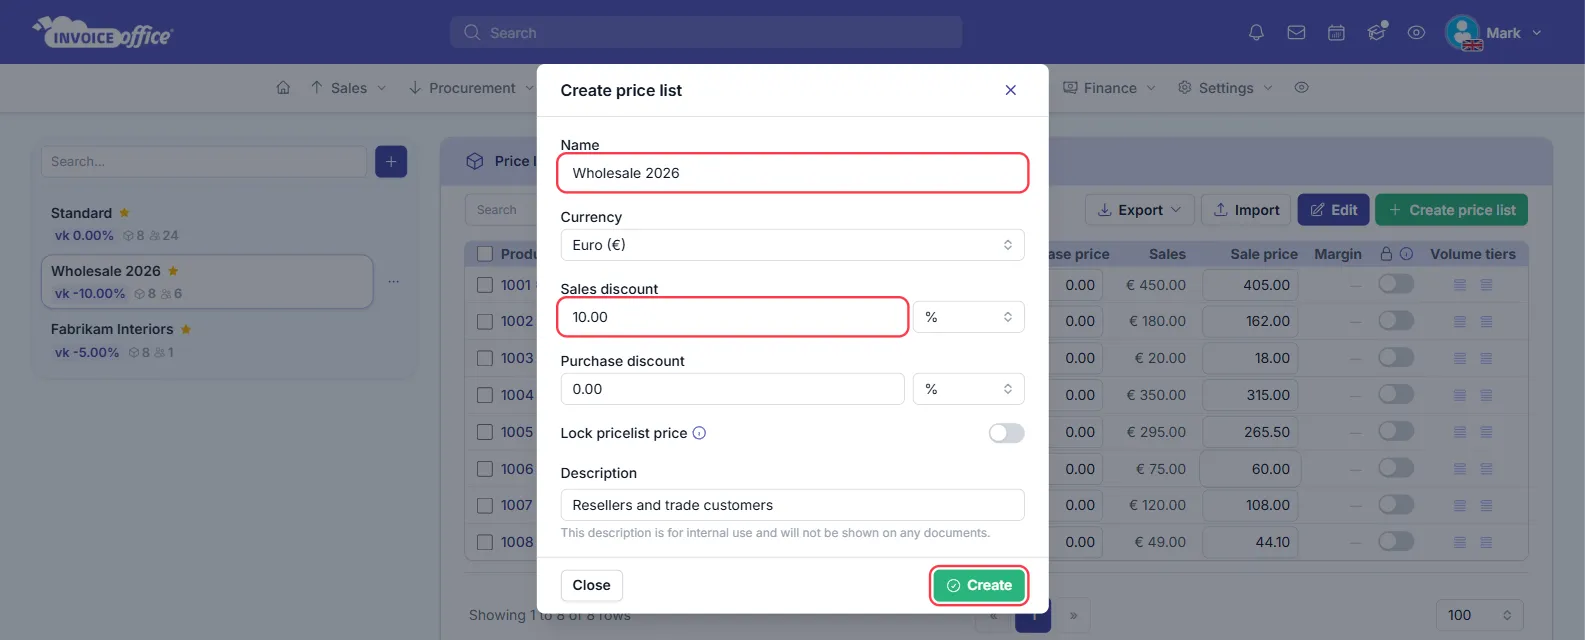
- Fill in the window:
- Name: what you will recognise the list by, such as
Wholesale 2026or a customer’s name. - Currency: the currency of the prices on this list.
- Sales discount: an amount, with % or € next to it. A percentage is taken off every product’s sales price; an amount in € is deducted from every sales price instead.
- Purchase discount: the same, for purchase prices. It fills the list’s Purchase price for every product, which is the price used when the list is applied to a purchase order.
- Lock pricelist price: switch it on to keep the prices on this list as they are when you change a product’s own price. Handy when a customer has been promised a fixed rate for the year.
- Description: for internal use only. It is never shown on a document.
- Name: what you will recognise the list by, such as
- Click Create.
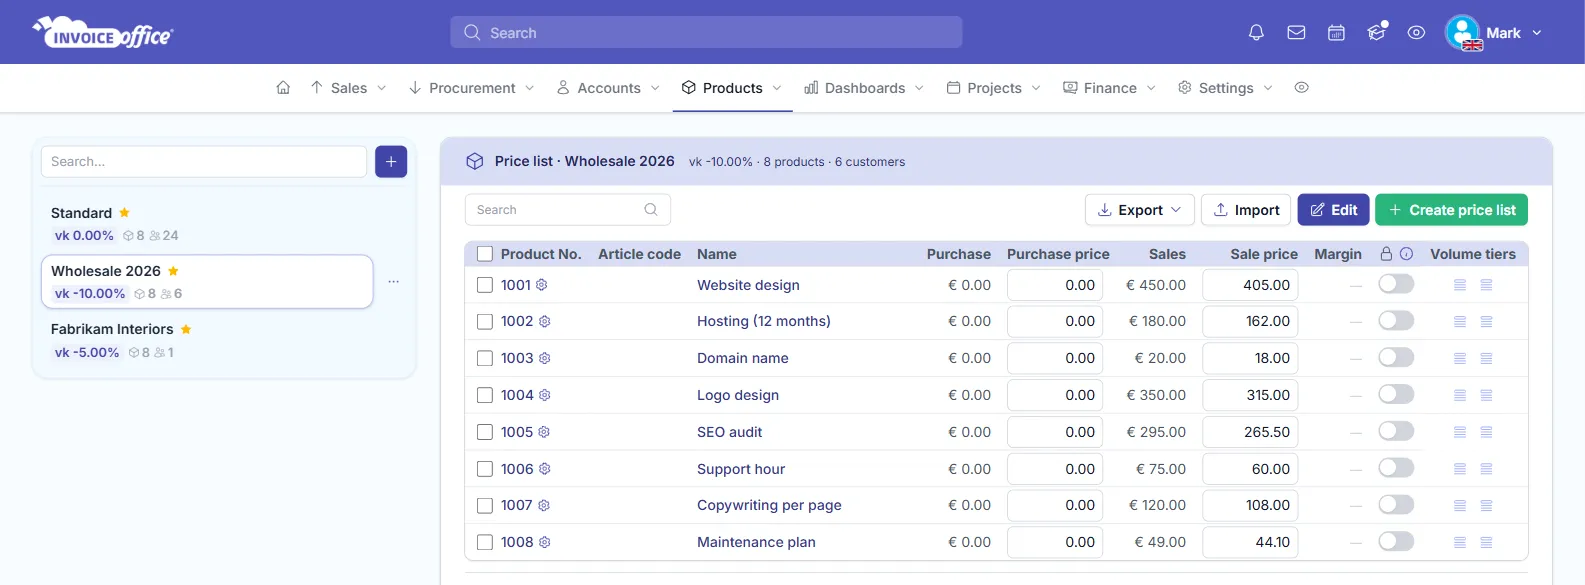
Invoice Office fills the new list straight away: every product gets a line on it, with its sales price minus the sales discount you set.
Step 2: Add more price lists
Repeat Step 1 for every price list you need, for example one per customer group or one per key account. There is no need to pick one discount style for all of them: one list can take 10% off, another a fixed €5, and a third can be a 0% list that you only adjust for a few products.
Your price lists appear in the panel on the left of Products → Price lists. Each one shows its sales discount, the number of products on it and, once it is in use, the number of customers linked to it. Click a list to open its products on the right.
Step 3: Set customer-specific prices per product
The discount gives every product a starting price. To give a product a different price on one list:
- Click the price list in the panel on the left.
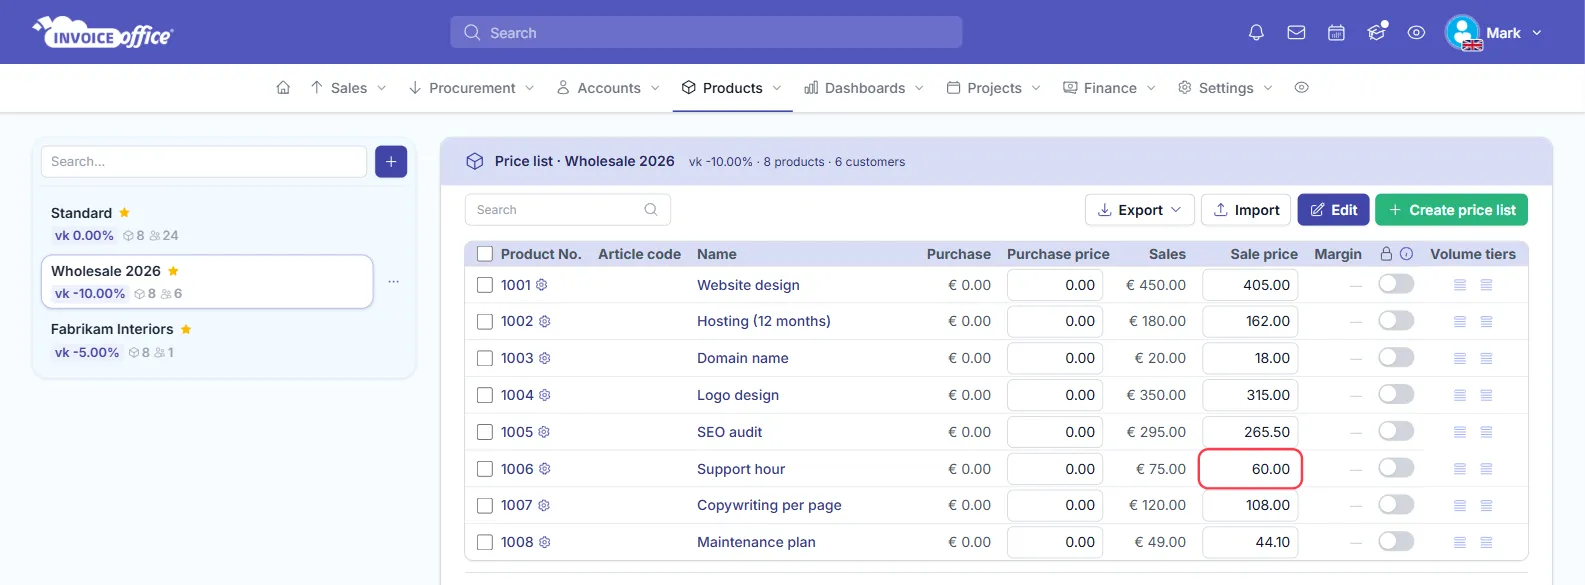
- Find the product in the table. Next to the product’s own Sales price is the Sale price on this list.
- Type the new price into Sale price. It is saved as soon as you leave the field. The Purchase price column works the same way for purchase orders.
Two more columns help with special pricing:
- The lock switch (column with the lock icon): when it is on, the price on this line is not updated when the product’s price changes. Typing your own price into Sale price or Purchase price switches it on automatically. Switching it off resets the line to the product’s price minus the list’s discount.
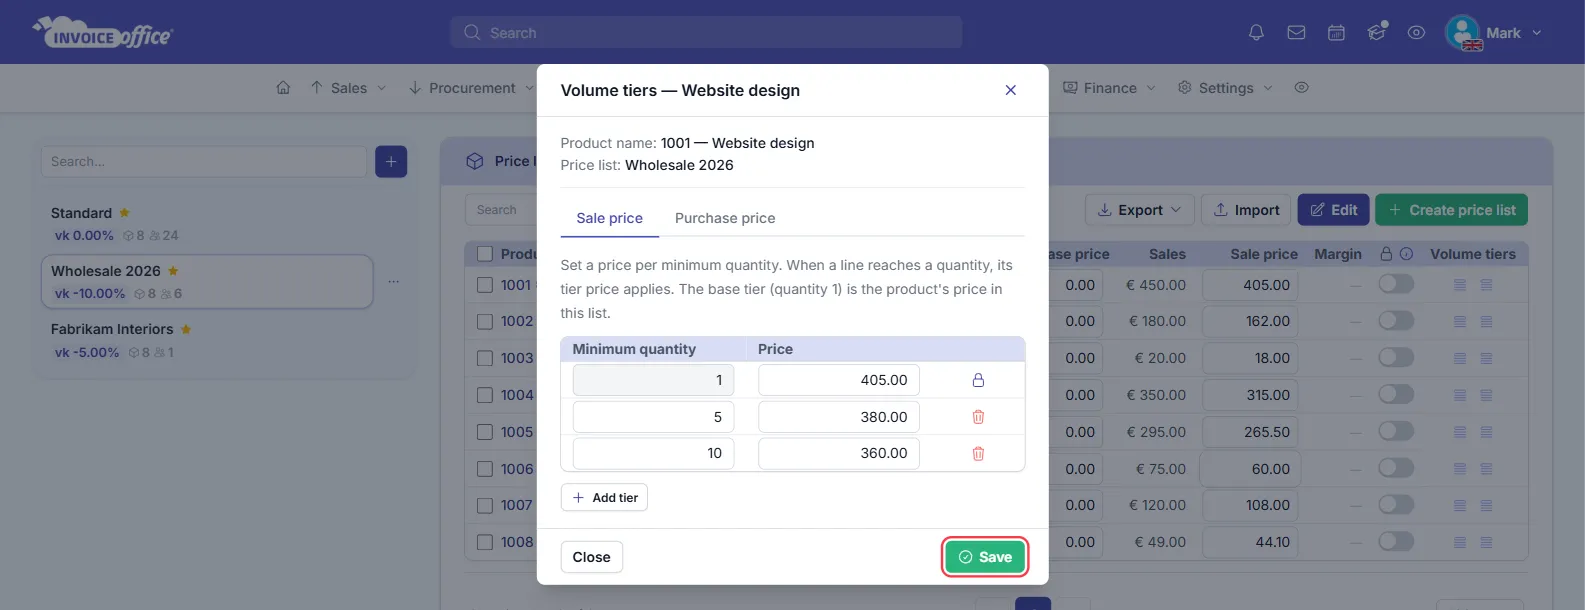
- Volume tiers: open it for a product to set tiered pricing by quantity, such as a lower price from 10 units. On a document, the tier that matches the line’s quantity is used, and it is picked again when you change the quantity. The first tier (quantity 1) is the product’s price on this list; click Add tier to add a quantity break, then Save.
Step 4: Assign a price list to a customer
- Go to Accounts → Customers and find the customer.
- Open the row’s Action menu and choose Settings. The cog icon next to the customer number opens the same page.
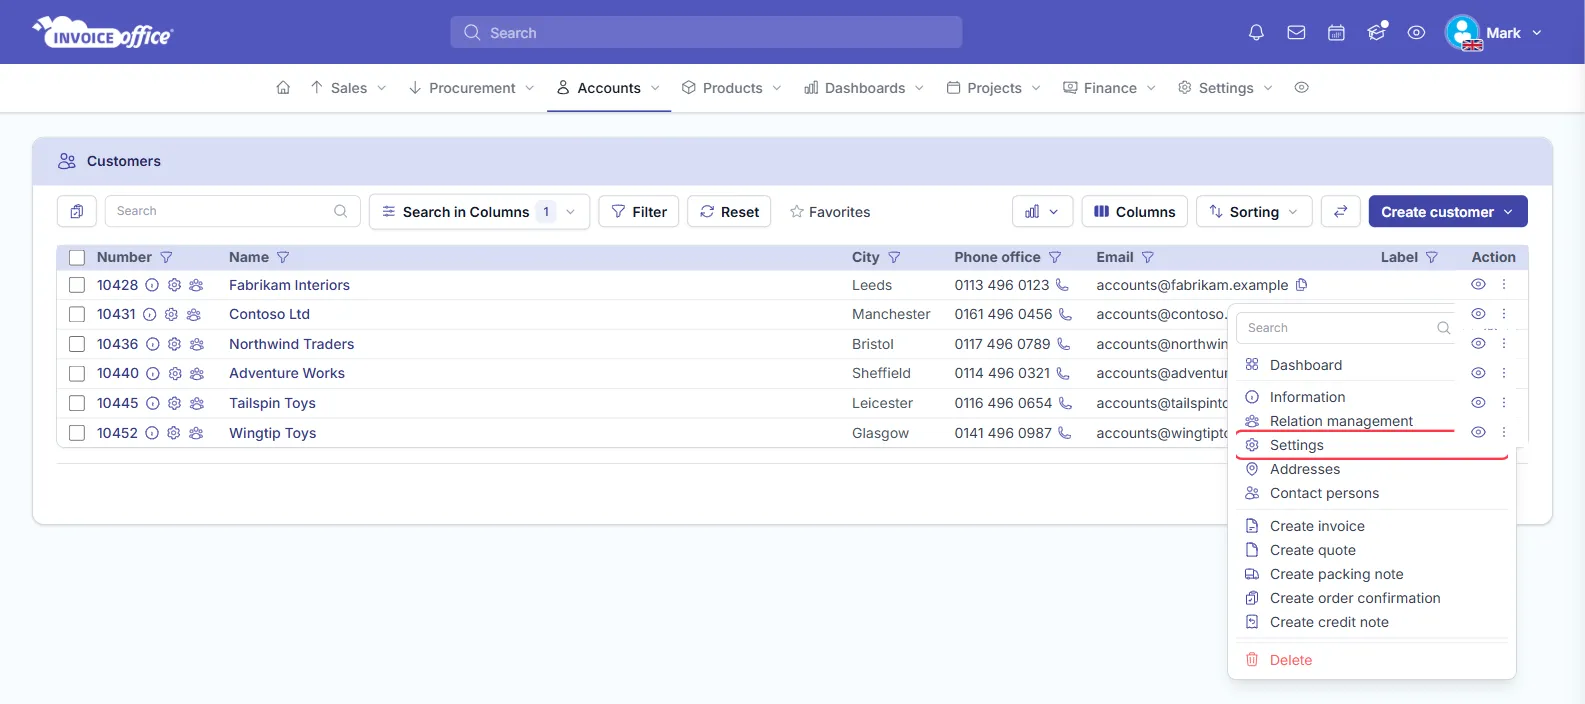
- Open the Price list section and choose the list in the Price list field.
- Click Save.
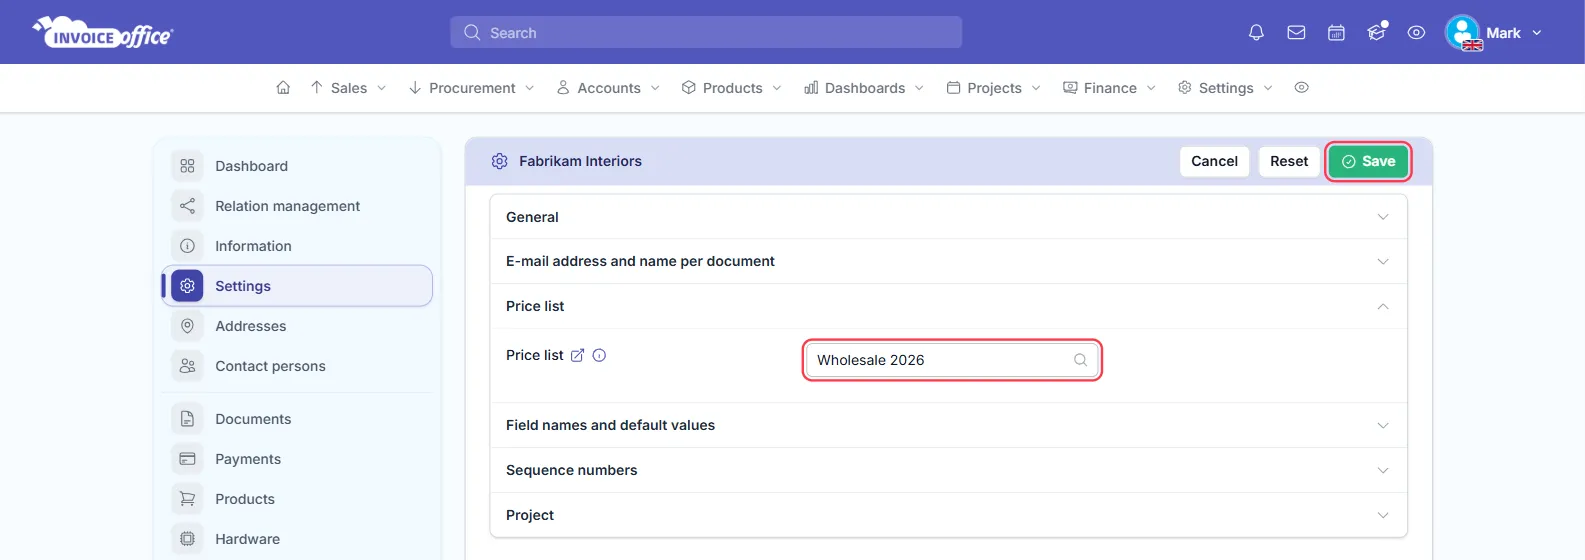
Each customer has one price list. Assign the same list to as many customers as you like: the panel on the price list page shows how many customers use each list.
How the price list applies on new invoices
When you create an invoice and choose the customer, Invoice Office fills in the document settings from the customer’s settings, including their price list. You can see it under the Price list tab (the sliders icon) in the document settings, next to Language and Currency.
With a price list selected, each product line gets its price from that list:
- If the product is on the list, its Sale price on the list is used, or the volume tier that matches the line’s quantity.
- Otherwise the list’s sales discount is applied to the product’s own price.
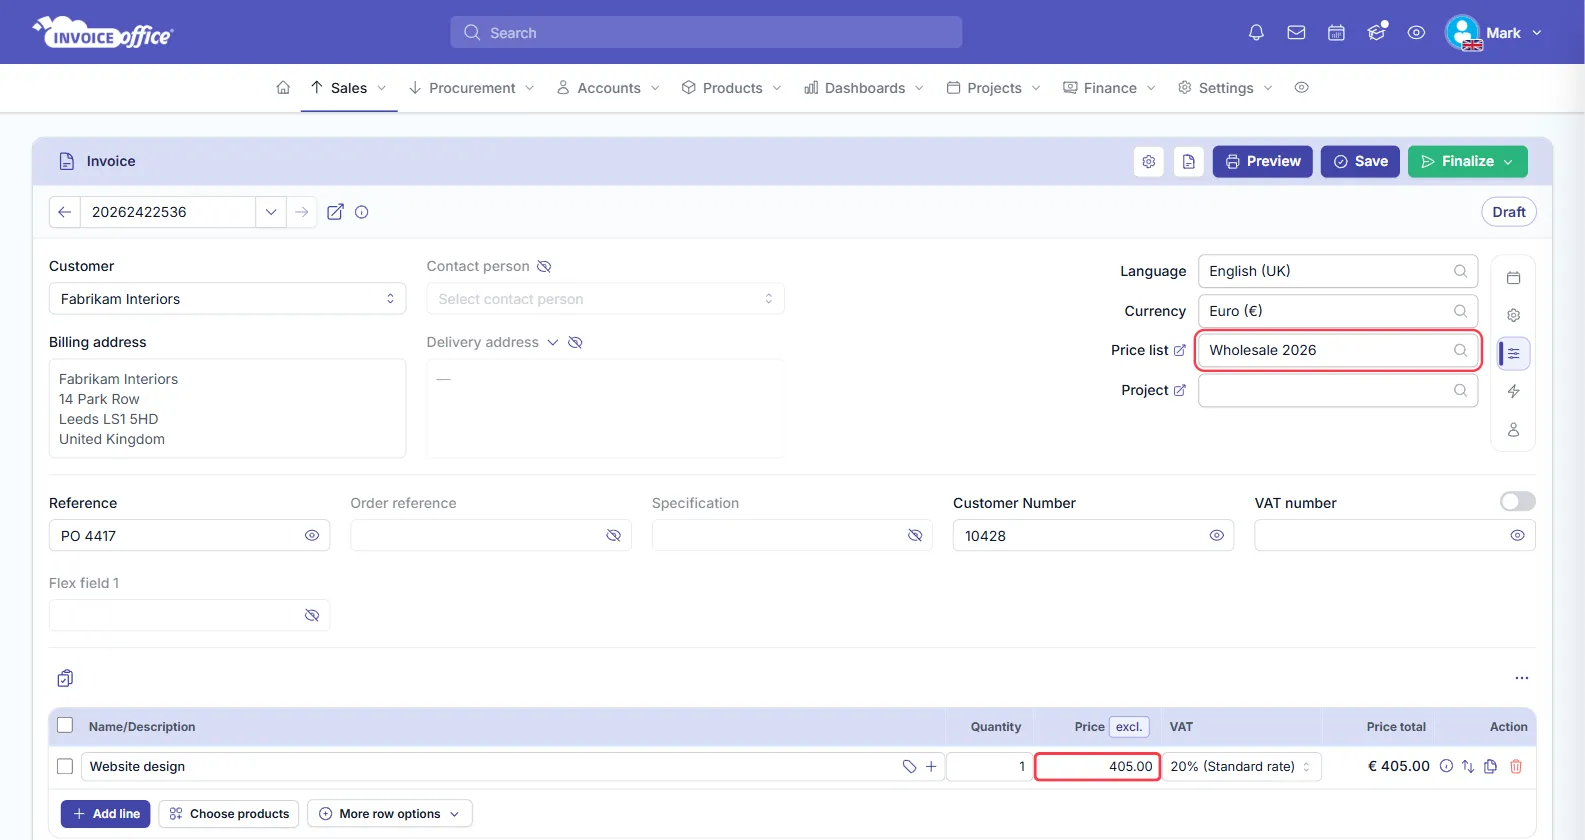
Products you add afterwards are priced from the list as well. To use a different list on one document, change the Price list field on that document. Clear the field and the lines priced from the list go back to the products’ own prices.
The same applies to quotes, order confirmations, proforma invoices, recurring invoices, credit notes, packing notes and consignments. On a purchase order, the list’s Purchase price is used.
When the prices are not applied
- The currencies differ. If the price list’s currency is not the document’s currency, Invoice Office shows “The selected price list uses a different currency than this document, so its prices were not applied.” Set Currency Code in the General section of the customer’s Settings to the same currency as their price list, or use a list in the document’s currency.
- No Pro licence. Applying a price list to documents needs Pro.
- An existing document. Opening a saved document does not reprice the lines it already has; a finalized document keeps exactly the prices it was saved with.