You can keep multiple bank accounts in Invoice Office — a current account, a savings account, an account at a second bank. You add them under your company settings, mark one as the default that prints on your invoices, and give each account its own bank statement under Finance → Bank transactions, so you import and reconcile each account separately. This guide covers adding an account, choosing your default, and working with the transactions of each account.
Step 1 — Add a bank account in your company settings
- Go to Settings → Company → Company settings and click Bank accounts in the menu on the left.
- Click Add line.
- Fill in the new row: Bank name, Bank account name (the name the account is held in), Bank account number (your IBAN) and BIC Code.
- Click Save.
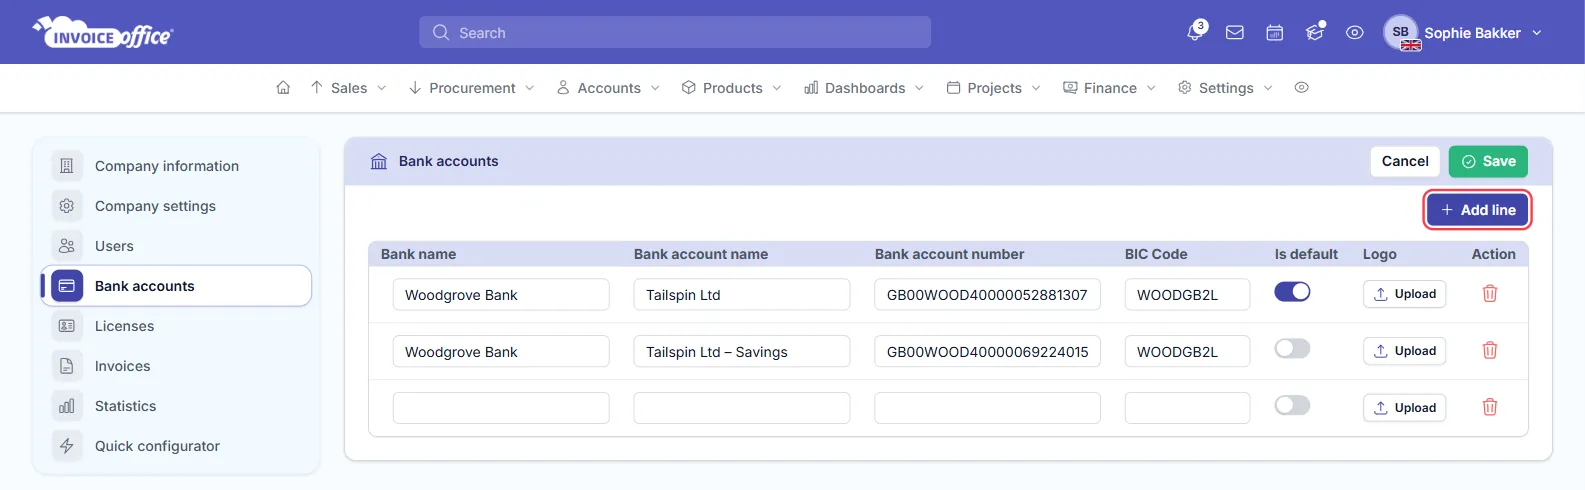
Repeat for every account. Fill in at least the Bank name and Bank account number — your invoices and Peppol e-invoices use them. To remove an account, click the delete icon in its Action column and click Save. Each field is explained in how to add your bank account details.
Step 2 — Set the default account shown on invoices
Switch on Is default on the account customers should pay into, and click Save. Only one account can be the default. If none is switched on, Invoice Office picks one of your accounts itself — so switch it on to control which IBAN appears.
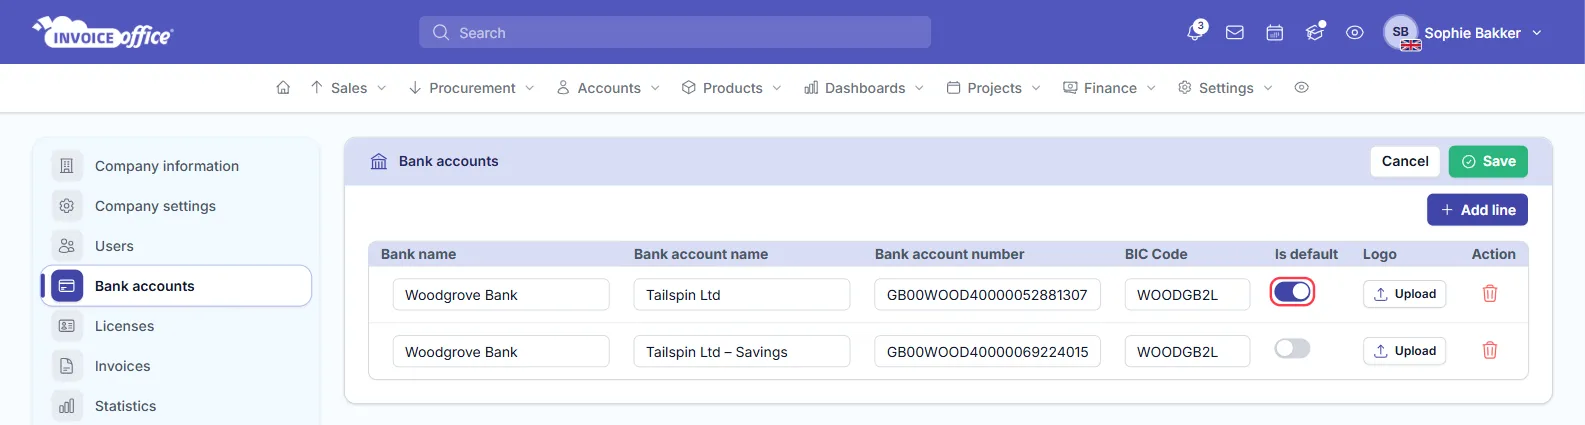
The default account is the one your invoices use: the bank placeholders in your document text, such as
[accountBankNumber] and [accountBankBicCode], are filled in from it, and its IBAN is sent with your
Peppol e-invoices. You cannot pick a different account per invoice. To show a different IBAN on your
invoices, switch Is default to that account — invoice PDFs generated from then on use it.
Your other accounts are still available elsewhere: you choose the Bank account the money came in on when you register a payment, and the account a collection goes to when you use direct debit.
Step 3 — Give each account its own bank statement
Each bank account has its own bank statement in Invoice Office — its own list of transactions, its own Opening amount and Closing balance, and its own Unprocessed count. A statement is created for an account in one of three ways:
-
Import a statement file for it. The import reads the account number from the file and puts the transactions in that account’s statement. If the IBAN is not in your bank accounts yet, Invoice Office adds it for you.
-
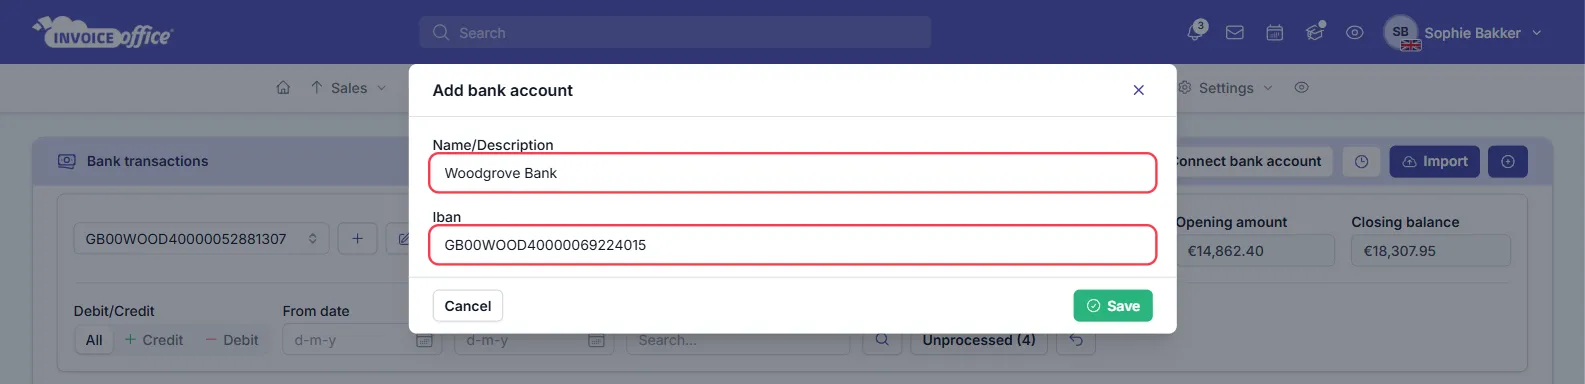
Add it on the Bank transactions page. Go to Finance → Bank transactions and click the + button next to the account selector (Add bank account). Fill in Name/Description and Iban and click Save. This adds the account to your company’s bank accounts and opens its new, empty statement. The + button appears once you have at least one bank statement; for your first account, import a statement file or connect Ponto.
-
Connect it via Ponto. Every bank account you link in Ponto gets its own statement — see how to connect your bank account via Ponto.
An account you only added under Settings → Company → Company settings → Bank accounts does not appear on Bank transactions until it has a statement.
Step 4 — Import bank statements per account
Download a statement from your bank for each account and import them one by one: go to Finance → Bank transactions, click Import, choose the file format and upload the file. You do not choose the account in the import — Invoice Office takes it from the file, so each file lands in the right statement.
A .csv file import can hold several accounts at once: the rows are split by the column you map to Account number, and each account number gets its own statement.
The formats, the switches and the CSV mapping are explained step by step in import and reconcile bank statements.
Step 5 — Reconcile each account separately
On Finance → Bank transactions, use the account selector at the top of the page to switch between your accounts. Everything on the page belongs to the account you picked:
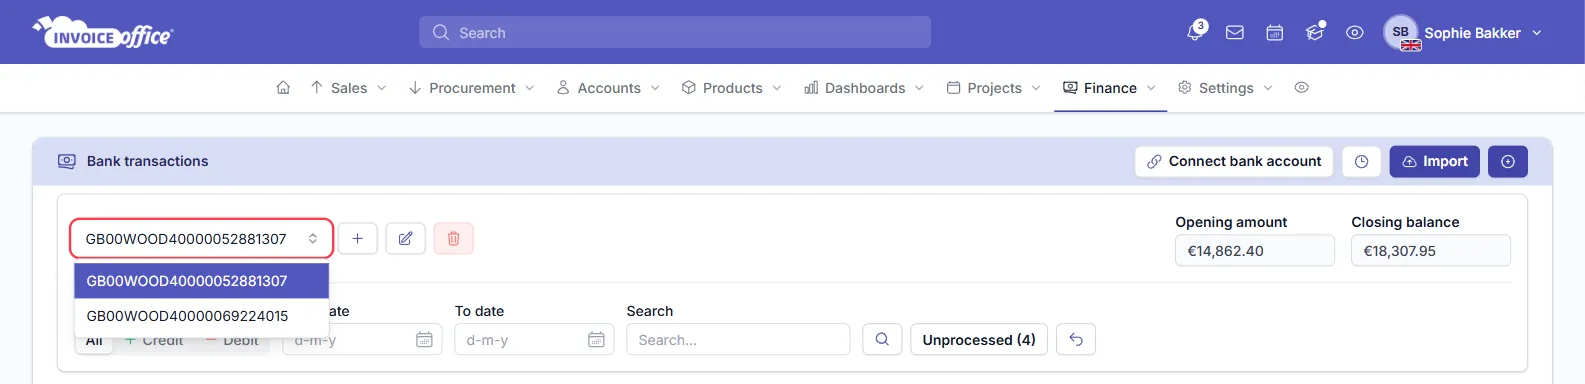
- Opening amount and Closing balance — compare the closing balance with your online banking for that account.
- Unprocessed — the lines of this account that are not linked to a document or booking yet. Work through them with Register payment, Register income or Register expense.
- Add transaction and Transactions import history — for this account’s statement. Import takes the account from the file, whichever account you have selected.
An account is reconciled when its Unprocessed list is empty; then pick the next account. Every transaction is matched against all your open invoices and purchases, whichever account the customer paid into. How the matching works is explained in import and reconcile bank statements.
To see the money in and out per account, open Dashboards → Bank statement and pick the account (or All) in the Bank statement filter.